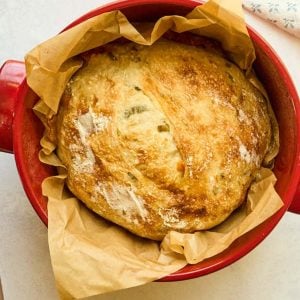
This recipe for jalapeño cheddar no-knead bread is going to be your new favorite! It’s perfect alongside a soup or chili, or (my favorite), a turkey sandwich with a thin layer of cream cheese. Try it, it’s good.

It’s not too spicy, and very beginner-friendly thanks to the no-kneading (but you will need some patience). The dough will be somewhat wet when you first mix everything. Don’t worry about it. It gets firmer as the gluten forms during the long rise times, but it’s still easy to work with.
Table of Contents
Ingredients and Tools You’ll Need
You don’t need any special tools: a Dutch oven is helpful but not required. You can simply bake on a parchment-lined baking sheet. But you will definitely need parchment paper, no matter how you bake it.
This makes one loaf (or about 10 slices). If you want to double or triple the batch, you can make adjustments in the recipe card at the bottom of this post.
Get Access to
All my Free planners, Printables, binders and more
Get a copy of this frugal recipe binder with lots of crockpot favorites, pasta dishes, casseroles, and more inside the subscriber library. Plus SO much more.

Equipment
- Plastic Wrap
- Cooking Spray
- Parchment paper
- Baking Sheet
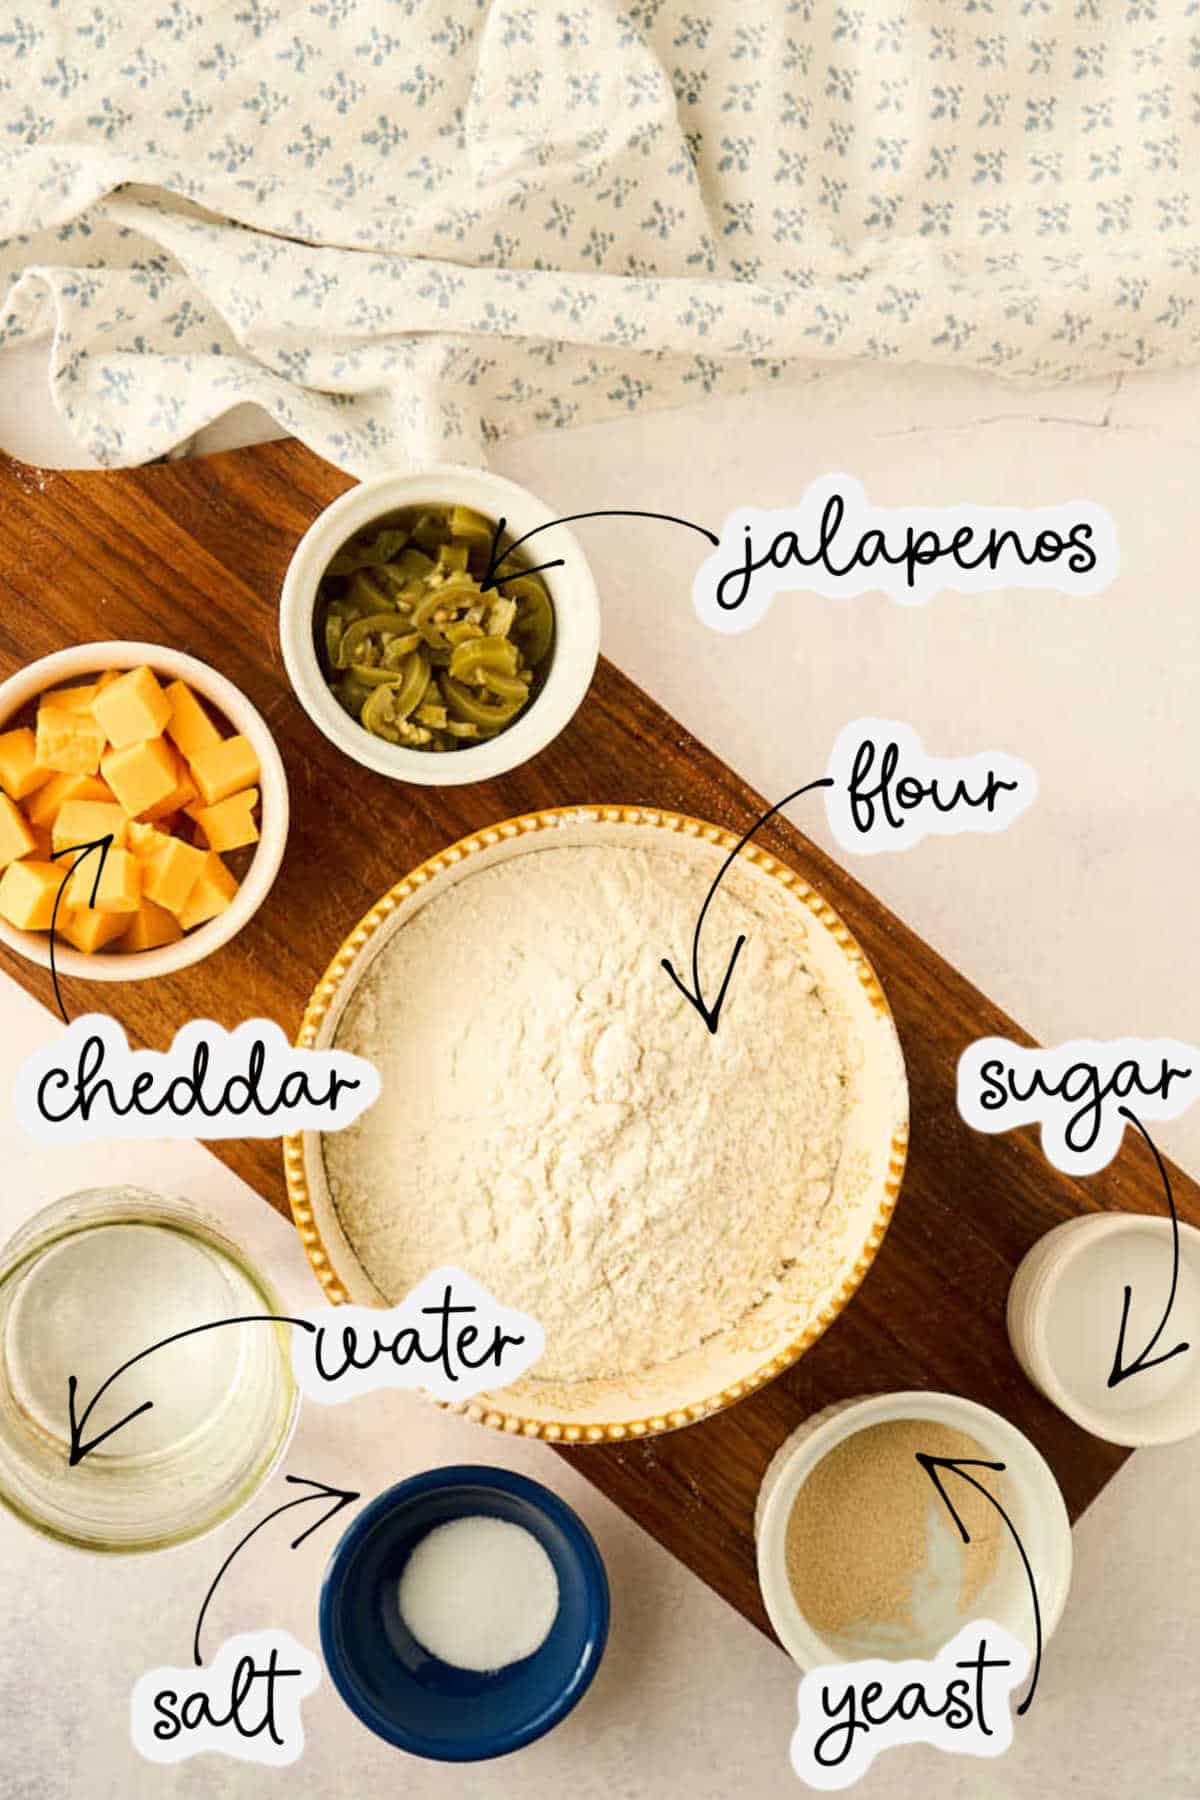
Ingredients
- 3 ¼ cups all-purpose flour plus 2 tablespoons
- 1 cup water plus 3 tablespoons
- 1 ½ teaspoons salt
- 1 teaspoon sugar
- ½ teaspoon instant yeast or active dry
- ⅓ cup chopped jalapeños (pickled or fresh are both fine; If using pickled jalapeños, drain any excess liquid.)
- ½ cup diced cheddar cheese (cut into approximately ½ inch cubes; I used mild, but medium or sharp are great too)
How to Make
The importance of the long rise means you can’t rush this process. The long rise times are essential. You can pop the dough in the fridge if it’s getting late in the day. But don’t move on to the next step until you’ve waited for the dough to rise.
Step One: Mix
The first step is a simple matter of mixing all the ingredients—no particular order. Just dump and mix.
Remember that flour will absorb water differently depending on the brand and how it is stored; you may need to add a bit more flour or water. You want the dough to be soft and slightly sticky. It should come together and hold its shape, not like a batter. But it should not be stiff or dry. Use the pictures as your guide and tweak as needed. Go slowly because adding even a tablespoon of water will make a big difference.
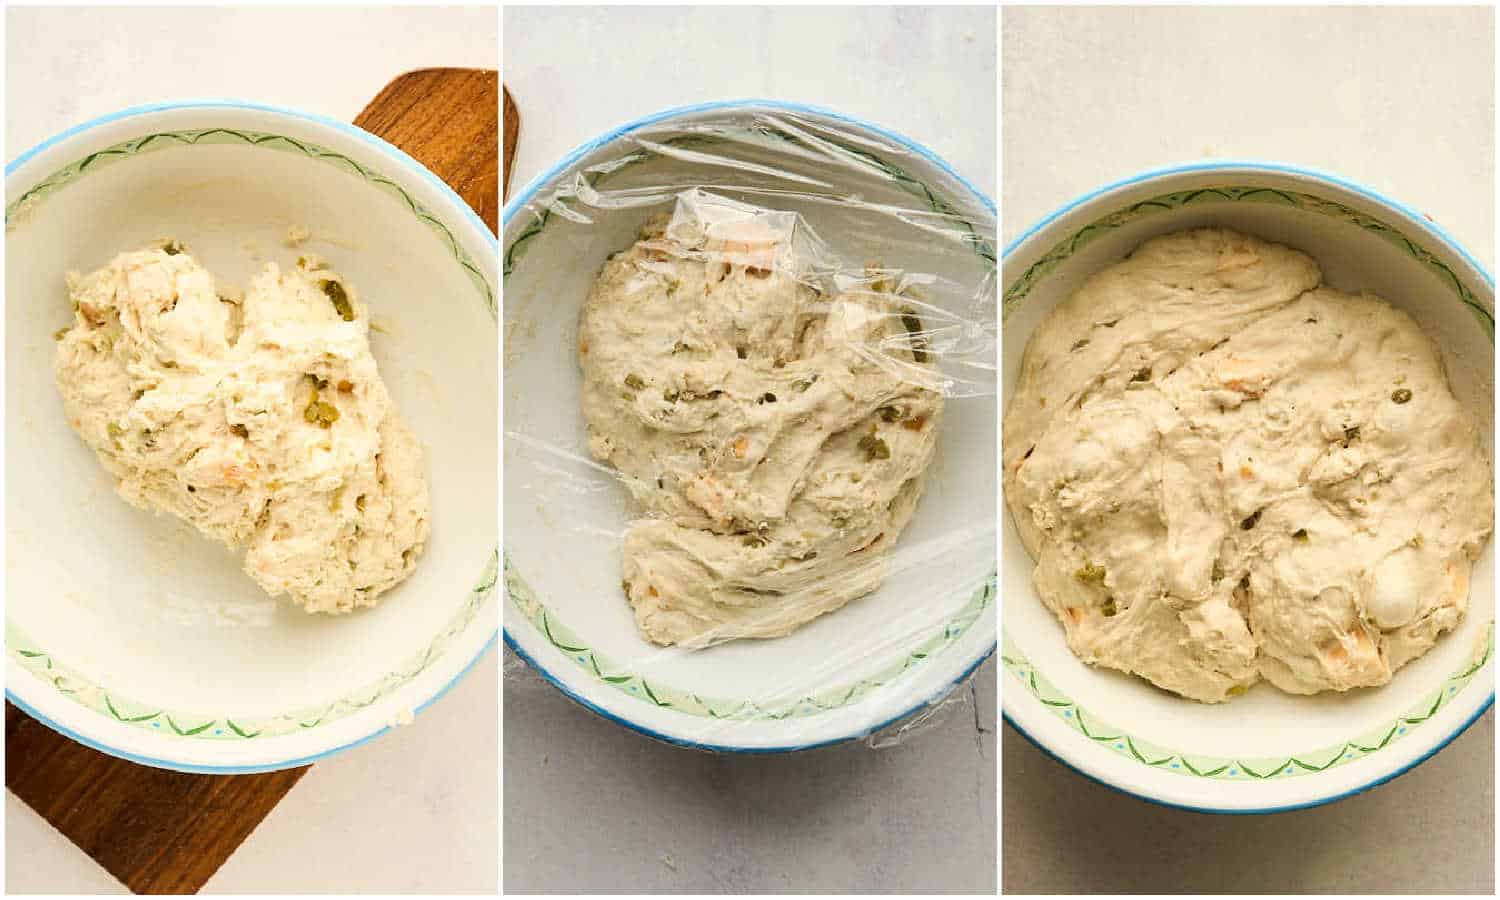
Step Two: Long Rise
Next is the long rise. Again, look at the pictures and wait until your dough is puffy, large, and bubbly. If it’s not ready after ten hours, give it more time. This process will happen faster in a warm kitchen and slower in a cooler spot.
Step Three: Shape
Shaping is simple: just pull the bottom of the loaf until the top smooths out into a ball.
To make sure that you get a perfectly risen loaf, be sure to follow the instructions. You’ll want to deflate any large air bubbles that form before the second rise. To do this, simply press gently down on any big pockets of air.
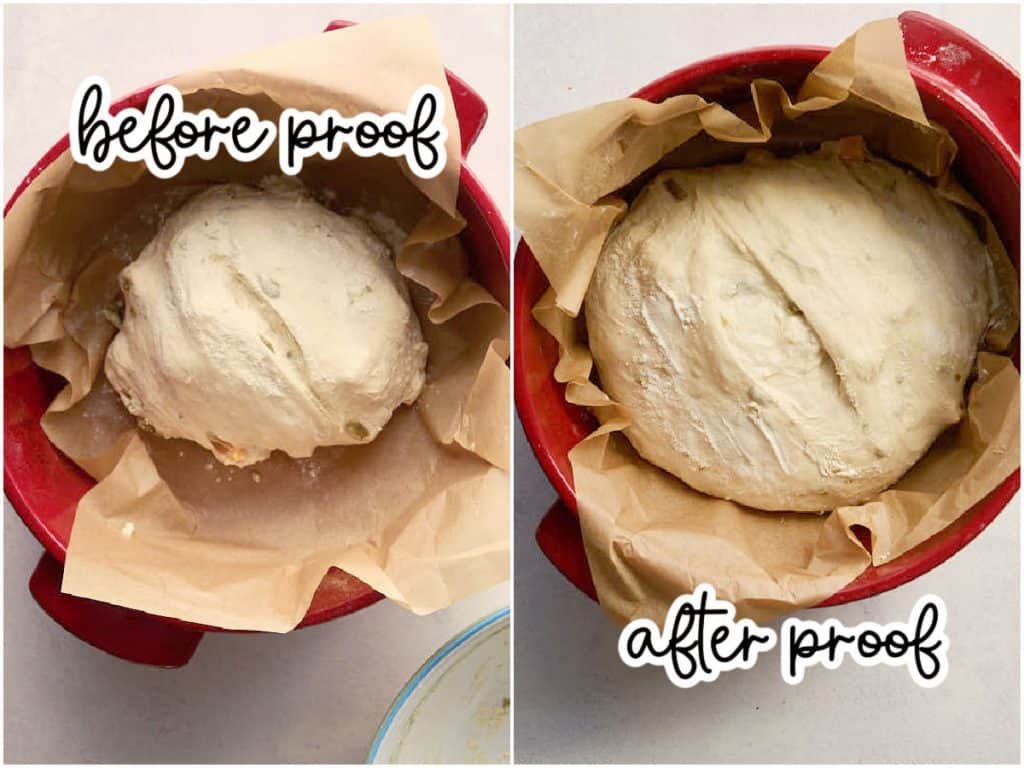
Step Four: Second Rise
Place it on a baking sheet or in a Dutch oven lined with parchment and allow it to rise again. You can do the second rise in a warm place, and it will be much faster than the first, only 45 minutes to an hour.
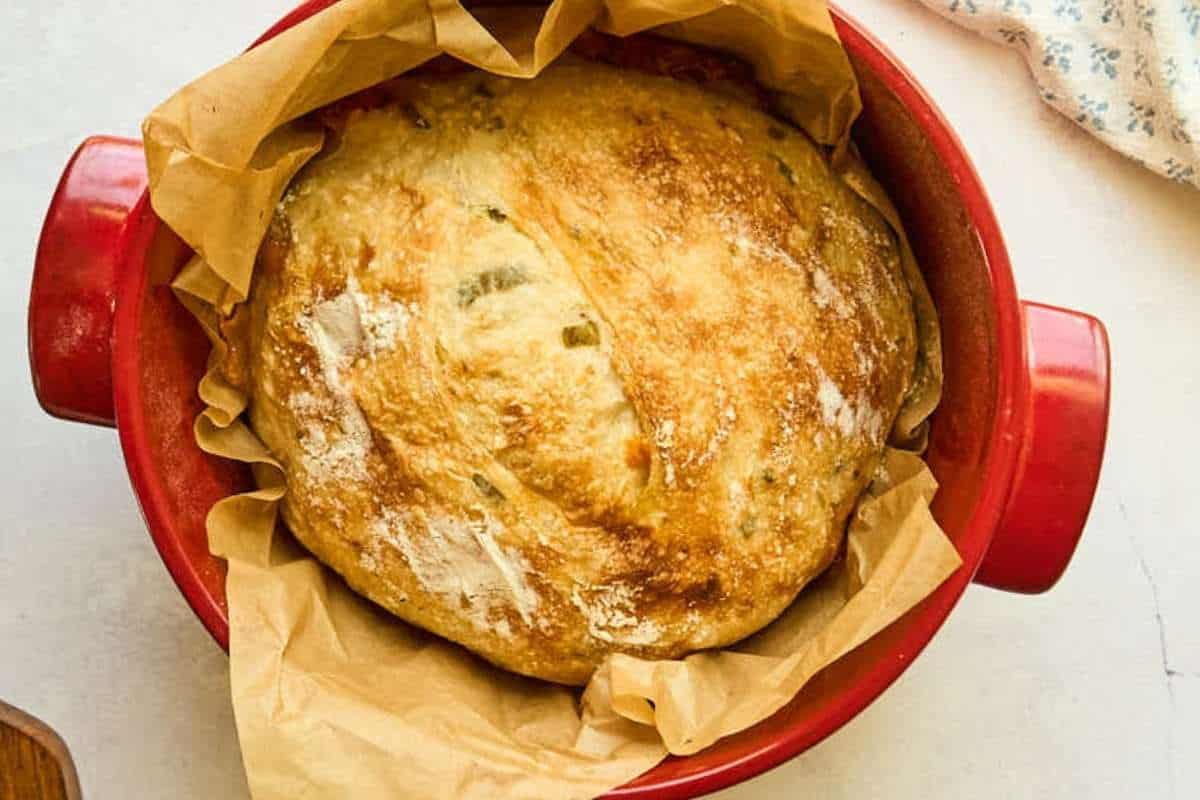
Step Five: Bake
All that’s left to do is bake. Bake it for 35-40 minutes at 425℉. Cool for 30 minutes, and slice!
Serving & Storing
Serve with chili, or slice and make my favorite grilled cheese: spread cream cheese on top, add some sliced cheddar and cooked bacon, then pan-fry.
The cheese makes this bread a bit more perishable than plain bread, so don’t leave it sitting out uncovered. Wrap it tightly in plastic wrap or store it in an airtight container. It will keep for 2-3 days on the counter or a week in the fridge.
It will stay fresh in the freezer for 3 months. I like to slice the whole loaf before freezing so I can grab just what I need. The cheese can make the slices stick together a bit, but they separate easily once thawed out.
Questions and Troubleshooting
Just keep giving it more time. If your kitchen is cold, try putting it in a warmer spot to speed it up. Turn your oven on for a few minutes, turn it off, then put the bowl of dough inside. Just don’t forget it’s in there!
No. The dough is supposed to be sticky – that’s what makes it no-knead. Don’t add more flour to “fix” it. When you’re shaping it, use wet hands or a tiny bit of oil to keep it from sticking to you.
You REALLY want to use parchment for this one because of the cheese. If you don’t have it, grease your pan like crazy with butter or cooking spray. The cheese will stick otherwise, and you’ll lose half your loaf to the pan. Trust me on this one!

More Easy Bread Recipes
- This no-knead raisin and cinnamon loaf tastes amazing in the morning.
- A basic no-knead white bread recipe is really all you need. No special equipment needed!
- If you’ve got a sourdough starter, make this cheddar-jalapeno sourdough version!
Printable Recipe
Jalapeño & Cheddar No-Knead Bread
Equipment
- Plastic Wrap
- Cooking Spray
- Baking Sheet
Ingredients
- 3 ¼ cups all-purpose flour plus 2 tablespoons
- 1 cup water plus 3 tablespoons
- 1 ½ teaspoons salt
- 1 teaspoon sugar
- ½ teaspoon instant yeast or active dry
- ⅓ cup chopped jalapeños (If using pickled jalapeños, drain any excess liquid.)
- ½ cup diced cheddar cheese (cut into approximately ½ inch cubes)
Save This Recipe
You'll join my email list which you will love. And if you don't, unsubscribe in one click. ❤️
Instructions
- Mix. In a large mixing bowl, combine the flour, water, salt, sugar, yeast, cheddar, and jalapeños. It's important to mix everything together at once so that the cheese and peppers will disperse easily. Use a rubber spatula to mix well, incorporating any dry areas of flour. The dough should form a shaggy ball. If there are any dry bits that are not being incorporated, add a few more teaspoons of water and mix again.
- Cover and rise. Tightly cover the bowl of dough with plastic wrap. Place the covered bowl on the counter and allow it to rise for ten hours. Ideally, it will have doubled in size. If the dough has not changed much in size, give it more time to rise on the counter. You can always place the dough in the fridge to slow the process down and start again later.
- Shape. Prepare a baking sheet by lining it with parchment or spraying it generously with nonstick cooking spray. This bread can really stick to the pan as the cheese melts, so if you have parchment paper, be sure to use it. Gently pick the dough out of the bowl and shape it into a smooth ball. Pull from the bottom of the dough to smooth out the top rather than smashing the dough down. Deflate any large air bubbles that have formed. Place the dough onto the prepared baking sheet. If you'd like a fancier-looking loaf, sprinkle with flour and place slices of jalapeño on top. Using a very sharp knife or lame, make a slash in the center of the loaf, cutting around a ¼ inch deep.
- Second rise. Prepare a warm place for the second rise, either by briefly turning on your oven or placing a bowl of hot water inside it. Cover the ball of dough with greased plastic wrap, making sure that the loaf is completely covered. Let it rise in a warm place for about 45 minutes, until puffy but not quite doubled in size. Towards the end of the rising time, preheat the oven to 425℉ with the rack in the center. Be sure to remove the dough first.
- Bake. Bake the loaf for 35-40 minutes at 425℉. The finished loaf will be deep golden brown and have an internal temperature of 200 degrees. Some cheese may have leaked from the loaf, but don't worry, most will still be inside. Carefully remove the bread from the baking sheet and place it on a cooling rack. Let it cool for at least thirty minutes before serving. If you cut into the loaf too soon, the cheese can leak out.
Notes
Nutrition


OMG! I made this yummy loaf exactly as per your instructions and it was amazing. It hadn’t risen enough late yesterday so I put it in the fridge and brought it out this morning. It did take a long time to rise I think as it’s pretty cold here at the moment. I baked it in my Dutch oven for about 40 minutes and took the lid off half way through. Very delicious. Thank you for the recipe!👍
Hi Chris! I’m so glad it was a success. And I wish it was cold here at the moment!
What temperature should the loaf be baked at in the oven
425 🙂