A soft and tender sandwich bread made with milk and honey. This recipe will consistently give you a soft and tender, slightly sweet loaf that is perfect for sandwiches. This one is my kids’ favorite bread recipes.

If you are interested in making homemade bread but feeling a bit intimidated, this recipe is a great place to start. The milk and honey make it rich and sweet, making this bread irresistible (and still easy to make).
Table of Contents
Ingredients and Tools You’ll Need
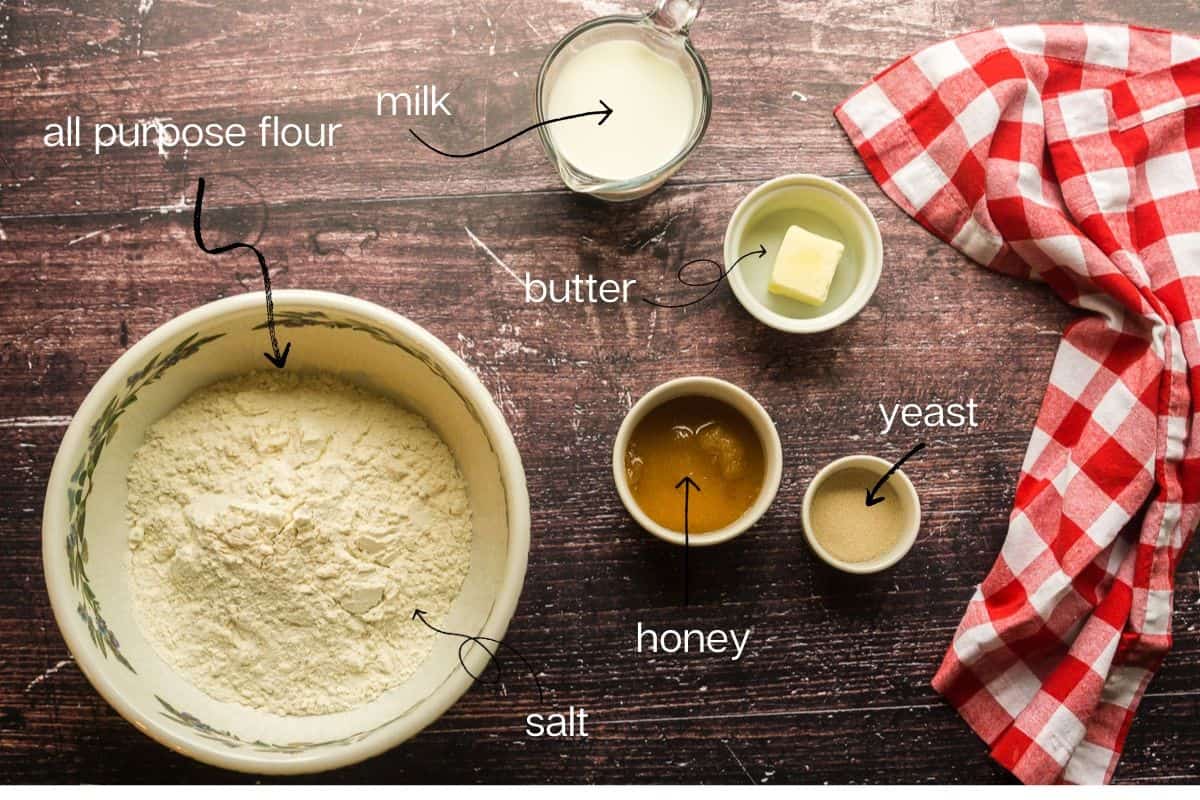
You should have all you need in your pantry already. If you need to buy some yeast, I’ve linked my favorite down below.
Heart’s Content Farmhouse is a participant in the Amazon Services LLC Associates Program, an affiliate advertising program designed to provide a means for sites to earn advertising fees by advertising and linking to Amazon.com. This means that when you click on certain links on this site and make a purchase, I may earn a small commission at no additional cost to you. I only recommend products I genuinely believe in and would use in my own kitchen. As an Amazon Associate, I earn from qualifying purchases.
Get Access to
All my Free planners, Printables, binders and more
Get a copy of this frugal recipe binder with lots of crockpot favorites, pasta dishes, casseroles, and more inside the subscriber library. Plus SO much more.

This is a great recipe to double or triple, and freeze for later. You can make adjustments in the recipe card at the bottom of this post, and it will adjust the measurements for you.
Ingredients
- 3 cups all-purpose flour
- 3 tablespoons honey
- 1 cup milk (add a few more tablespoons if necessary)
- 1 1/2 teaspoons salt
- 2 tablespoons softened butter
- 2 teaspoons instant yeast (SAF brand is the best and can be purchased in bulk and frozen)
- Non-stick cooking spray
Tools
- A “standard-sized” loaf pan: 8 1/2 inches x 4 1/2 inches x 2 1/2 inches. (Goldtouch brand is my favorite.)
- A stand mixer fitted with a dough hook or a basic bread machine. (I love this model, which is affordable and mixes and rises the dough beautifully.)
- A pastry brush for brushing the top of the loaf with milk.
How to Make Milk And Honey Bread
Step One: Make the Dough
There is no need to be fussy about combining the ingredients, especially when you are using instant yeast. Just toss everything in together and mix. If you are using a bread machine, just hit the dough cycle. Keep an eye on the dough for a while. You are looking for dough that stays as a ball. It should not be so dry that it won’t come together, but it should also not be so wet that it sticks to the sides of the bowl. If it seems off, just add a bit more flour or milk as needed.

Step Two: Knead
Once the consistency is right, start kneading. I recommend ten minutes of kneading in the stand mixer, with short breaks every few minutes so you don’t burn out the motor.

To check for readiness in the dough, take a golf ball-sized ball of dough and attempt to stretch it out. If it tears easily, the dough is not ready. If translucent “windows” appear in the dough, it’s ready to go!

Step Three: Rise
Shape the dough into a ball and place it in a lightly oiled bowl to rise. Cover with a clean, damp tea towel or greased plastic wrap and place in a warm place to rise. The best temperature for bread rising is about 80-90 degrees. If you don’t have a suitable place, turn your oven on for a minute or two, turn it off, and place the dough inside. After an hour or so, check on your dough. It should be very puffy and have doubled in size.
Step Four: Shape
Now we shape! Lay your loaf pan on the counter and use it to help guide you. You want to gently stretch the dough out into a rectangle when the short side of the rectangle is the same length as the long side of the loaf pan. Tuck in the top two corners and start rolling down. “Shoulder in, head down.”
Tuck the sides under and pinch the seams the best you can to close. Don’t get upset if this doesn’t go perfectly. Your loaf will still be fine!

Step Five: Final Rise
Spray your loaf pan with non-stick spray and gently place the loaf of bread inside. Cover it with heavily sprayed plastic wrap and put it back in a warm spot to rise again. This rise will be around 45-60 minutes, until the loaf is an inch over the top of the pan. Towards the end of the rising time, preheat your oven to 350 degrees with the rack in the center. Brush the top with milk if you want a beautifully browned crust.

Step Six: Bake
Bake the loaf for 40-45 minutes, until the top is very golden brown. When you take it out of the oven, feel free to brush it with melted butter to help it shine.

Remove the bread from the pan and place it on a wire rack to cool for at least an hour or two before slicing.
Storage Instructions
Homemade bread in general only keeps for a few days at room temperature. Wrap it tightly in plastic wrap or a bread bag for up to 2 days on the counter.
However, it freezes very well if cooled completely and stored properly. Slice it and freeze in a freezer bag for up to 3 months. Thaw slices as needed.
What to Serve with Milk And Honey Bread
- This makes excellent sandwiches for lunch, especially a grilled cheese.
- Toast it in the morning and spread it with some homemade butter or raspberry jam.
- Use it for French toast, like this orange French toast version.
- Serve some slices on the side with crockpot ham and bean soup.
Questions and Troubleshooting
Bread dough is naturally more sticky. But if it’s wet and you can’t work with it, add flour a tablespoon at a time until it clears the bowl sides.
The simplest way is to poke it with your finger. If it pops back, it needs more time. If it stays, it’s ready.
Brush the loaf with melted butter right after baking and wrap it in a clean tea towel while it’s cooling.
More Sandwich Bread Recipes
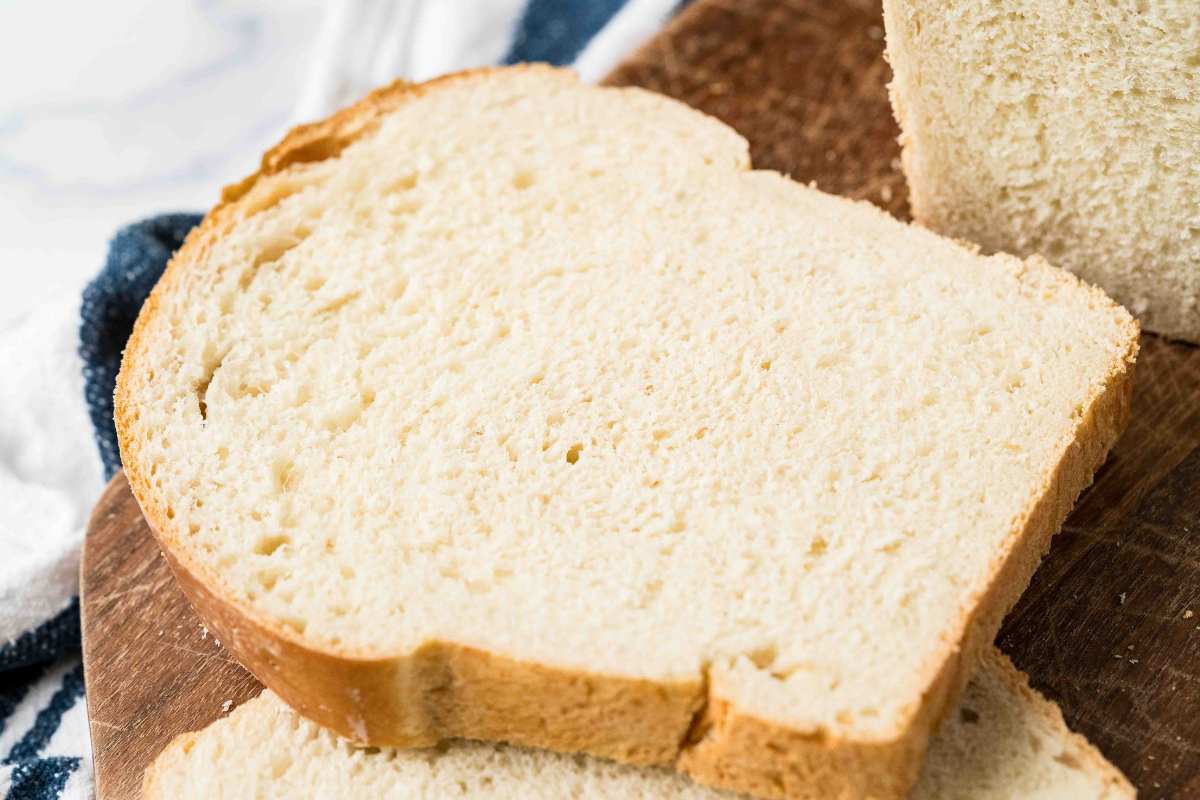
- Sourdough sandwich bread is soft and tender as well.
- If you like whole wheat bread, this oatmeal bread recipe uses whole grains and brown sugar.
- Cinnamon swirls are always a good choice. Try this cinnamon swirl sourdough loaf, or just use the filling technique with this recipe.
Printable Recipe
Milk and Honey Bread Recipe
Ingredients
- 3 cups all-purpose flour
- 3 tablespoons honey
- 1 cup milk
- 1 teaspoons salt
- 2 tablespoons softened butter
- 2¼ teaspoons instant yeast
Save This Recipe
You'll join my email list which you will love. And if you don't, unsubscribe in one click. ❤️
Instructions
- Mix. Combine all ingredients in the bowl of a heavy-duty electric stand mixer fitted with a dough hook. (If using a bread machine, put everything in the bucket and select the dough cycle.). Stir for a minute and evaluate the consistency of the dough. It should form a ball and clear the sides of the bowl. If it is crumbly and not coming together, add a bit more milk. If it is sticking to the bowl, add a bit more flour. (If using a bread machine, skip to step 4.)
- Knead. Knead the dough until it is smooth, bouncy, and elastic. To see if the gluten is developed, take a golf ball-sized piece of dough and stretch it out to see if translucent areas form. If these areas are visible, the dough is sufficiently kneaded.
- First rise. Shape the dough into a ball and place it into a lightly oiled bowl. Cover with a clean, damp tea towel and place in a slightly warm place to rise. Allow it to double in bulk, about 45 to 60 minutes.
- Shape. Shape the dough into a loaf by spreading it out into a rectangle. The short side of the rectangle should be roughly as long as the loaf pan. Tuck the corners in and roll up into a cylinder, then tuck the ends in.
- Second rise. Place into a greased loaf pan and lightly cover with oiled plastic wrap. Place the dough in a warm place and allow it to rise until very puffy and the top of the dough has risen 1 inch above the top of the loaf pan. Towards the end of the rising time, preheat the oven to 350℉.
- Bake. Remove the plastic wrap and brush the bread with milk. Bake for 40 minutes, until very golden brown. Remove from the loaf pan and cool on a wire rack for at least an hour before slicing. Store leftovers tightly wrapped for up to 2 days.
Notes
Nutrition




This is the first time Ive tried milk bread, and I loved it. Thank you so much for the recipe! I only had unsweetened vanilla almond milk and maple syrup instead of honey, and the recipe worked beautifully. Soft fluffy but substantial interior and a delicious crust!
We love this bread so much! I freshly mill my hard white wheat and it comes out beautifully.
hi Sara! wow that sounds amazing! I’m so happy you like the recipe 🙂
Wonderful! I have been trying different bread recipes recently. 3 day foccacia, whole wheat, gluten free rolls, Italian … And honestly this is my favorite! Thank you. I am planning to make this and turn it into rolls for Thanksgiving 🦃 ❤️
Hey Dawn,
it means so much that this recipe has become your favorite, especially with all the amazing breads you’ve been trying. Turning this into rolls for Thanksgiving sounds absolutely perfect. Thank you for the compliment, happy baking!
yes!!! I just made 2 loaves and WOW. I am beyond impressed! I love how spongy and soft the bread is. It is incredibly light but holds perfectly. It doesn’t crumble when you cut it, holds just wonderfully:) love how there is no bad ingredients, no seed oils or granulated sugar. Perfect, wouldn’t change a thing!
hey Alyssa! yes! so glad you liked it. it will stay soft quite a while too 🙂
I love this beautiful recipe! Thank you Kate.
I was not able to get this dough to rise very well by just following the recipe, but I just ended up baking it anyway because I am out of bread lol I let it rise for 60 mins both times, and it didn’t rise much at all. any suggestions to help the rise would be amazing!! thank you!!!!
hey adrian milk breads often rise a little slower. next time try warming up your oven just a little (a VERY little, turning it off and having the bread rise in there. if your yeast is good, the bread WILl rise… it just might take longer. if you aren’t using SAF instant yeast, get some, it’s much less finicky about temperature but otherwise works exactly the same 🙂
thank you for your reply!! I did heat my oven very little and let the bread rise in it, I always do lol! I think maybe it was the yeast I used, im going to double the recipe and make 2 loaves today so fingers crossed it works out! I love this recipe, btw! thank you again!
another think you could try is using veg oil instead of butter. or a splash of water. sometimes a slightly dry dough rises suuuuuper slow and this time of year our flour is dry and could u se a tad more liquid!
Did you heat the scold the milk first? Seems like many suggest cooking the milk so it does not hinder the yeast. I did not and this is the slowest rise/proof time Ive ever had but its my first time using milk.
I changed it just a tad, cause I wanted to use my sourdough starter I made,… so I did proof if the same time, but I used instant yeast aswell. It turned out super delicious! Thanks!
How much starter did you use?
This recipe produces by far the best white bread I’ve ever tasted! I’m obsessed with peanut butter and jam sandwiches made from this fluffy, flavorful and high rising bread. I bake one, sometimes two, loaves a week!
This loaf turned out so good! Going to definitely be making it again soon, especially because it’s almost already gone! Yummy!!
Tastes great and rose perfectly! Thanks for the recipe!
How much milk is needed? I can’t find the amount listed in the recipe.
heather I’m so sorry! it’s between 1 cup and 1 1/8 cup (start with 1 cup and add a bit more if the dough doesn’t come together.). adding it now 🙂