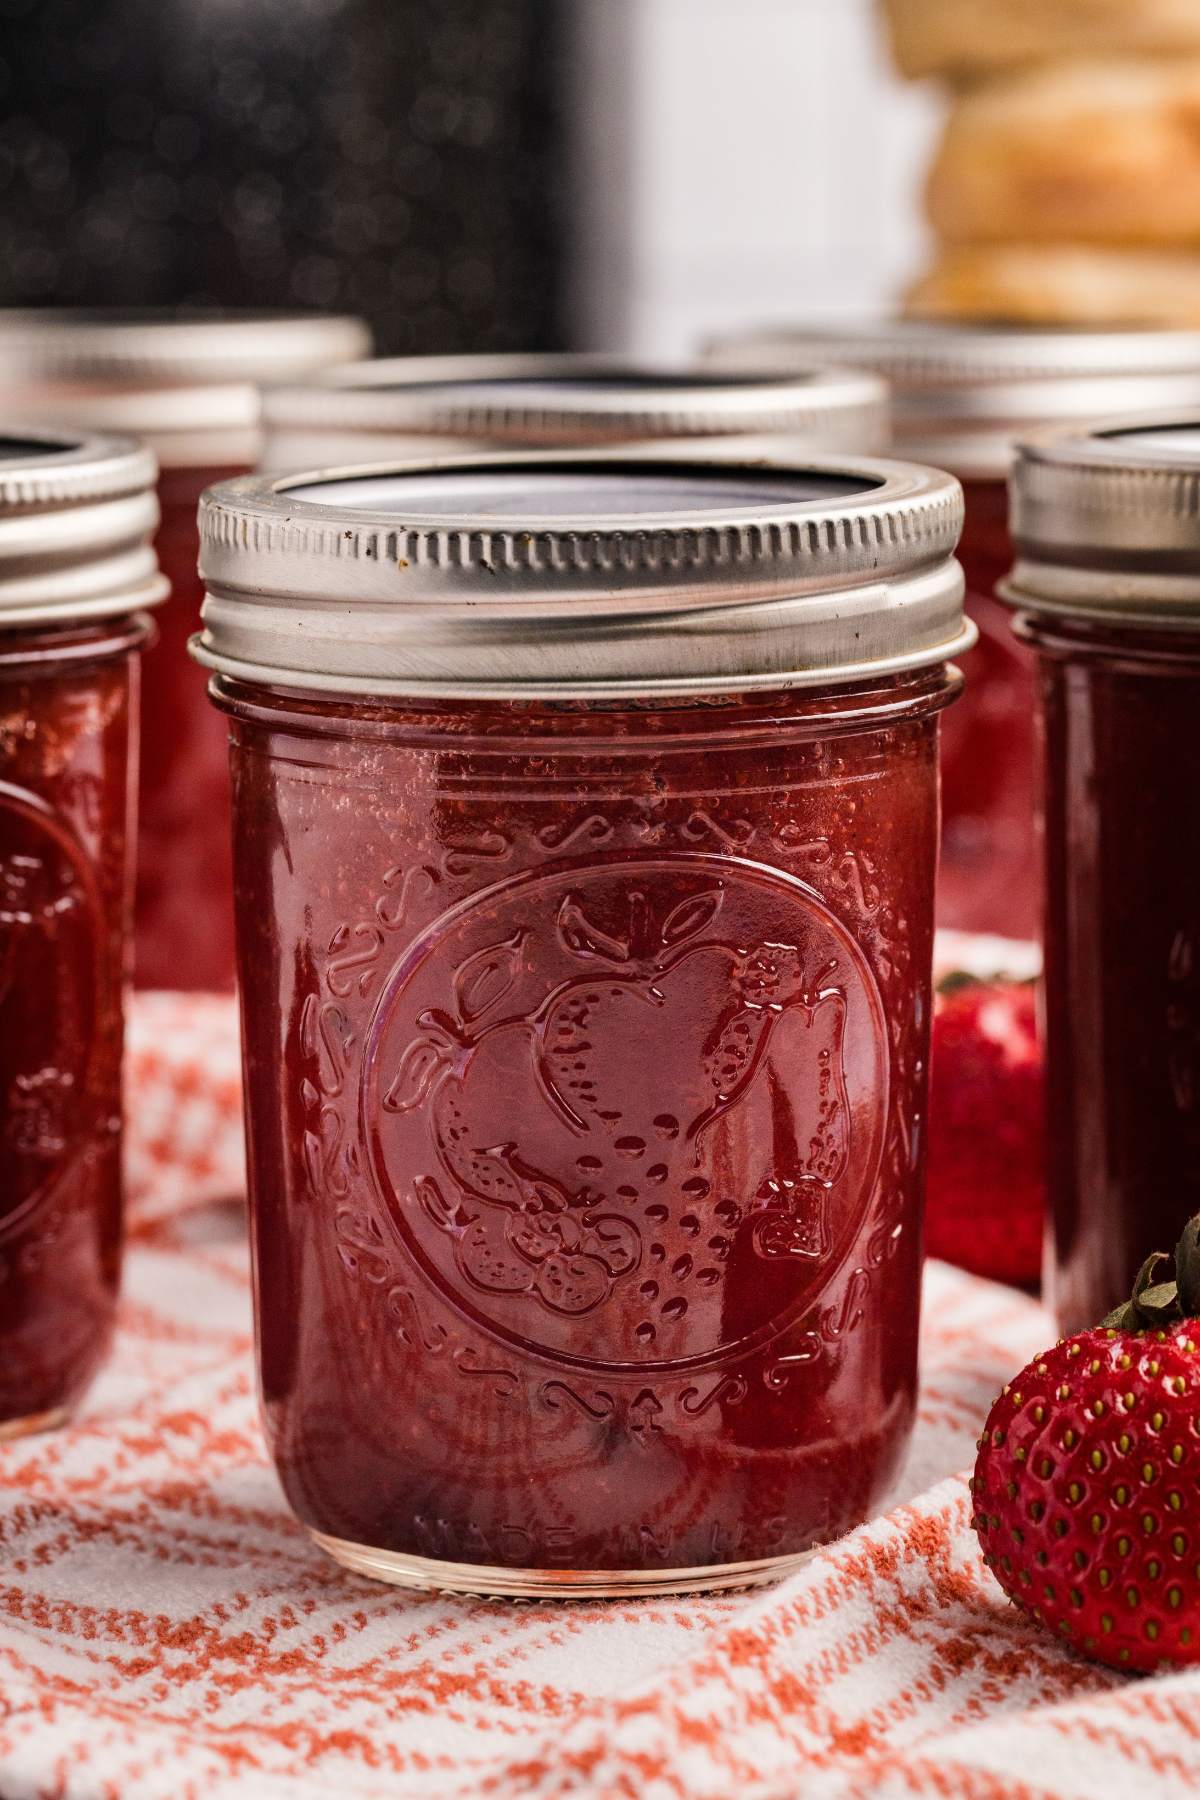
Strawberry Butter (Canning Recipe)
Strawberries are slowly cooked down with sugar and vanilla until they turn into a glossy and delicious spread that you’ll want to put on everything. Thicker and richer than jam, this will be your new favorite way to preserve fruit.
A heads up before you start: this recipe rewards patience. You’re going to stand at the stove stirring for a while. That’s the whole trick. The magic is in the slow reduction. Rushing won’t work. Grab a book and a stool, pour some coffee, and enjoy one of the most satisfying canning projects you’ll ever do.
what You’ll Need
This is a tested water bath recipe, which means the ratios of fruit, sugar, and bottled lemon juice are what make it shelf-stable. Don’t swap sugar alternatives or skip the lemon juice. If you want a lower-sugar version, keep it in the fridge instead of canning it.
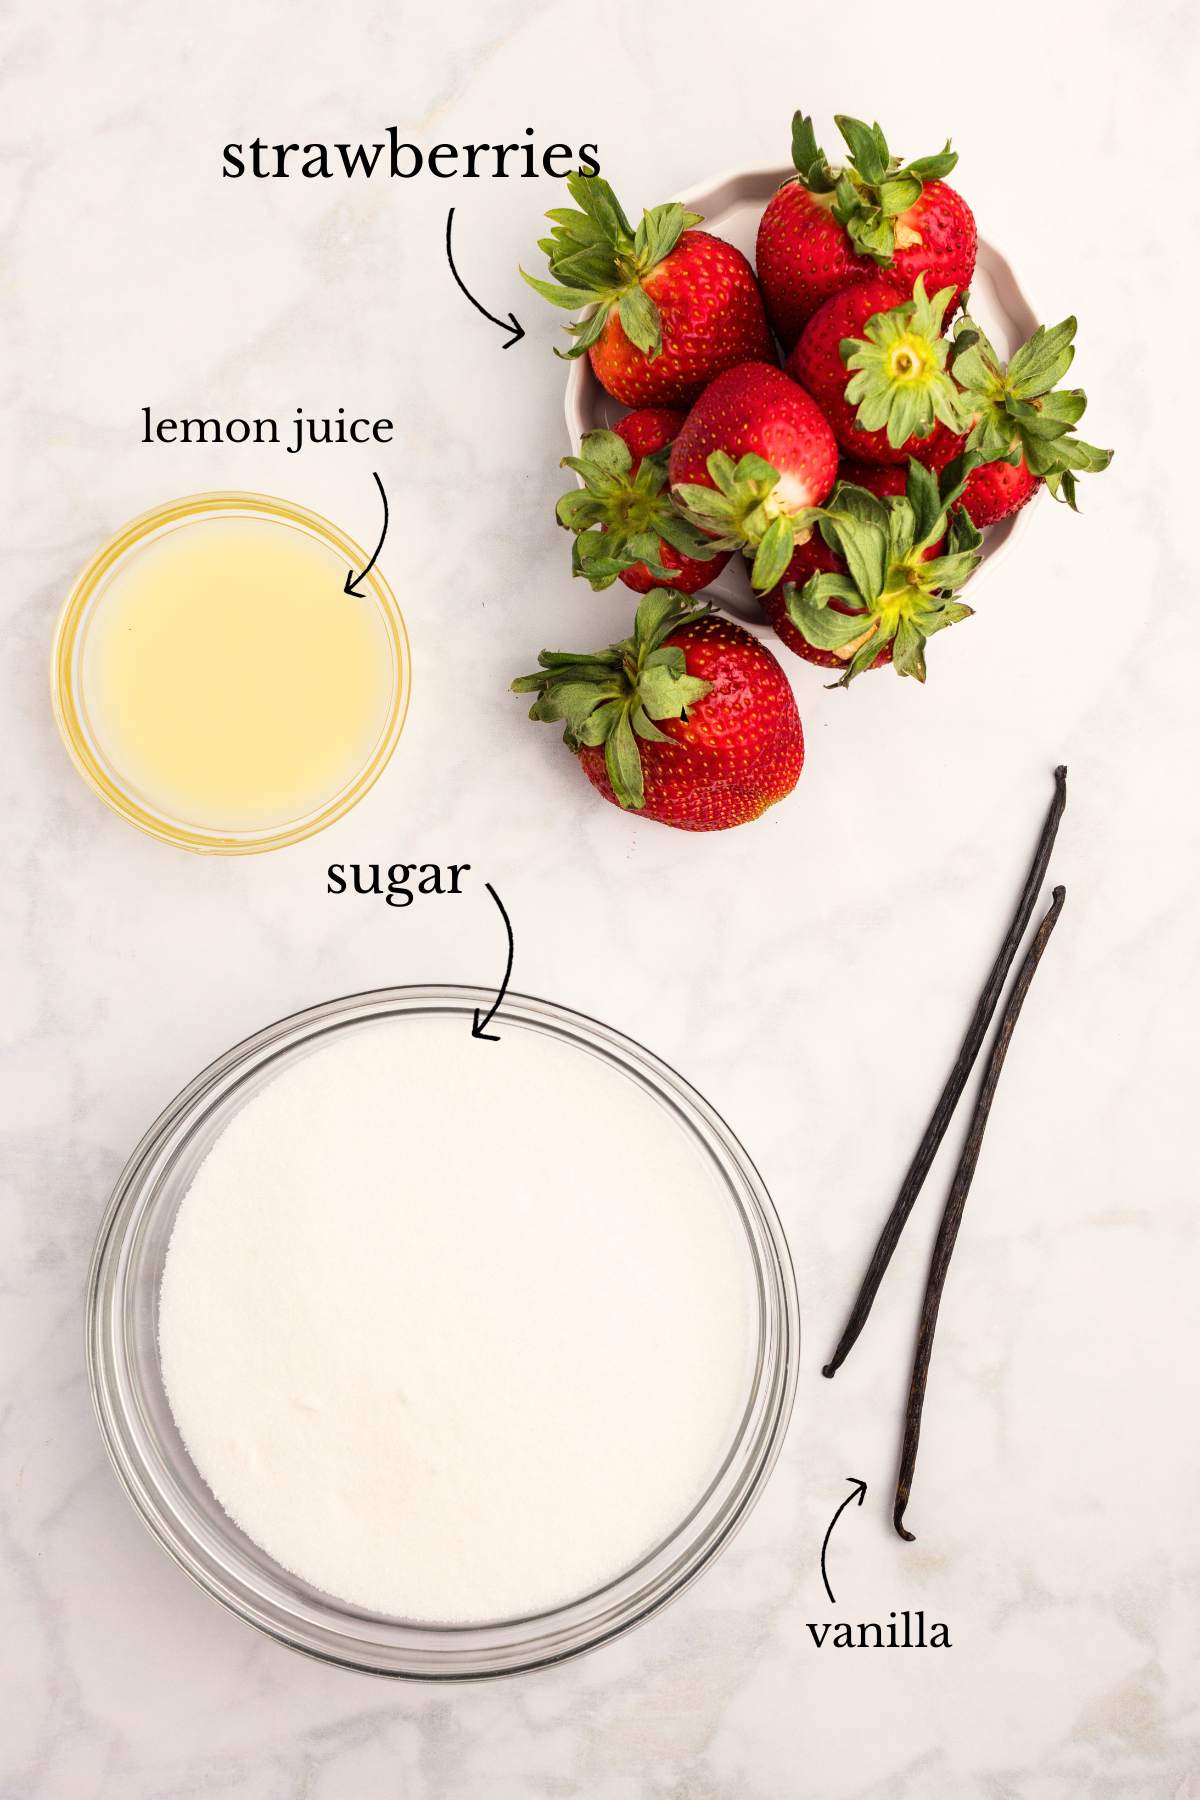
- 3 pounds strawberries
- 1 ½ cups granulated sugar
- 2 vanilla beans
- ¼ cup bottled lemon juice: Bottled has a consistent, tested acidity level
Instructions
Step One: Macerate the Strawberries
In your large pot, stir together the hulled strawberries and sugar over medium heat. Let them sit and do their thing for a few minutes, stirring occasionally, until the strawberries release their juices and the sugar dissolves completely.
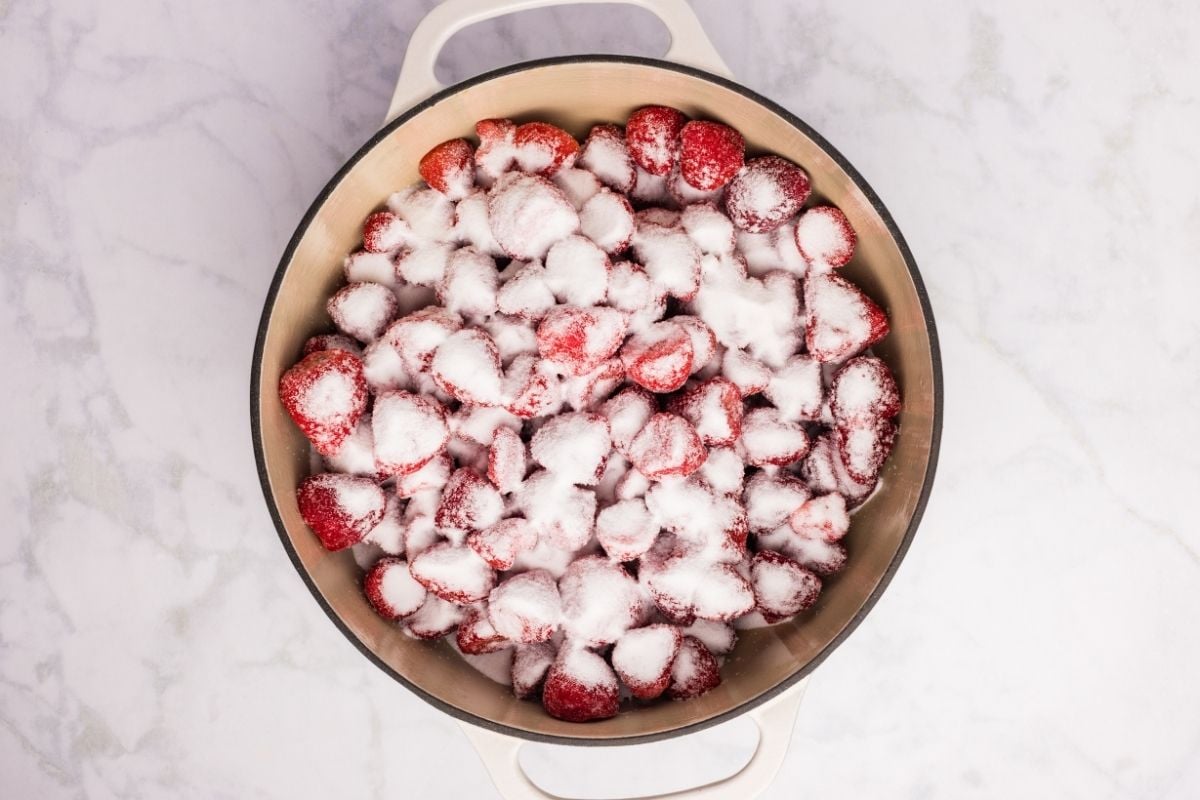
You’ll know it’s ready when you see a shiny pool of syrupy juice at the bottom of the pot.

Step Two: Add the Vanilla and Simmer
Split your vanilla beans lengthwise down the middle and drop them right into the pot (Pod, seeds, and all.) Bring the mixture up to a boil, then reduce to a simmer and let it bubble away for about 30 minutes.
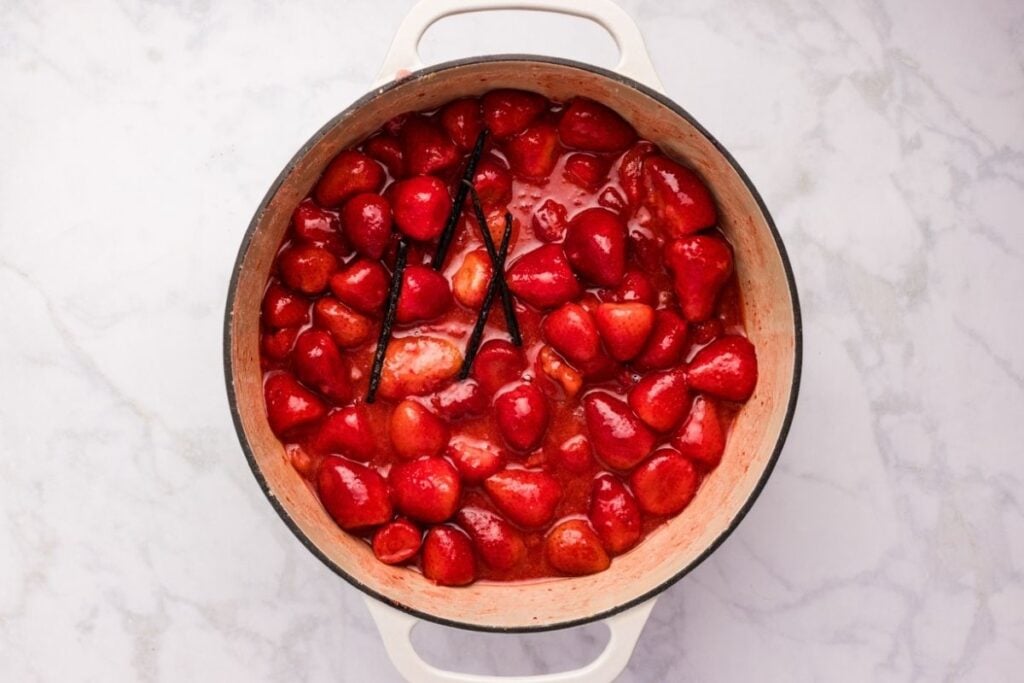
This is where the vanilla starts to infuse and the fruit begins breaking down.
Step Three: Blend until Smooth
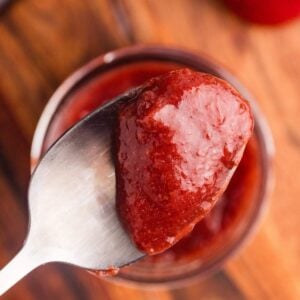
Fish the vanilla bean pods out (you can scrape any remaining seeds back into the pot). Then grab your immersion blender and blend the mixture until it’s completely smooth.
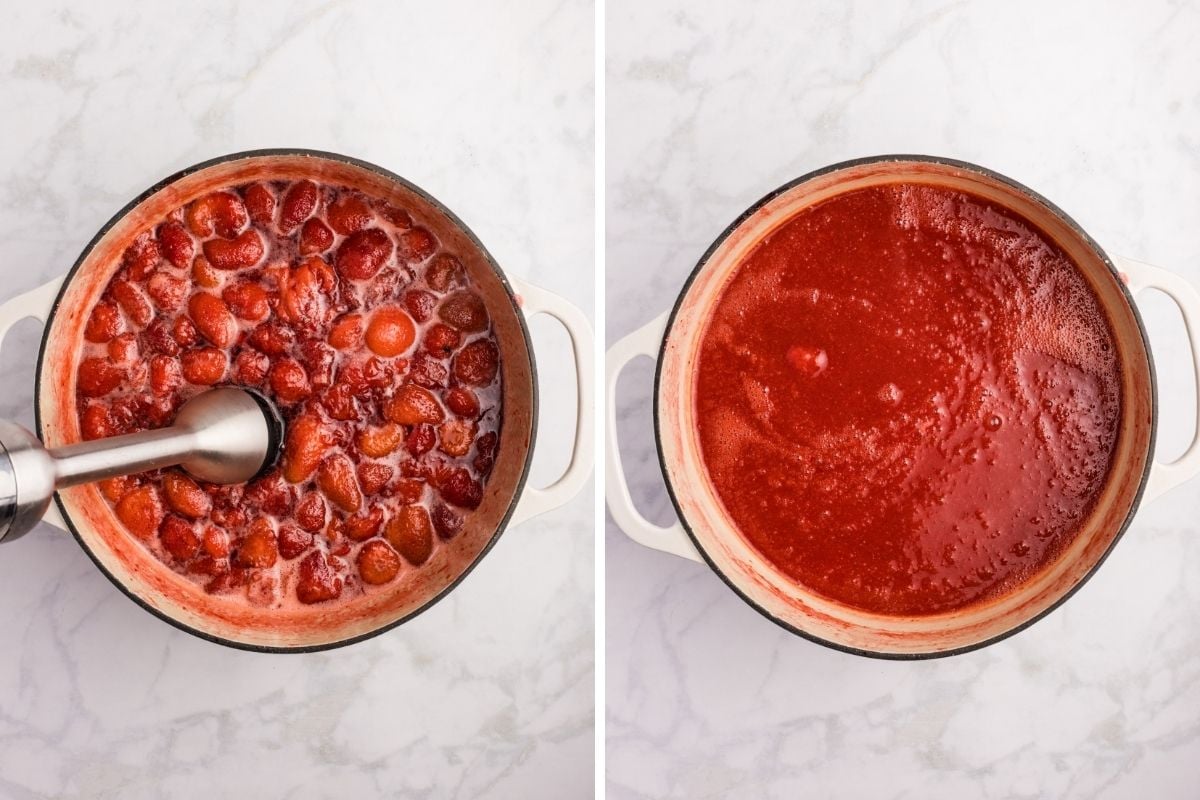
COMPLETELY smooth! No chunks, no lumps, silky all the way through. If you’re using a standard blender, work in small batches and be careful with the hot fruit.
Step Four: Reduce Until Thick
Bring it back up to a gentle boil, then drop the heat to a low simmer. Now the real work: cook for 1 to 1 ½ hours, stirring frequently, until it thickens and darkens into that classic fruit butter color. Stir more and more toward the end. At first it will seem like very slow going, but as the water cooks down it will move faster, so don’t walk away thinking nothing is happening!
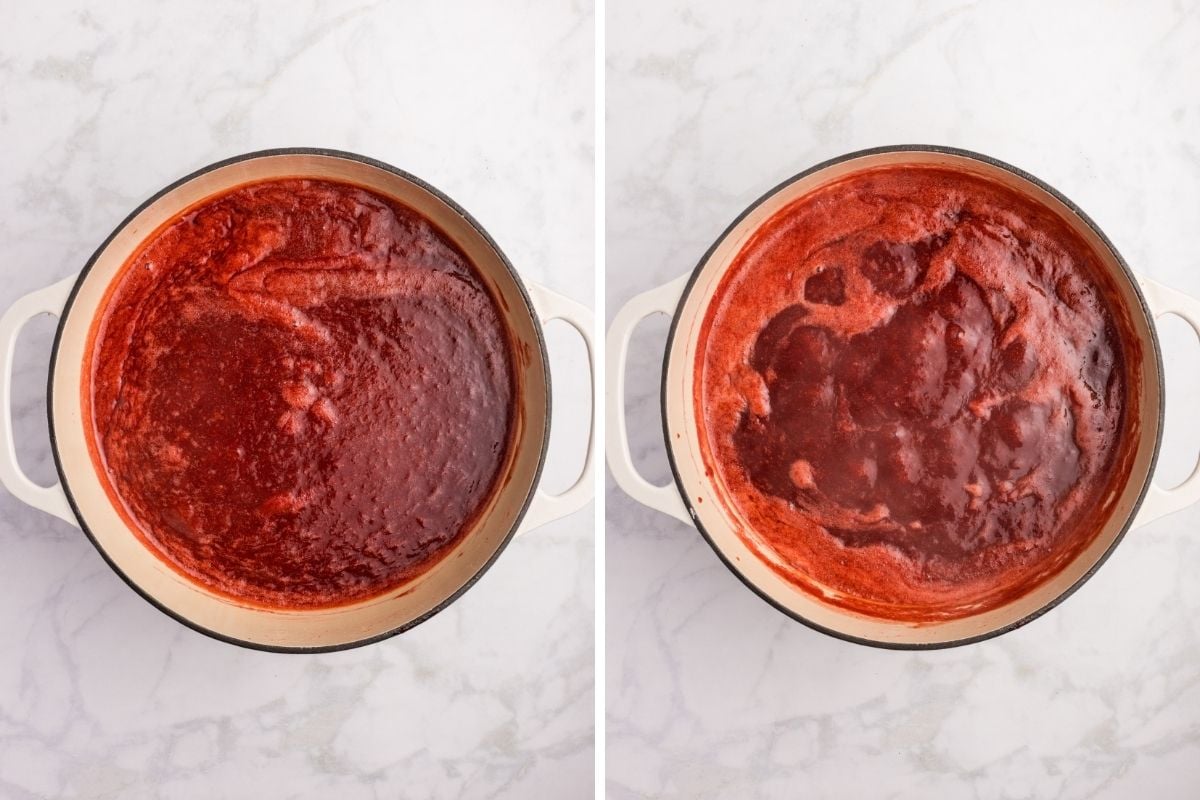
To check for doneness: dip a spoon in, then run your finger across the back of it. If the trail holds and doesn’t run back together, you’re there.
Step Five: Prep Your Jars and Canner
While the butter is finishing, wash your jars, lids, and rings in hot soapy water. Keep the jars hot (simmering, not boiling) in your water bath canner until you’re ready to fill them.
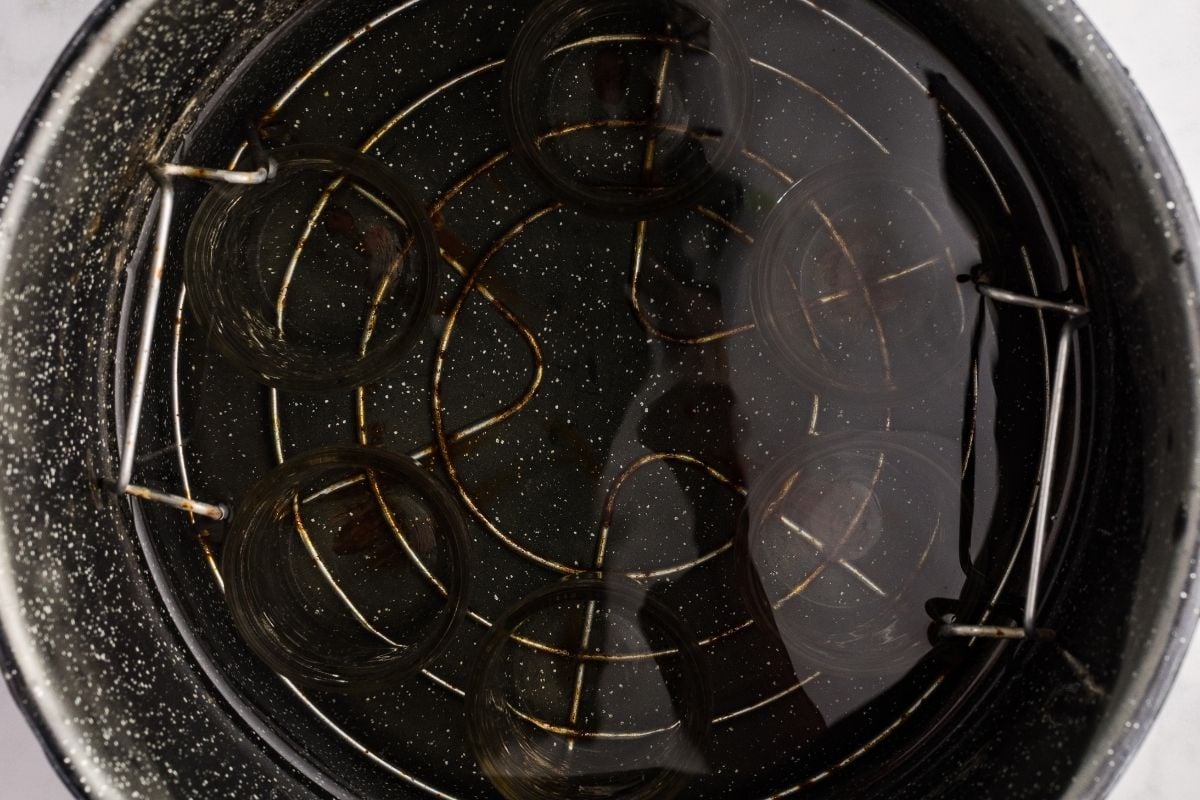
Hot jars going into hot butter going into hot water is what keeps them from cracking.
Step Six: Stir in the Lemon Juice
Once your butter is thick, stir in the ¼ cup of bottled lemon juice and let it simmer for another 5 minutes. This is the step that makes it safe for water bath canning, so don’t skip it or swap it.
Step Seven: Fill the Jars and put on lids and rings
Ladle the hot butter into the hot jars, leaving a ¼-inch headspace at the top.
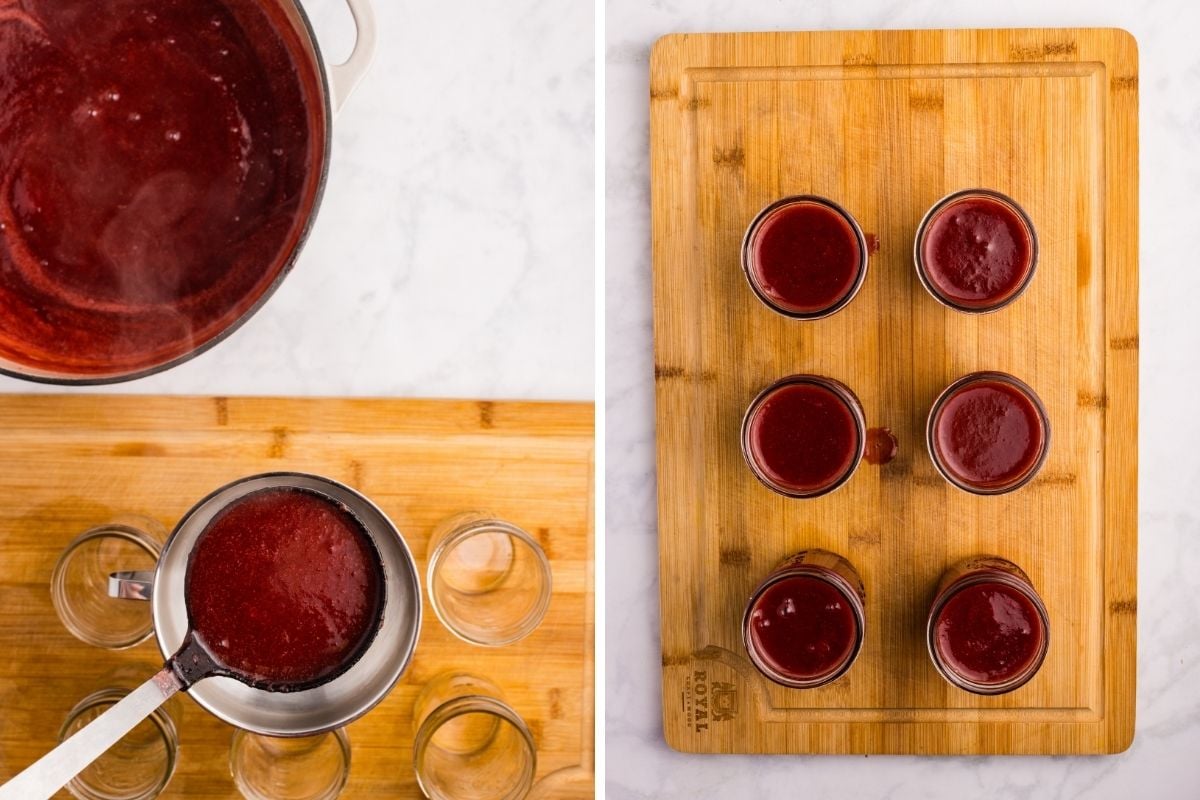
Run a bubble remover or spatula around the inside to release any air pockets, wipe the rims clean with a damp cloth, and apply the lids and rings to fingertip tight.
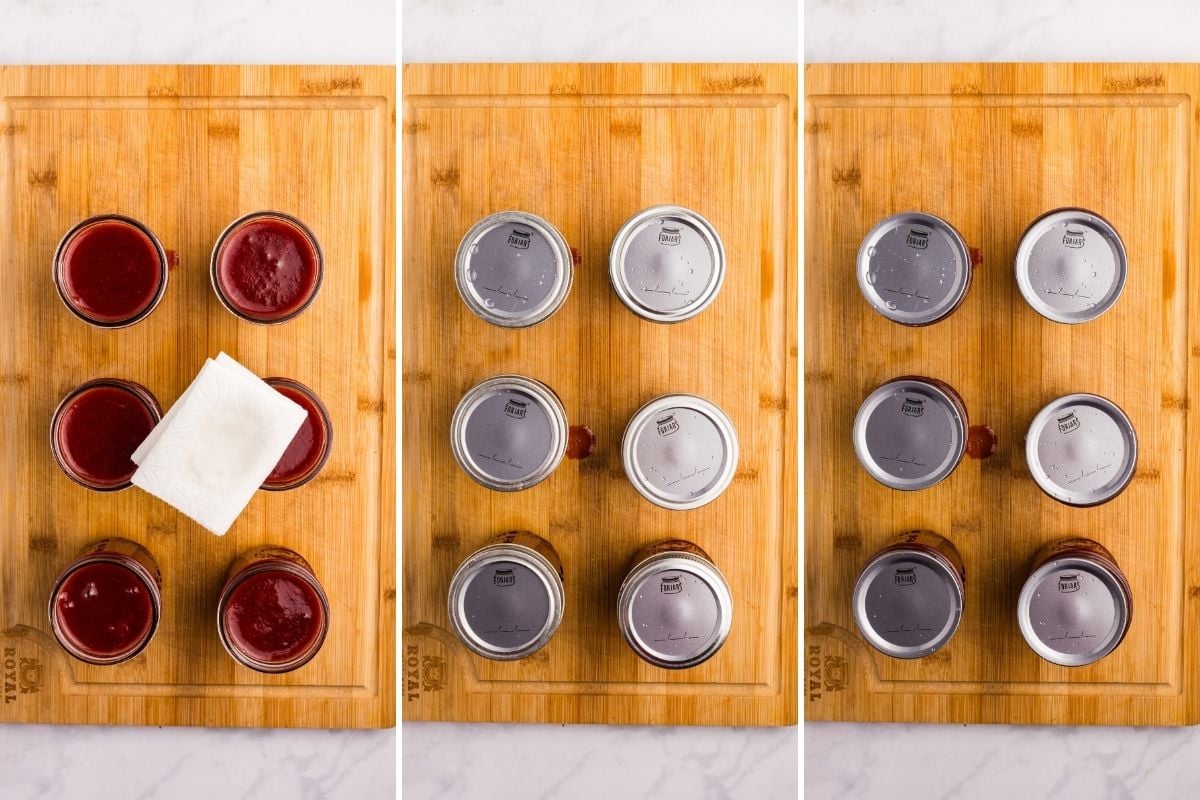
This means snug, but not cranked down.
Step Eight: Process, Cool and Check Seals
Lower the jars into your water bath canner, making sure they’re covered by at least an inch of water. Bring the water to a rolling boil and process for 10 minutes (adjusting for your altitude: add more time if you’re above 1,000 feet).
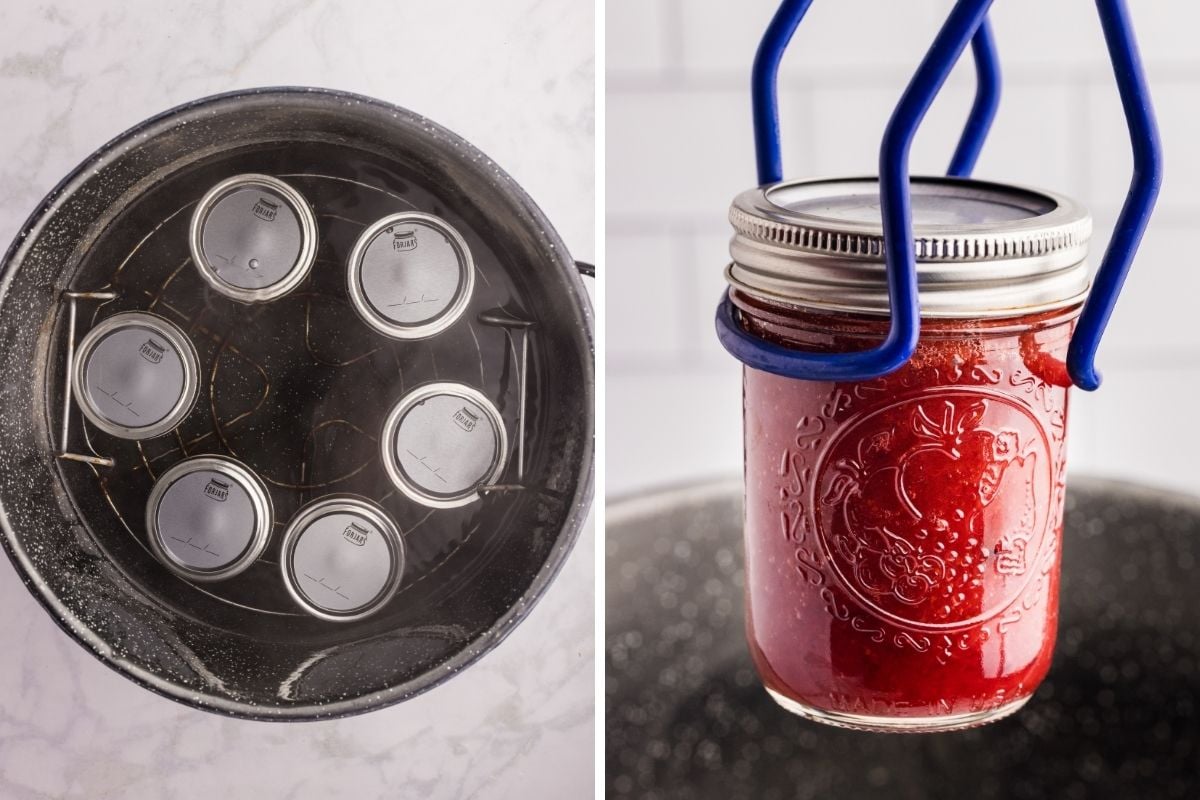
Turn off the heat, take off the canner lid, and let the jars sit in the water for 5 minutes. Then move them to a towel-lined spot on the counter and leave them completely alone for 12–24 hours. I know. It’s hard. Don’t touch them.
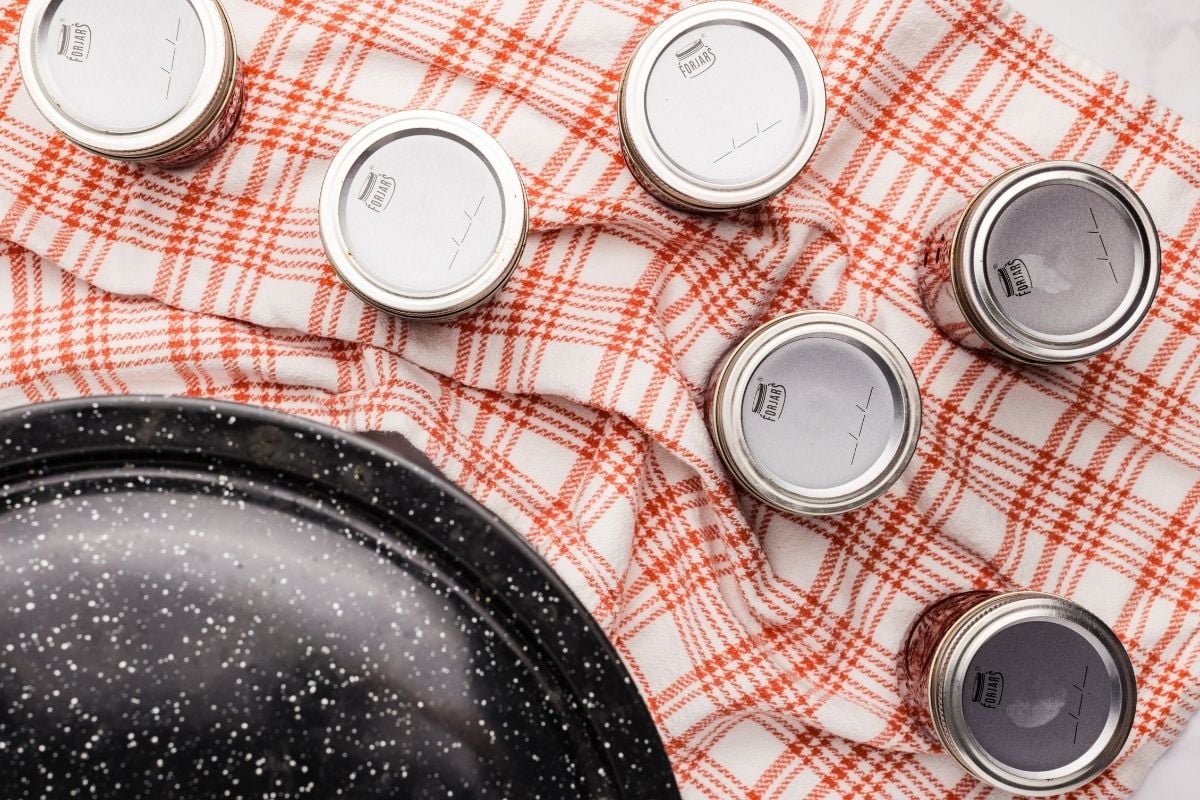
Once they’re fully cool, press the center of each lid. If it doesn’t flex or pop back, you’ve got a seal. Remove the rings, wipe the jars down, label with the date, and store in a cool, dark pantry.
Storage Instructions
Shelf life: Properly sealed jars will keep for 12–18 months in a cool, dark place.
After opening: Refrigerate and use within 2–3 weeks.
How to Use it Up
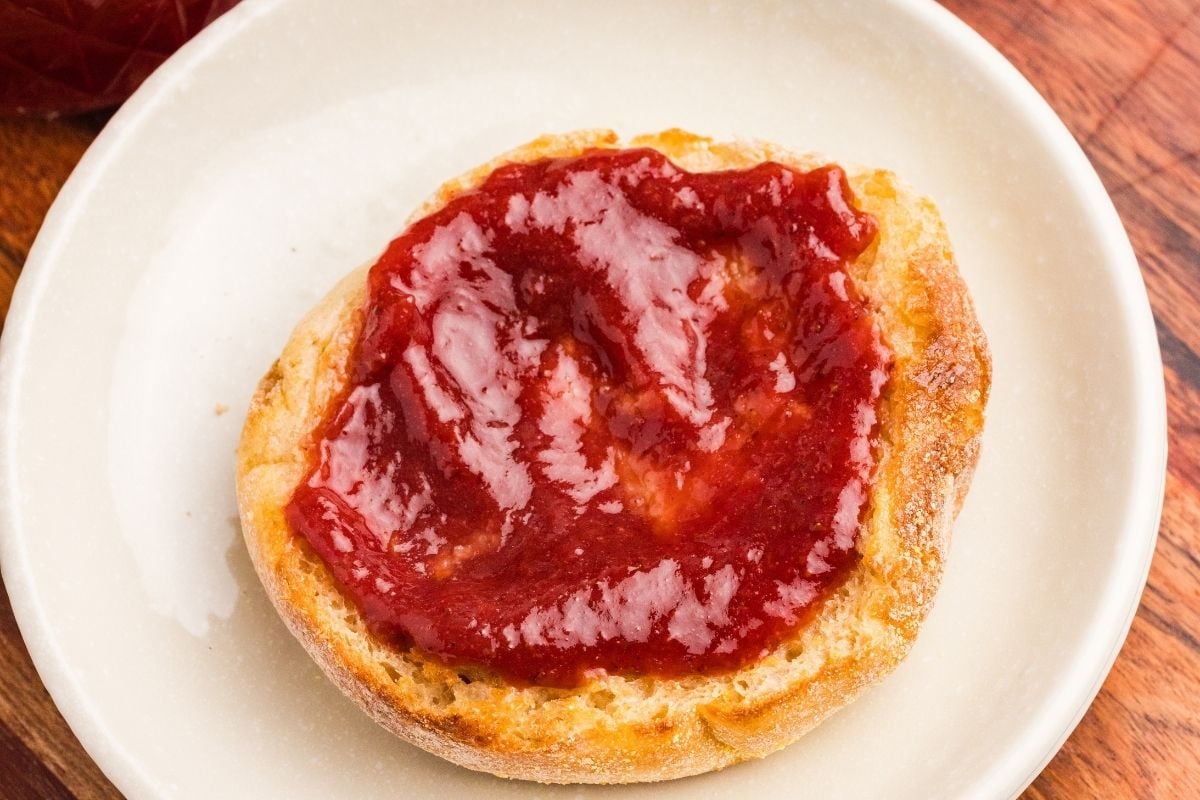
- Spread on toast, biscuits, etc. (obviously!)
- Use in place of jam in thumbprint cookies. It sets up better and has more flavor.
- Add to gift baskets at the holidays. It’s beautiful and everyone will love it.
Troubleshooting
You just need more time. Keep it simmering and stirring. Moisture has to cook off, and there’s no shortcut. It will happen.
Stir in a tablespoon or two of water or strawberry juice to loosen it back up.
Drop the heat and stir more often, especially in the last 30 minutes. A heavy-bottomed pot helps a lot here. But if it’s already scorched, carefully transfer the butter to a clean pot, don’t scrape the burned bits in.
Printable Recipe
Strawberry Butter for Canning
Equipment
- 1 large heavy-bottomed pot or Dutch oven
- 7 half-pint (8 oz) jars with lids and rings
- 1 Jar lifter
- 1 bubble remover or small spatula
Ingredients
- 3 pounds strawberries tops removed
- 1 ½ cups granulated sugar
- 2 vanilla beans split lengthwise
- ¼ cup bottled lemon juice bottled only, not fresh
Save This Recipe
You'll join my email list which you will love. And if you don't, unsubscribe in one click. ❤️
Instructions
- Macerate the strawberries. In a large pot, combine the strawberries and sugar over medium heat. Stir occasionally until the strawberries release their juices and the sugar dissolves.
- Add the vanilla. Split the vanilla beans lengthwise and add them to the pot. Bring the mixture to a boil, then reduce to a simmer and cook for 30 minutes.
- Blend smooth. Remove the vanilla bean pods. Use an immersion blender to blend the mixture until completely smooth (or carefully transfer to a standard blender and return to the pot).
- Reduce until thick. Bring back to a gentle boil, then reduce to a low simmer. Cook for 1 to 1 1/2 hours, stirring frequently, until thickened. To test doneness, run a finger across the back of a coated spoon. If the trail holds, it's ready!
- Prep the jars. Wash jars, lids, and rings in hot soapy water. Keep jars hot (simmering, not boiling) in your water bath canner until ready to fill.
- Add the lemon juice. Stir in the bottled lemon juice and simmer for an additional 5 minutes.
- Fill the jars. Ladle hot strawberry butter into hot jars, leaving 1/4-inch headspace. Remove air bubbles, wipe rims clean, and apply lids and rings fingertip tight.
- Process. Place jars in the water bath canner, covered by at least 1 inch of water. Bring to a rolling boil and process for 10 minutes, adjusting for altitude.
- Cool. Turn off the heat, remove the canner lid, and let jars sit for 5 minutes. Transfer to a towel-lined surface and cool undisturbed for 12-24 hours.
- Check seals and store. Check lids for a proper seal. Remove rings, label, and store in a cool, dark place for 12-18 months. Refrigerate after opening and use within 2-3 weeks.
Notes