Easy Bread Machine Sourdough (Truly Foolproof)
Most people love the idea of baking with sourdough because they see pictures of beautiful artisan loaves with deep crust, slashes, and all the rest. And then the reality of their bread is a flat, weird situation that is not quite what they expected. Anyone else?
It’s time to end that sadness forever. Because once you master this bread machine sourdough recipe, you’ll have a foolproof loaf you’ll be proud of every time.
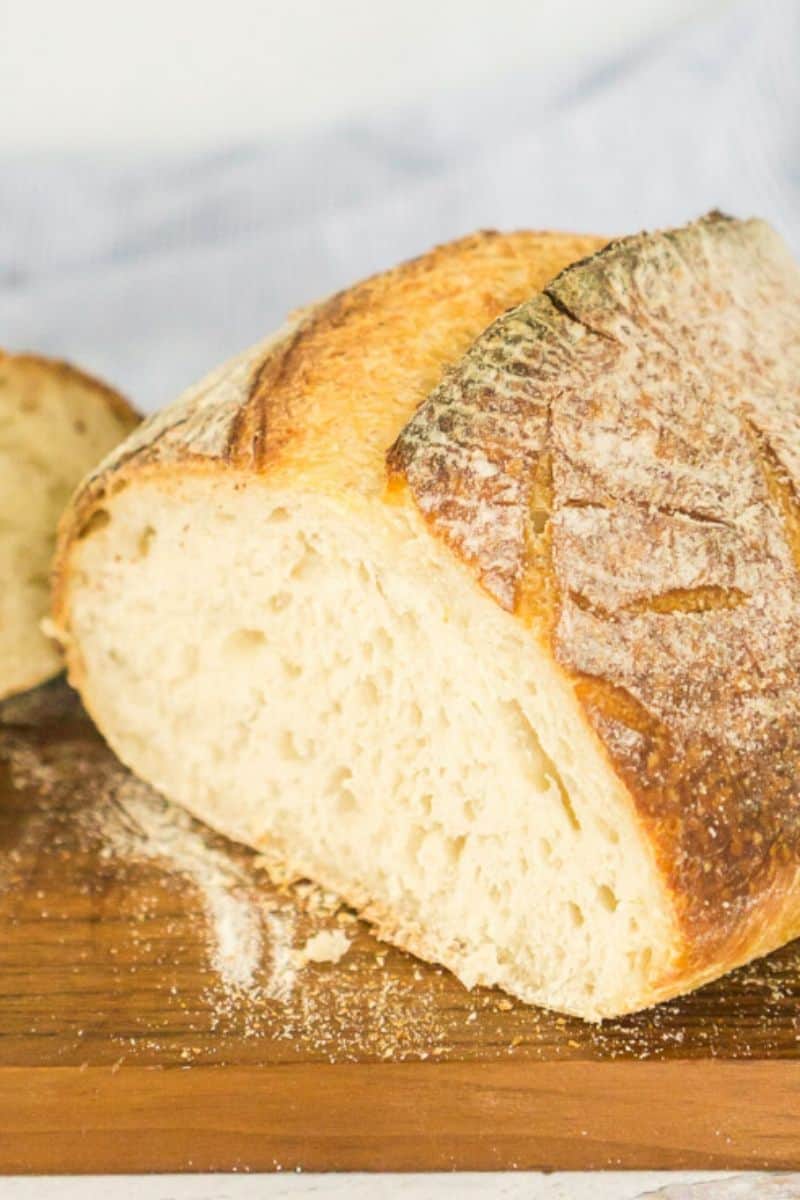
Over time, this has become my go-to for daily baking. It’s incredibly easy, especially since my bread machine handles most of the kneading. With just a few basic ingredients and letting the dough rise overnight in the fridge, I always end up with a crispy loaf on the outside and soft and chewy inside.
It’s perfect for sandwiches, toast, or even just a buttered slice. At first, the dough might seem a bit dry, but I’ve learned that’s completely normal. Resist the urge to add extra water and trust the process, and it turns out perfectly every time.
Ingredients and Tools You’ll Need
We’re using the bread machine to do the kneading, but you can also do it in a stand mixer. Make sure your starter is bubbly and active.
Sourdough Sundays Newsletter

Every Sunday evening I’ll send you a sourdough recipe to make that week, straight from my kitchen to your inbox.
And as a thank you for signing up, I’ll send you this e-book with beautiful printable recipes right away. Simple!
You will not be added to any other email lists or my daily newsletter. But if you’re already on my newsletter, you’re welcome to join and receive both.
Heart’s Content Farmhouse is a participant in the Amazon Services LLC Associates Program, an affiliate advertising program designed to provide a means for sites to earn advertising fees by advertising and linking to Amazon.com. This means that when you click on certain links on this site and make a purchase, I may earn a small commission at no additional cost to you. I only recommend products I genuinely believe in and would use in my own kitchen. As an Amazon Associate, I earn from qualifying purchases.
Equipment
- Bread machine (with a dough cycle setting) (It does the kneading for you. If you don’t have one, kneading by hand or using a mixer works, but a bread machine simplifies the process.)
- Large mixing bowl
- Measuring cups and spoons
- Damp tea towel or kitchen towel
- Baking Sheet
- Parchment paper
- Rimmed baking sheet
Ingredients
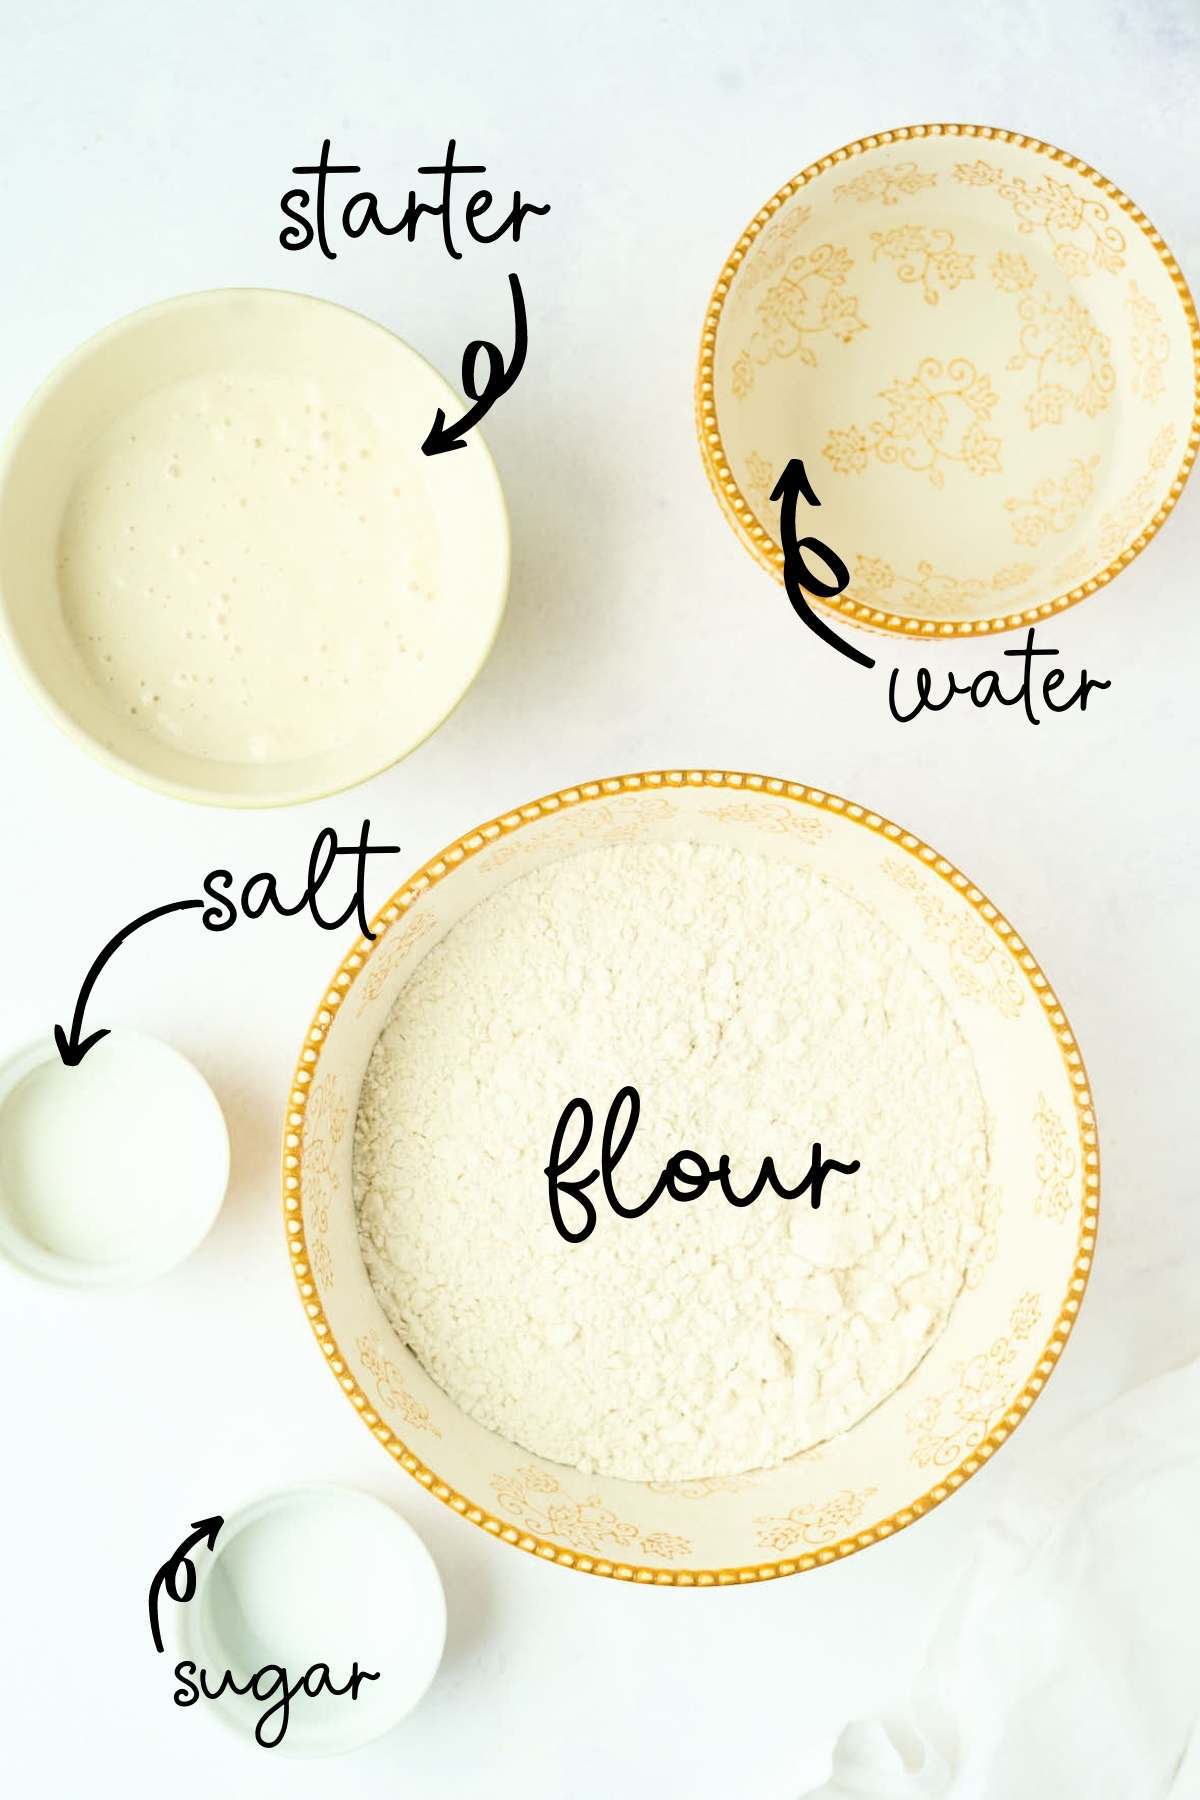
- 3 cups bread flour (15.85 ounces) (regular or wheat flour will work too, but bread flour will make your bread chewier and stronger)
- 1 cup lukewarm water (7.75 ounces)
- ¾ cup fed sourdough starter (5.65 ounces) (You can also easily make your own at home with flour and water—it takes about 5-7 days to get a strong starter going.)
- ½ tablespoon sugar
- 1 ¾ teaspoon salt
How to Make Bread Machine Sourdough
Step One: Autolyze
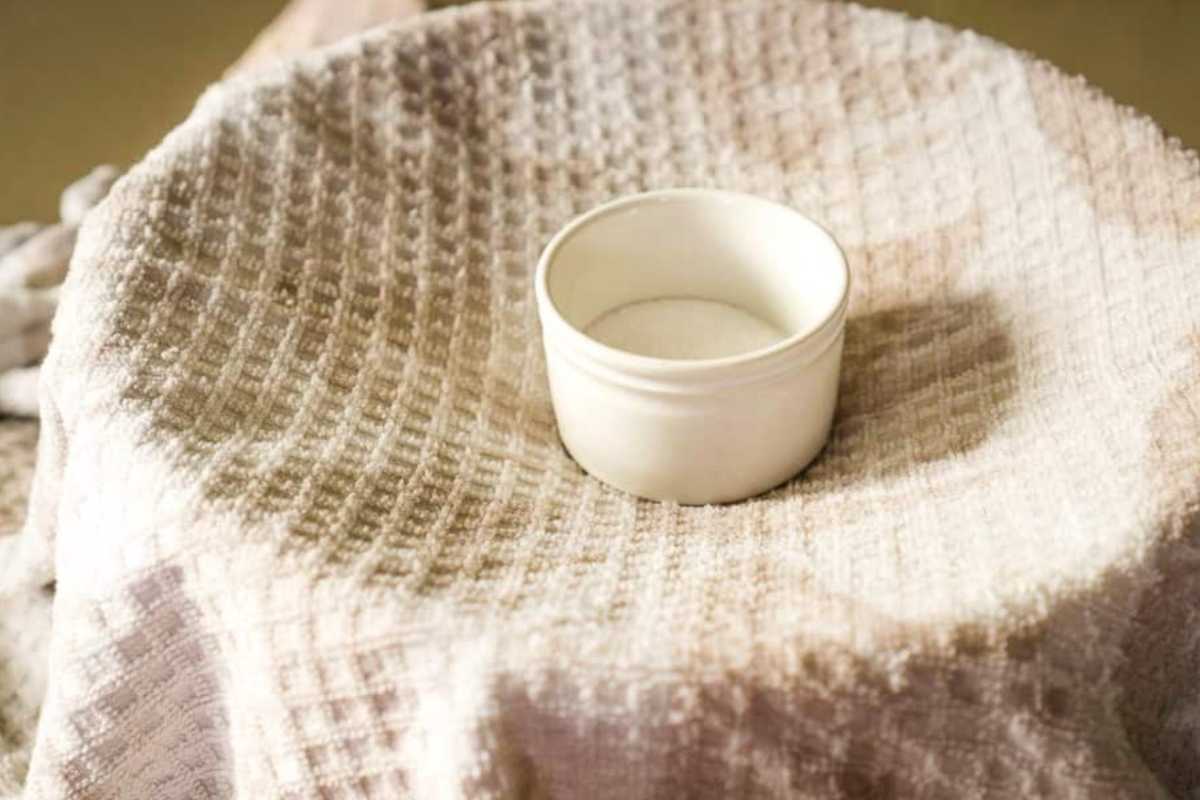
Combine the bread flour, sourdough starter, sugar, and water in a large mixing bowl. The dough will feel drier than typical sourdough—this is normal. Do not add more water. Use your hands to make sure all ingredients are incorporated into a cohesive ball. Cover the bowl with a damp tea towel and let the dough rest on the counter for 30 minutes. Tip: Pre-measure the salt and place it in a small container on the towel to remind yourself to add it later.
Step Two: Knead
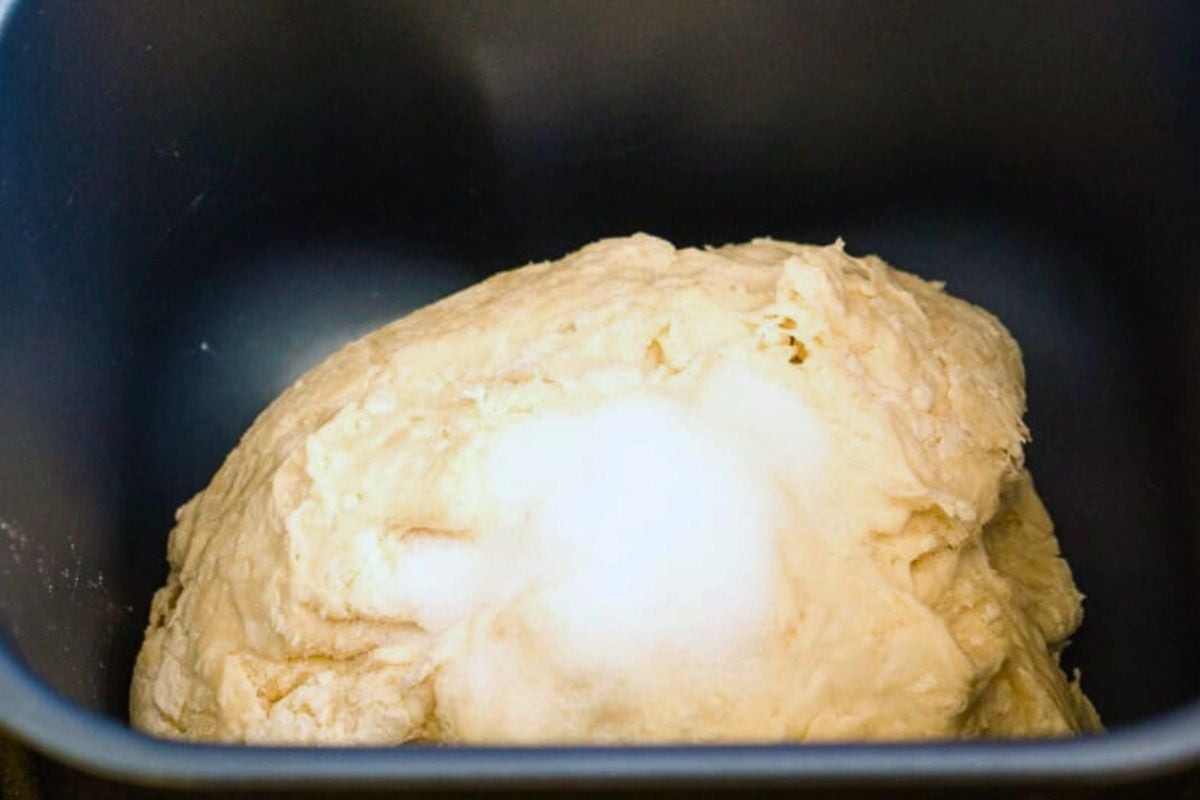
After the autolyze, transfer the dough and salt into the bread machine bucket. Then, select the “dough” cycle and press start. You don’t need to fold the dough or anything crazy like that. Just walk away.
Step Three: First Rise
When the cycle ends, leave the dough in the machine to continue rising for 2-3 more hours. The dough should be noticeably puffier and soft to the touch, though it may not have doubled in size. This longer rise helps develop the flavor and texture of the bread.
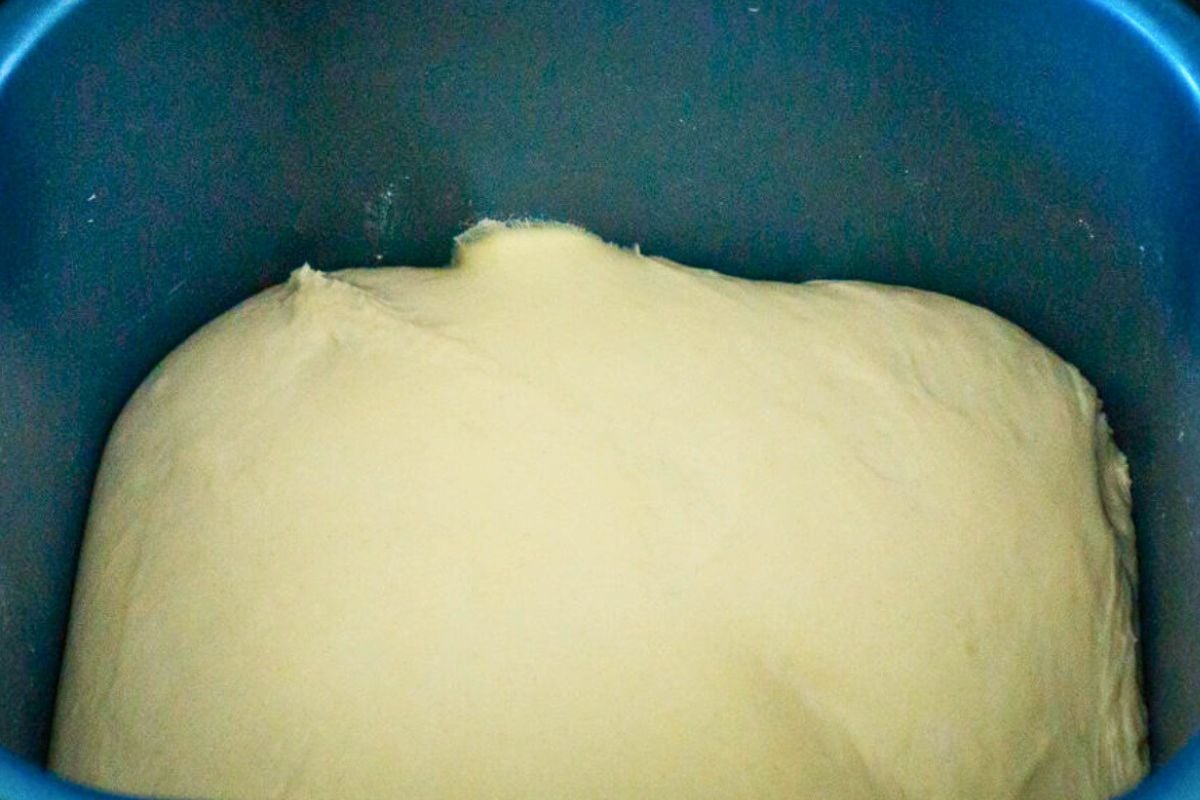
Step Four: Shape The Loaf
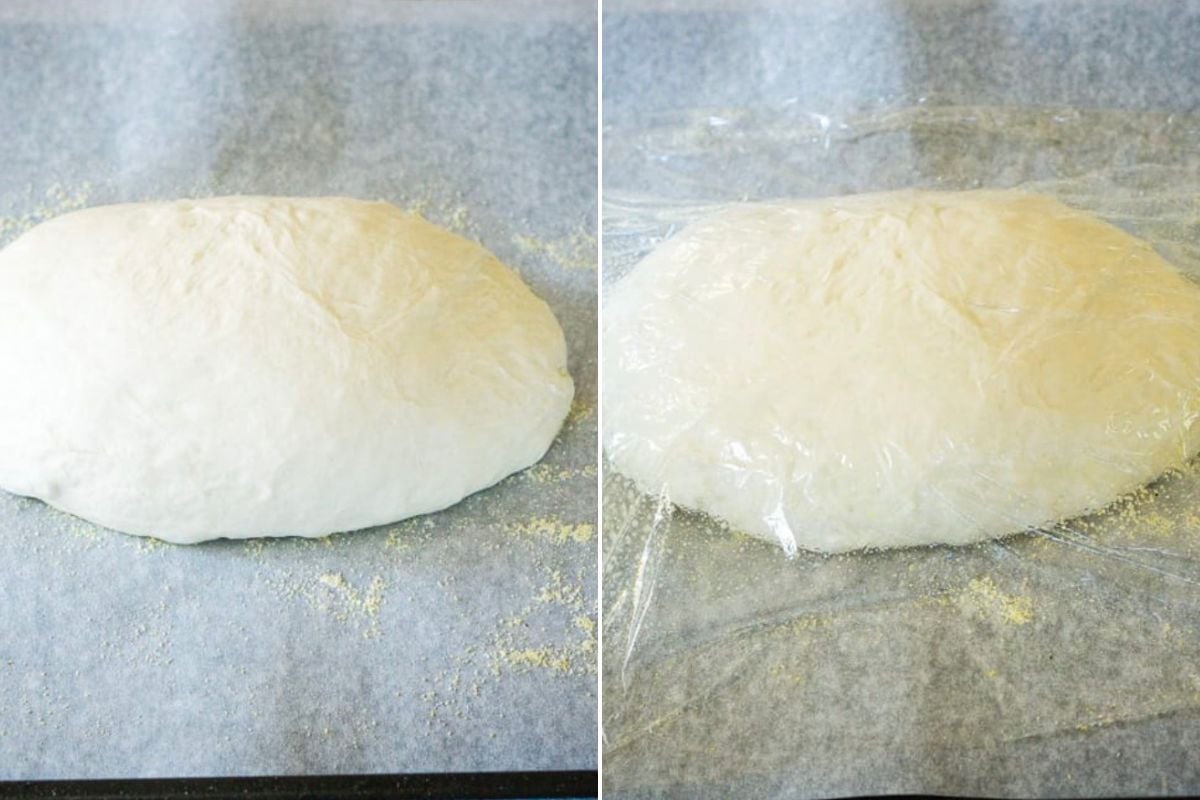
Prepare a baking sheet by lining it with parchment paper and sprinkling cornmeal over the surface. Carefully remove the dough from the bread machine and gently shape it into a round or oval loaf. The dough will be slightly sticky, but avoid using flour for shaping. Place the dough on the prepared baking sheet.
Step Five: Second Rise (Overnight Proof)
Spray a piece of plastic wrap with cooking spray and loosely cover the shaped dough. Place the covered loaf in the refrigerator to proof overnight for 8 to 16 hours.
Step Six: Prep For Baking
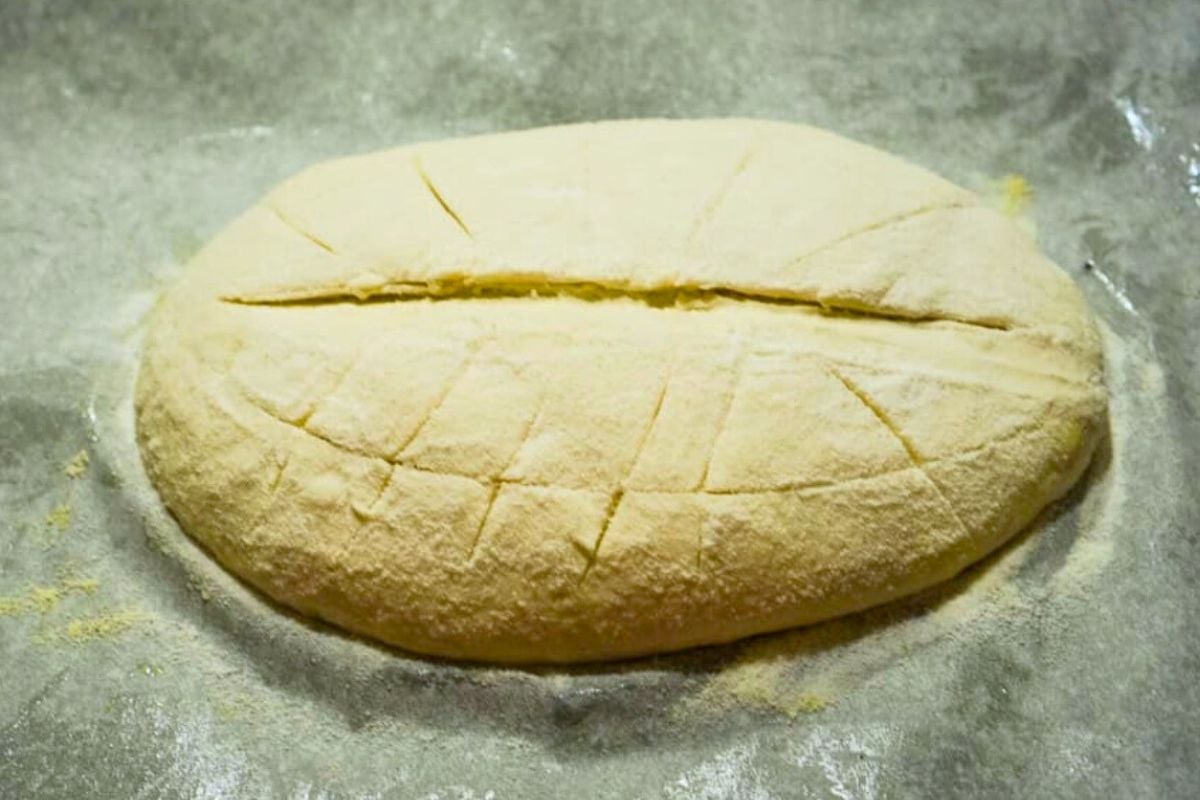
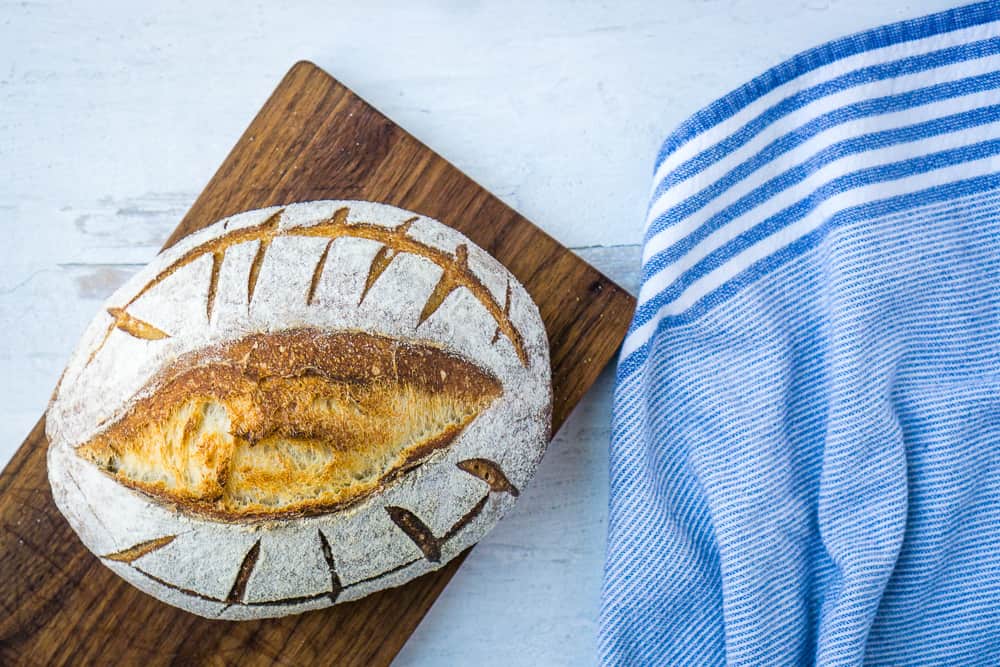
In the morning, preheat the oven to 450°F (230°C). Position two racks: one in the center of the oven and the other in the lower middle. Then, place an empty-rimmed baking sheet on the lower rack while the oven is preheating. Next, remove the loaf from the fridge. Dust it lightly with flour and use a lame or a sharp serrated knife to slash the top of the dough, allowing the loaf to expand during baking.
Step Seven: Bake With Steam
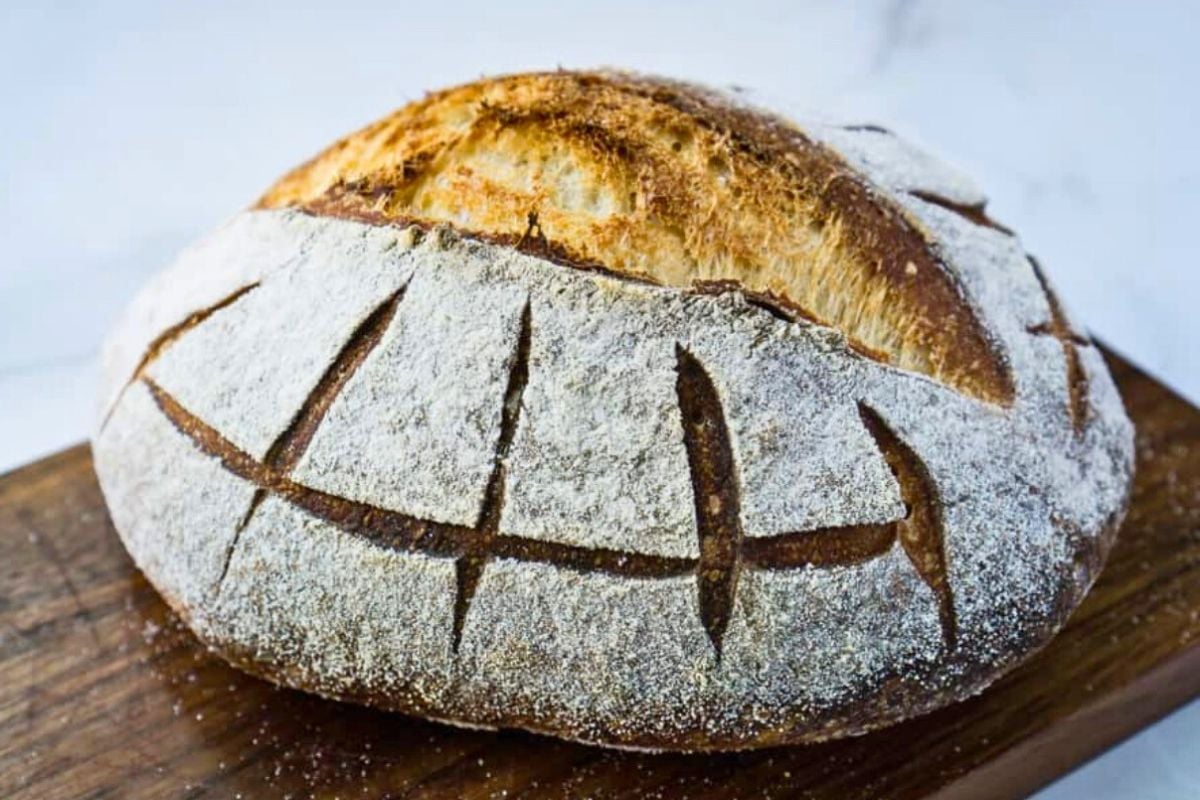
When the oven is fully preheated, carefully pour 1 cup of water into the baking sheet on the lower rack to create steam. Immediately place the loaf on the center rack and close the oven door. Bake the loaf for 45 minutes until it reaches a deep golden-brown color. Remove from the oven and allow the bread to cool on a wire rack for at least 4 hours.
Step Eight: Slice And Serve
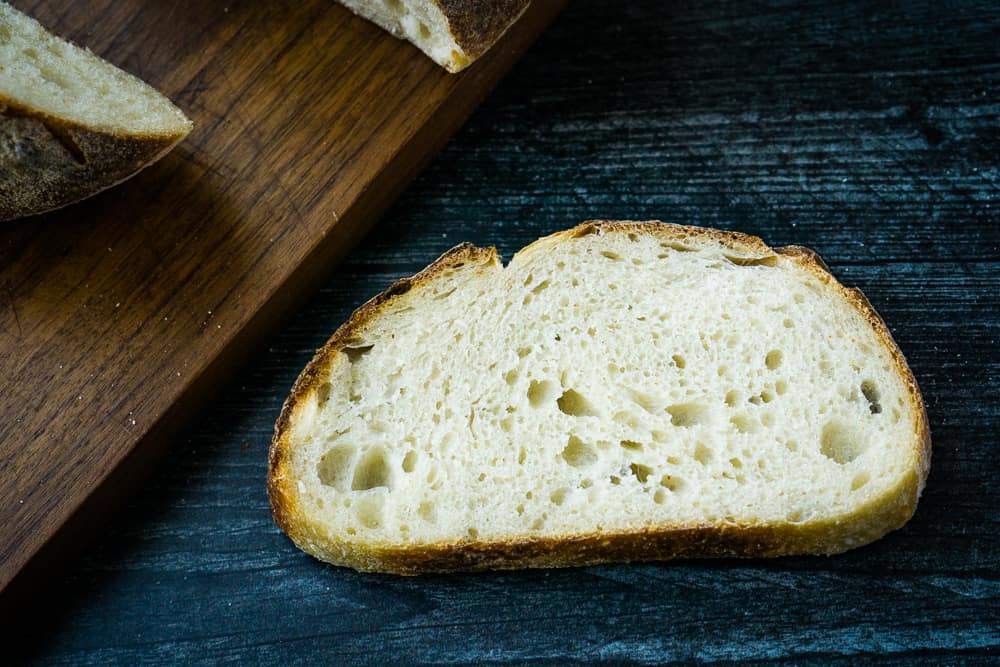
Once the bread has fully cooled (after at least 4 hours), use a sharp, serrated knife to slice the loaf into even pieces. Enjoy fresh or toasted with your favorite toppings!
Storage Instructions
Once the bread has completely cooled, wrap it in a clean kitchen towel or place it in a paper bag. This will help keep the crust crispy while preventing the bread from drying. Avoid using plastic, as it can cause the crust to become soft. Stored this way, the bread will stay fresh for about 3 days at room temperature.
You can also freeze it. First, let the loaf cool completely. Then, slice the bread into pieces, so it’s easier to use later. Wrap the slices tightly in plastic wrap or aluminum foil and place them in a freezer-safe bag. Remove as much air as possible before sealing the bag. The bread can be stored in the freezer for up to 1 month.
Thaw the slices at room temperature or pop them straight into the toaster. You can also reheat them in the oven for a few minutes to freshen up the crust.
What to Serve with Bread Machine Sourdough Bread
This bread is great for everything from toast at breakfast to a side at dinner.
- Spread on some homemade butter or strawberry jam.
- It’s great for grilled cheese sandwiches since it doesn’t have big holes.
- Serve as a side for dinner, like with a creamy chicken noodle soup.
Questions and Troubleshooting
Check my Sourdough FAQ page to see what could have gone wrong.
The autolyze step helps improve the dough’s texture, but if you’re short on time, you can throw everything in the bread machine and still get a great loaf.
No! It’s normal for this particular recipe. Once it rests and rises, the dough will soften and be easier to work with.
Great question! The dough should look noticeably puffier, but doesn’t need to double in size. If you press it gently with a finger and it springs back slowly, it’s ready.
Yes, you can! If you’re in a rush, let the dough rise at room temperature for another 2-3 hours. The slow, overnight rise helps develop the sourdough flavor, so try it when you can.
There are a couple of reasons this could happen. If your starter wasn’t bubbly and active when you used it, that could slow the rise. Also, sourdough can be slightly slow to rise, especially in cooler kitchens. If this happens, just give it more time to puff up! If you’re having trouble with your sourdough starter and wondering if it’s still alive, don’t worry! Check out this helpful guide on how to tell if you’ve killed your sourdough starter.
Yes! Some readers have baked this in the machine. But you can’t just run a cycle from start to finish. You’ll need to remove the dough to rest in the fridge overnight, then pop it back in to bake in the morning.
You sure can. The steam and baking sheet is really a workaround for those of us who don’t have one. 😊
More Sourdough Recipes For Beginners
- My sourdough roll recipe uses the same steam technique and adds a pinch of instant yeast for a fluffy roll with a crisp crust.
- Sourdough baguettes are hand kneaded but also a similar process.
- And if you want to do all the crazy folding and buy some neat tools, here is a true artisan bread recipe you might like.
Printable Recipe
Bread Machine Sourdough

Equipment
- Bread machine (with a dough cycle setting)
- Large mixing bowl
- Measuring cups and spoons
- Damp tea towel or kitchen towel
- Baking Sheet
- Rimmed baking sheet
Ingredients
- 3 cups bread flour (15.85 ounces)
- 1 cup lukewarm water (7.75 ounces)
- ¾ cup fed sourdough starter (5.65 ounces)
- ½ tablespoon sugar
- 1 ¾ teaspoon salt
Save This Recipe
You'll join my email list which you will love. And if you don't, unsubscribe in one click. ❤️
Instructions
- Autolyze. Combine the bread flour, sourdough starter, sugar, and water in a large mixing bowl. The dough will feel drier than typical sourdough—this is normal. Do not add more water. Use your hands to make sure all ingredients are incorporated into a cohesive ball. Cover the bowl with a damp tea towel and let the dough rest on the counter for 30 minutes.Tip: Pre-measure the salt and place it in a small container on the towel to remind yourself to add it later.
- Knead. After the autolyze, transfer the dough and salt into the bread machine bucket. Then, select the “dough” cycle and press start. You don’t need to fold the dough or anything crazy like that. Just walk away.
- First rise. When the cycle ends, leave the dough in the machine to continue rising for 2-3 more hours. The dough should be noticeably puffier and soft to the touch, though it may not have doubled in size. This longer rise helps develop the flavor and texture of the bread.
- Shape the loaf. Prepare a baking sheet by lining it with parchment paper and sprinkling cornmeal over the surface. Carefully remove the dough from the bread machine and gently shape it into a round or oval loaf. The dough will be slightly sticky, but avoid using flour for shaping. Place the dough on the prepared baking sheet.
- Second Rise (overnight proof). Spray a piece of plastic wrap with cooking spray and loosely cover the shaped dough. Place the covered loaf in the refrigerator to proof overnight for 8 to 16 hours.
- Prep for baking. In the morning, preheat the oven to 450°F (230°C). Position two racks: one in the center of the oven and the other in the lower middle. Then, place an empty-rimmed baking sheet on the lower rack while the oven is preheating. Next, remove the loaf from the fridge. Dust it lightly with flour and use a lame or a sharp serrated knife to slash the top of the dough, allowing the loaf to expand during baking.
- Bake with steam. When the oven is fully preheated, carefully pour 1 cup of water into the baking sheet on the lower rack to create steam. Immediately place the loaf on the center rack and close the oven door. Bake the loaf for 45 minutes until it reaches a deep golden-brown color. Remove from the oven and allow the bread to cool on a wire rack for at least 4 hours.
- Slice and serve. Once the bread has fully cooled (after at least 4 hours), use a sharp, serrated knife to slice the loaf into even pieces. Enjoy fresh or toasted with your favorite toppings!
Video
Notes
Nutrition
Love,


I just came across this post and I’m so excited to give it a try! My bread machine is a Neretva. It has a “Knead” option. Is this the setting I would use? Sorry, I’m so new to this and still getting accustomed to it. Any suggestions is greatly appreciated. 🙂
hi yes knead is probably the one the one! unless there is a knead +proof and then you would use that:)
Help there is a problem with quantities in this printable recipe. The number of cups changes but the weight (grams) or mls does not. I like to weigh my ingredients but dare not use this recipe until this error is fixed. No one else has mentioned it though.
Hi rosie. The grams will not multiply because I have manually calculated it. there’s no way for me to enter the recipe with both quantities, so if you hit the 2x or 3x button they will ot change. you’ll hve to double those youurself if you choose to double the recipe. the quantities are correct, it’s just thatt he doubling feture does not work with the grams because they are a note i have added after each ingredient.
Works out great EVERY TIME!!
this is an awesome recipe! I’ve been struggling with getting BF right with other non bread machine recipes and this solved it for me. I have 2 questions:
1. what is the reason for sugar in this recipe?
2. if I wanted to add some stretch and folds to get a lacier crumb, is there a way to incorporate them into this recipe ?
I have found it rises better with the sugar but i think you could leave it out without any disastrous effects. now… for an open crumb, you need high hydration and this technique just won’t work. I have a no knead sourdough and a recipe called “easy artisan sourdouugh” that are still simple but they’re just a whole different ball game. 🙂
thank you so much!
My first loaf was as hard as a brick. What did I do wrong?
hi pam, either it did not rise (meaning your starter was not in a good state) or you overbaked.
Can I skip the sugar?
yes
I’ve been exploring with sourdough (Sourdough Tina) recipes for a bit but couldn’t get myself to do an artisan loaf as I was intimidated by the steps and rise times. I had made softer loaves directly in my machine or used the discard in various ways. I found your straight forward recipe and decided to give it a try. What a success! So crunchy, chewy, soft and flavorful. My family ate the entire loaf in a day and raved about it tasting better than store bought. I plan to make this again and again! Thank you.
Christine I’m soooo happy the bread was a success! And don’t be intimidated by artisan loaves; they can be easy too! I have a basic one to try if you don’t feel like pullingo ut the bread machine 😊
Can I bake this in a dutch oven?
yes it will do VERY well in there. you can skip the step with creating steam from a pre-heated cookie sheet. 🙂 bake with lid on first 25 minutes, then remove and bake until browned.
Hi, thank you for the recipe! Bread turned out delicious cooked in a Dutch oven, but it had big (too big) air pockets in the cooked loaf? What do you think I am doing wrong? Thanks
OK I’m trying this recipe but I was gifted my bread machine and I don’t really know what setting to use. It’s a Cuisinart automatic breadmaker. Would “8- Dough” be the right setting? Or should I set it at “1-White/Basic” and take it out before it starts baking? Thanks for the advise!
8- Dough! 🙂
The instructions say when the machine beeps after the dough is made, Leave it in the machine for 2 or 3 hours. Read item two and three again to get the whole picture
Delicious flavor and great texture. Even though I forgot and added the salt with everything else. My only problem was that I did it in my Dutch oven and I could NOT get it out! I had to rip it free and leave the bottom crust stuck to the pot! How can I prevent this?
Hey Cecilia did you use parchment paper? It does sometimes still stick with it. I’ve heard spraying the paper will help. if you didn’t use parchment, definitely do next time!
How long does it rest for the autolyse step?
about 30 minutes
Not impressed a pain to make and not worth it. I followed the recipe to a t and it was heavy and doughy. I threw it out
Lorie I would guess your rising times were too short or your starter not active enough.
I love this recipe and the crusty roll sourdough recipe! I have used the long rise in the refrigerator with other sour dough recipes after trying this one which really helps when I work and have less time at home.
The link to print this recipe is not working for me?
hey jill, try refreshing a few times and trying again. if it doesn’t work i can email you the PDF 🙂
I’m going to switch to the Dutch oven for baking.
1. Is the cooking temp and time the same?
2. Can I put in the Dutch oven overnight with the lid?
3. And do I still need to use the plastic wrap if I do the overnight proofing with a lid on the Dutch oven?
Thanks for any help!
cooking temp the same, you’ll find it will brown less in the dutch oven. i’d leave t he time the same to start but if it seems. underbrowned, remove the lid and bake a bit longer. you can leave it in the dutch oven with the lid on to proof, no cover needed, HOWEVER i can never. fit mine so i don’t do it. try it empty first and see if it’s worth the trouble!
Is there any way in which I could do the second rise without using a plastic wrap?
Would it work if I use a an hermetic bowl
Epic fail for me …. Didn’t rise, too dense, followed the recipe to the letter!
Same here. Then I started reading about altitude. I’m at 5,000 ft. HUGE difference in recipe amounts. Don’t know if that could be your issue too, but thought I’d mention it. From what I’ve read, at 5k ft, reduce sugar 6%, increase flour 5%, increase liquid 15%, and if using other ingredients for other recipes, increase egg 6%, decrease baking soda or powder by 40%, and decreasing baking time by 5-8 minutes per 30 minutes of posted baking time.
Good thought on the altitude adjustments. I live at sea level and mine didn’t rise properly either. The guess on mine is if was kneaded properly. The doughwas so dense that my machine was stalling during the knead cycle. I switched to a stand mixer with dough hook. The quantity of dough was really enough to allow the mixer to do a thorough job either. I might try the stand mixer recipe which uses double the ingredients or try added a bit more liquid to the machine recipe to soften the dough a bit. Anyone have their machine not be able to handle this dough?
hey, my guess is that you measured flour by flour instead of weight (which is totally fine), it just sometimes requires a little tweaking. it’s normal for the dough to be a little dense, but if the machine is straining you’ll want to add some water. first make the dough as written and then watch the machine like a hawk. add water a couple teaspoons at a time, let it mix in for a few seconds and re-evaluate before adding more. the texture changes quickly. good luck! 🙂
This is one of our go-to recipes. Great having an easy way to make bread without manufactured yeast! Read one of your tips on another recipe to use a covered dutch oven instead of pouring water in bottom baking sheet. It works great for this recipe.
We’ve found it easier to wrap loaf in two pieces of oiled plastic wrap for proofing. Need to be extra careful that it’s well wrapped or an exposed part of dough might dry out. We bake at 425 on convection for 35 minutes. Using dutch oven might shorten the baking time.
Noticed your link to buying bulk flour is broken now, and main site doesn’t work. Do you have a favorite place to buy quality baking flour in bulk?
Very successful and yummy and so easy. My 20year old bread machine has been resurrected again as I did not know that I could use it for sourdough. Thank you for all persisting and your determination to make a great sourdough.
Maureena
so happy the recipe is working well for you maureena! and long live your bread machine 🙂
Just made this bread maker sourdough. Brilliant! And a lot less messing than kneading it myself. Thanks.
Terrific recipe. We’ve used it many times this past year.