Old-Fashioned Raspberry Jam (With Canning Instructions)
This raspberry jam canning recipe is a pantry staple that everyone likes. This easy waterbath canning recipe will guide you through every step, so your jam turns out perfectly every time. Don’t skip the frozen plate test (see step 5). It will show you how to tell if your jam is set properly.

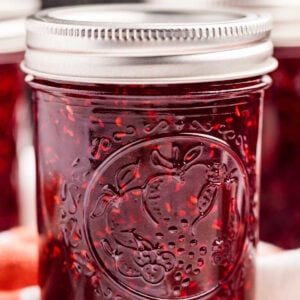
Put it on toast, layer it in between cakes, or just admire the jars looking like jewels in your pantry. Whatever you like to do with homemade jam, this recipe will do it well. It’s easy enough for complete beginners and I’ll hold your hand through every step. I mean, you know, not literally.
Ingredients and Tools You’ll Need
Obviously, raspberries are the main ingredient here. So if you can, use fresh, ripe raspberries for the best flavor and texture. You can use frozen berries, just make sure they are fully thawed and well-drained.

Equipment
- 6-8 quart pot
- Water Bath Canner, to safely process and seal jars
- 6 Pint jars plus lids and rings
- lid lifter
- Jar lifter, to remove hot jars from canner without burning yourself
- Funnel, to pour hot jam in hot jars without making a mess
- Ladle
- Towel
Ingredients
- 8 cups raspberries, fresh or frozen
- 3 tablespoons lemon juice, bottled for proper acidity levels
- 4 cups sugar
How to Make Raspberry Jam
Step One: Prep For Canning
Place a clean, dry plate in the freezer to use later to test if your jam has set.
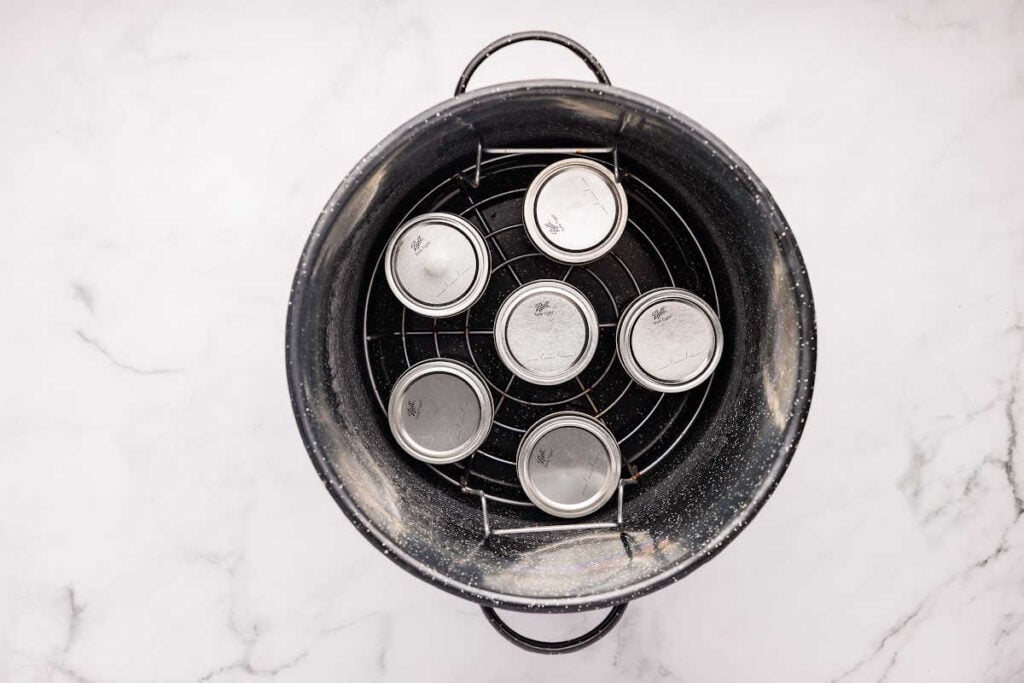
Prepare the jars by washing them with hot soapy water. Transfer them to a water bath canner and fill the canner with water until the jars are fully submerged in water. Place over medium heat and bring to a simmer. Put the rings and lids in a saucepan with water. Place over medium-low heat and bring to a simmer. Do not boil.

Step Two: Crush Some Of The Berries
In a large pot add 4 cups of the fresh raspberries. Smash the berries down so the berries are broken up.
Step Three: Add Remaining Fruit And Lemon Juice
Add the rest of the raspberries and lemon juice. Bring the mixture to a full rolling boil.

Step Four: Add Sugar And Boil
Once the raspberry mixture has come to a full rolling boil, add the sugar all at once. Bring the mixture back up to a full rolling boil, stirring constantly. Once it comes back up to a full rolling boil, set a timer for 90 seconds. Stir constantly.

Step Five: Check For The Set
After 90 seconds, you can check the mixture by dropping a dollop of jam onto the frozen plate from step one. Let it sit for a minute, then push the mixture with your finger. You want it to be a somewhat solid “blob” that’s squishy, not runny. If it’s still runny, boil for 1 more minute. This jam usually takes me 90 seconds of full rolling boil.
Step Six: Fill Hot Jars With Jam
Remove the jars from the canner. Place a canning funnel on the jar and ladle the hot jam into the hot jars. Leaving ¼ inch headspace.

Step Seven: Wipe Rims And Fasten Lids
Wipe the rims of the jars with a clean moist towel. You can use a vinegar-moistened towel. Place the lids and the rings on the jars and tighten the rings so they are finger-tip tight.

Step Eight: Process In Canner
Transfer the jars to the water bath canner. Make sure the jars are fully submerged in the water with at least 1 inch of water over the jars. Add the lid and bring the water to a boil. Once the water is boiling, process the jars for 10 minutes.
Step Nine: Cool
After 10 minutes, remove from the heat and remove the lid. Allow the jars to sit for 5 minutes. Transfer the jars to a heat-proof area so they can cool completely for 12-24 hours.

Step Ten: Check Seals
After 12-24 hours, check the jars for a proper seal by pushing the middle of the lid. If it doesn’t pop up you have a good seal. Remove the rings and store the jars in a cool dark place for up to 18 months or per your lids manufacturer’s recommendations.
Serving and Storage Instructions
Serve on toast, or homemade cream biscuits, with coffee or tea.
Once the jars are completely cooled and the sealed, remove the rings and store in a cool, dark place (like your pantry) for 18 months.
Once a jar is opened (or hasn’t sealed properly), store in the fridge for a few weeks.
More Raspberry Recipes
When raspberries are in season, they’re everywhere. But it’s such a short time. I hope you make the most of them.
- Try this raspberry syrup to add to your pancakes and waffles.
- Add some peaches for delicious summer raspberry peach jam.
- If you still have raspberries to use up, make a blackberry raspberry pie!
- For a fast and refreshing drink, make a raspberry peach iced tea.

Questions and Troubleshooting
Absolutely! Just make sure to thaw and drain them completely before using. This helps maintain the right consistency in your jam.
Yes, lemon juice is important. It adds acidity to help preserve the jam and make it set properly.
No worries! If your jam is too runny, you might need to boil it a bit longer. Use the frozen plate test to check for the right consistency.
I wouldn’t recommend it. The sugar helps with setting and preserving the jam. If you want a low-sugar option, look for a recipe specifically designed for that.
If properly sealed and stored in a cool, dark place, your jam should last up to 18 months. Always check the seal before using.
Printable Recipe
Raspberry Jam Canning Recipe
Equipment
- 6-8 quart pot
- 6 Pint jars plus lids and rings
- lid lifter
- Jar lifter
- Funnel
- Ladle
- Towel
Ingredients
- 8 cups raspberries fresh or frozen
- 3 tablespoons lemon juice bottled for proper acidity levels
- 4 cups sugar
Save This Recipe
You'll join my email list which you will love. And if you don't, unsubscribe in one click. ❤️
Instructions
- Prep for canning. Place a clean plate in the freezer to use for the frozen plate test later. Prepare the jars by washing them with hot soapy water. Transfer them to a water bath canner and fill the canner with water until the jars are fully submerged in water. Place over medium heat and bring to a simmer. Put the rings and lids in a saucepan with water. Place over medium-low heat and bring to a simmer. Do not boil.
- Crush some of the berries. In a large pot add 4 cups of the fresh raspberries. Smash the berries down so the berries are broken up.
- Add remaining fruit and lemon juice. Add the rest of the raspberries and lemon juice. Bring the mixture to a full rolling boil.
- Add sugar and boil. Once the raspberry mixture has come to a full rolling boil, add the sugar all at once. Bring the mixture back up to a full rolling boil, stirring constantly. Once it comes back up to a full rolling boil, set a timer for 90 seconds. Stir constantly.
- Check for the set. After 90 seconds you can check the mixture by dropping a dollop of jam onto the frozen plate and pushing the mixture with your finger. You want it to set up into a solid after a minute on the plate. If it's still runny, keep boiling another minute. This recipe usually takes me 90 seconds of full rolling boil.
- Fill hot jars with jam. Remove the jars from the canner. Place a canning funnel on the jar and ladle the hot jam into the hot jars. Leaving ¼ inch headspace.
- Wipe rims and fasten lids. Wipe the rims of the jars with a clean moist towel. You can use a vinegar-moistened towel. Place the lids and the rings on the jars and tighten the rings so they are finger-tip tight.
- Process in canner. Transfer the jars to the water bath canner. Make sure the jars are fully submerged in the water with at least 1 inch of water over the jars. Add the lid and bring the water to a boil. Once the water is boiling, process the jars for 10 minutes.
- Cool. After 10 minutes, remove from the heat and remove the lid. Allow the jars to sit for 5 minutes. Transfer the jars to a heat-proof area so they can cool completely for 12-24 hours.
- Check seals. After 12-24 hours, check the jars for a proper seal by pushing the middle of the lid. If it doesn’t pop up you have a good seal. Remove the rings and store the jars in a cool dark place for up to 18 months or per your lids manufacturer’s recommendations.
Notes
Nutrition


This is my second summer using this recipe. And my grandchildren, in hubby love it! Super easy!
thank you for telling me marlane :)!
Hi. I didn’t have enough berries so made a half batch one day. Iti didn’t use the frozen plate. It seemed runny so I cooked it a bit longer. It set a bit thick. Then a friend gave me frozen berries. Again not quite enough for a batch – and I squeezed out more seeds. Again didn’t use the frozen plate. It seemed pretty good – a couple extra minutes but not as long as the day before. Did the waterbath and waited until now to tip the jars- not set! Can I empty the jars into a pan and cook longer? Should I add a bit of powdered pectin? Or liquid? I gave both. Thanks.
you CAN reprocess that is totally fine! and pectin is fine too. often it just needs literally 1-2 minutes more and it will set 🙂
My 2nd time using this recipe. Both times, jam is not set for 4-6 minutes… this second batch I took off heat before I really felt confident it is ‘set’. Any suggestions> Perhaps don’t know exactly how fast of a “rolling boil” to watch for? Any suggestions? I LOVE the fruit/sugar ration, no pectin, ang the flavor
hi Mary have you tried the “frozen plate test” and rolling boil should be like… CRAZY. like you’re trying to stir it down and it won’t stir down.
This recipe did not thicken after 90 sec, and then another 90 seconds. I let it continue to bubble for another 5 minutes before it started to thicken. Tastes delicious!!!
I followed exactly on my first batch, and on the second batch added about a cup more berries because I found the first batch a tad to sweet. That is a me thing. Anyway neither of mine really set well and is more like syrup which as my wife said what’s wrong with more cheese cake and pancakes.
I gave 5 star because it taste and the instructions are good, as well as your response to comments.
hi dan, thank you for the feedback. this recipe relies on the natural pectin in the berries, which can definitely vary a lot. if you want to give it another try I’d try adding 1 box of powdered pectin (1.75 ounces). it will set MUCh faster, like in a minute. and yes absolutely a syrup is delicious on many things, including cocktails!
If I use less sugar than called for, will it effect the canning process?
hi Charlotte, you can reduce it but sugar is a preservative, not just a sweetener. that doesn’t mean the jam won’t be safe (it’s the acidity that matters for that), but it won’t be as good for as long. I never recommend it, but you can try it and just through it faster.
Love this receipe! Easy to follow the receipe and ohhh my the jam tastes sooo delicious on homemade bread!
thank you April! so happy you enjoy it.
Great recipe! The half pint (500 ml) jars are exactly the right amount!
hi Jamie! thanks for coming back to tell me. happy canning 🙂
So this recipe makes 6 of the half pint jars?
hey Linda, I just remade it, and yes 6 HALF pints. it doubles quite well.
Love this recipe. Question – can I use the same recipe with my blackberries?
hi Christie! I do a bit higher sugar with blackberries. I have pectin in this recipe but it’s optional, they are naturally high in pectin as well: https://heartscontentfarmhouse.com/old-fashioned-blackberry-jam/#recipe
My favorite jam recipe!
Can I hjalf this recipe? I only have four cups of raspberries. Thank you
it’s never worked well for me Margie! I don’t know why. it always sets too fast for me when I try. but maybe if you keep an eye on it and reduce the cooking time!
Tastes delicious, and I like that it’s less sugar than most recipes, but I only got half as much as the recipe said I would. I doubled it, so you would think I’d get 12 pints. Only got 6. 🙁
Hey Adrienne! I’m about to make this again so I’m going to weigh the ingredients. hopefully that will help in the future. I’m glad you liked the flavor though 🙂
the pix show half pint jars… mystery solved!
am making this right now and doubling the recipe too… thanks!!
hi sal! well there we go 🙂