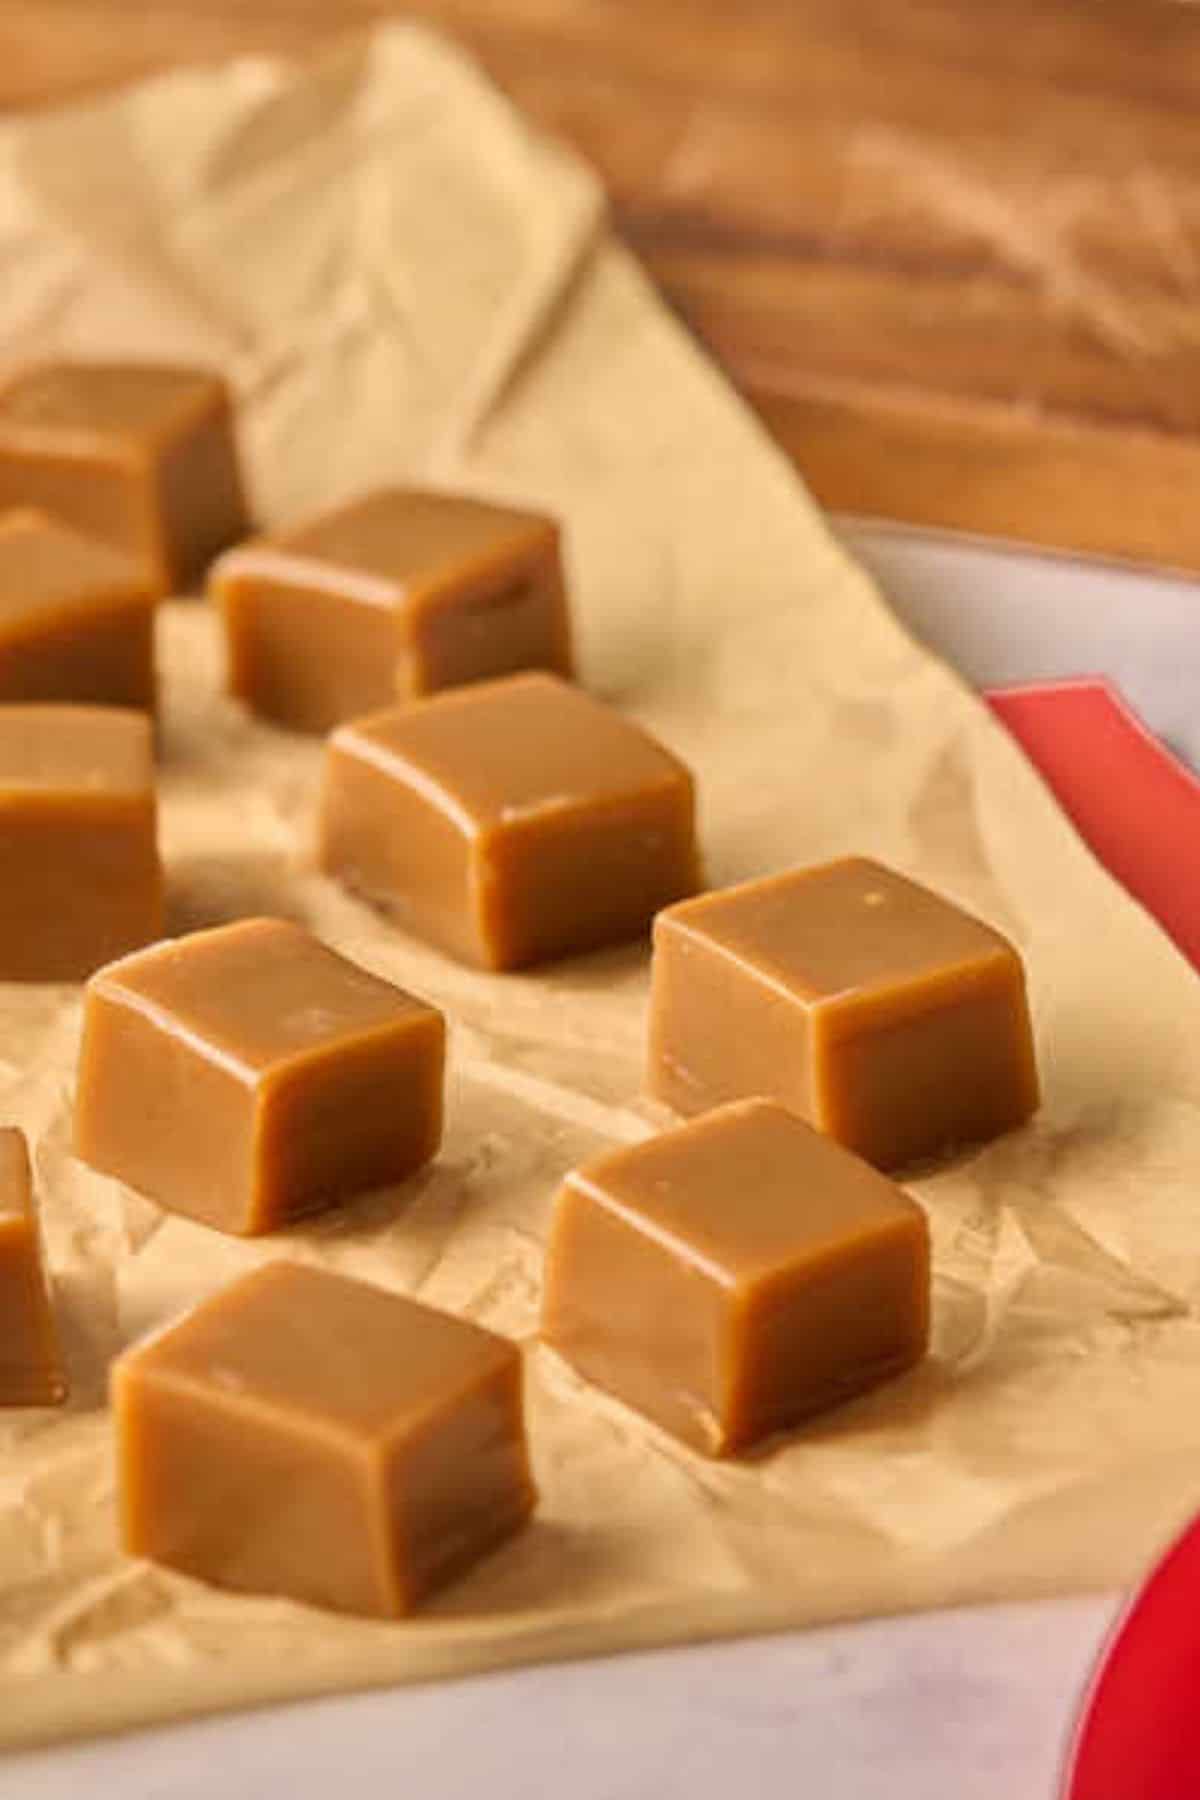
Old-Fashioned Soft Caramels
These are a classic that I make every Christmas. They’re smooth, creamy, and soft, and make great easy gifts. Like many candy recipes, you’ll need patience and a thermometer. If you can manage those two things, it’s an easy recipe to follow.
Make these on a dry day. Humidity does weird things to homemade candy.
Table of Contents
What You’ll Need
Make sure you get sweetened condensed milk and NOT evaporated milk. I know some of you don’t like to use corn syrup, but it’s what will make the caramels creamy.
Annoyingly, you’ll need both parchment and wax paper here – parchment to bake and wax to wrap. And please, PLEASE, use a candy thermometer!

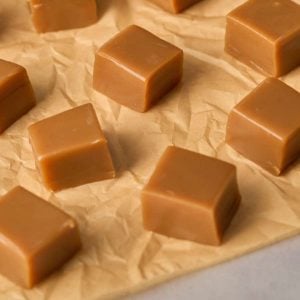
This should give you 81 one-inch pieces. If you need more, I recommend doing separate batches. Cooking a larger amount of caramel all in one pot can make it difficult to reach the right temperature evenly. If you need to do multiple batches, you can make adjustments in the recipe card at the bottom of this post, and it will do the math for you.
Equipment
- 3-quart saucepan (Yes, the size is important. Too small and the mixture will boil over, too large and it will scorch. Basically, it’s a medium-sized pot.)
- Candy thermometer (Yes, you absolutely need it unless you’re a candy-making Jedi)
- 9×9 or 8×8 baking pan
- Parchment paper for baking
- Wooden spoon
- Butter knife
- Wax paper for wrapping (Annoyingly, parchment paper doesn’t peel off as cleanly.)
Ingredients
- 16 ounces brown sugar
- 14 ounces sweetened condensed milk (1 can) (NOT evaporated milk)
- 1 cup corn syrup (For boring science reasons, adding corn syrup to the recipe gives you creamy caramels because it contains invert sugars.)
- 1 cup butter
- ½ teaspoon salt
- 1 teaspoon vanilla
How to Make Old-Fashioned Soft Caramels
Step One: Prep Your Pan
Line your pan with parchment paper first. Don’t skip this – trust me, you’ll hate yourself later if you do.

Step Two: Mix Everything Together
Dump everything except the vanilla into your saucepan. Turn the heat to medium and start stirring. Keep stirring. I mean it – don’t walk away to check Instagram or whatever. This mixture will stick and burn if you ignore it.

Step Three: Cook to Soft Ball Stage
Once it starts boiling, stick your candy thermometer in there. Make sure it’s actually IN the mixture but not touching the bottom of the pan. Now you wait and stir until it hits 236°F. This takes about 15-20 minutes, and your arm might get tired. Deal with it.

Step Four: Add Vanilla and Pour
When you hit 236°F, take it off the heat RIGHT AWAY and stir in the vanilla. It’ll bubble up and be crazy hot, so don’t lean over it. Pour it into your lined pan immediately. Don’t mess with spreading it around too much – it’ll level itself out.

Step Five: Wait (The Hardest Part)
Now comes the hard part: waiting. Leave it alone for at least 4 hours. I know, I know. But if you cut into it too early, you’ll have a gooey mess instead of nice clean squares.
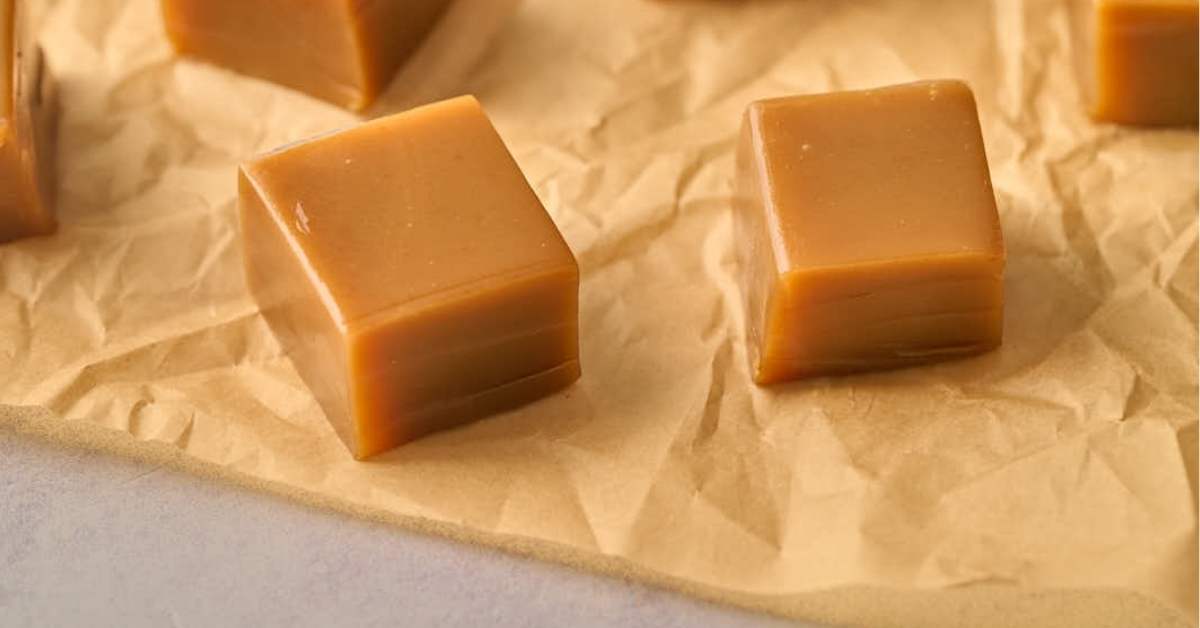
Step Six: Cut and Wrap
Once it’s completely cool and firm, lift it out using the parchment paper edges. Cut into squares with a buttered knife (the butter stops it from sticking).

Wrap each piece in wax paper if you want them to keep well or if you’re giving them away. Cut your wax paper into 3×4-inch pieces, plop a caramel in the middle, and wrap it up like a little present.

Serving & Storing
Pair these with some old-fashioned fudge and chocolate-covered shortbread cookies for a Christmas dessert platter, or homemade Christmas gift bags.
Store wrapped caramels at room temperature in an airtight container, where they will remain fresh for a little more than two weeks. You can store these in the fridge if your house is warm, but let them warm up a bit on the counter before you eat them.
You can also freeze them. Just let them thaw (still wrapped) completely at room temperature.
Questions and Troubleshooting
Ugh, technically yes, but it will be a lot harder. You have to keep testing the caramel by dropping a bit into cold water to see if it forms a soft ball. That means it’s ready. But if you want to make more candy, invest in a thermometer—it takes out the guesswork and makes your life easier (and they’re not that expensive).
You overcooked the syrup—no big deal. You can still eat them.
If the caramel is soft, it means that you didn’t cook it long enough. You can heat it back up and try again (yes, this actually DOES work), or just keep this batch as a sauce and start fresh.
The easiest way is to fill the pot with hot water and let it sit for a while. The caramel will dissolve in the water, and scrubbing will be easier. You can also heat the water on the stove to speed things up. Soak the utensils in hot, soapy water for a few minutes.
More Old-Fashioned Desserts to Make
Making these truly isn’t as hard as we make it seem. But everyone will still be impressed with you.
- Once you’ve mastered caramels, make some homemade vanilla fudge next. It’s almost the same process.
- Learn to make your own ice cream at home with this cookies and cream ice cream recipe. It’s basically just vanilla ice cream with cookies added at the end, but you’ll feel very proud.
- Everyone needs a good cookie recipe, and my Amish chocolate chip cookie recipe has a secret trick to keep them soft for days.
- Get yourself a Bundt cake pan and you’ll be able to make the easiest and most impressive cakes – like this chocolate Christmas Bundt cake.
Printable Recipe
Soft and Chewy Homemade Caramels
Equipment
- 3 quart saucepan (Yes, the size is important. Too small and the mixture will boil over, too large and it will scorch. Basically, it’s a medium-sized pot.)
- Candy thermometer (Yes, you absolutely need it unless you’re a candy-making Jedi)
- 9×9 or 8×8 baking pan
- Parchment paper for baking
- Wooden spoon
- Butter knife
- Wax paper for wrapping (Annoyingly, parchment paper doesn’t peel off as cleanly.)
Ingredients
- 16 ounces brown sugar
- 14 ounces sweetened condensed milk (1 can) (NOT evaporated milk)
- 1 cup corn syrup (For boring science reasons, adding corn syrup to the recipe gives you creamy caramels because it contains invert sugars.)
- 1 cup butter
- ½ teaspoon salt
- 1 teaspoon vanilla
Save This Recipe
You'll join my email list which you will love. And if you don't, unsubscribe in one click. ❤️
Instructions
- Prepare your pan. Line a 9×9-inch baking dish with parchment paper, ensuring the paper covers the bottom and sides. Set it aside.Note: Avoid using wax paper here, as it may melt or stick.
- Combine. In a 3-quart saucepan, combine the butter, brown sugar, corn syrup, sweetened condensed milk, and salt.
- Heat and stir. Place the pan over medium heat. Stir the mixture constantly with a wooden spoon as it heats, scraping the pan's bottom and sides to prevent sticking. Continue stirring until the mixture comes to a full boil.
- Cook to softball stage. Once boiling, attach a candy thermometer to the side of the pan, making sure the bulb is fully submerged in the caramel mixture without touching the pan’s bottom. Cook the mixture, stirring frequently, until it reaches 236°F (soft ball stage).Tip: Hold the thermometer at eye level for an accurate reading.
- Add the vanilla and pour. When the caramel reaches 236°F, remove the pan from the heat. Then, carefully add the vanilla extract, stirring until the caramel is smooth and has stopped bubbling, which should take less than a minute.
- Pour into dish. Immediately pour the hot caramel into your prepared dish, spreading it evenly if necessary. Be careful—the caramel will be very hot! Let it cool completely at room temperature for at least 4 hours or until firm.
- Cut and wrap. Lift the caramel from the pan using the parchment paper edges once cooled and firm. Use a buttered knife to cut the caramel into 1-inch squares. Wrap each caramel square in small wax paper for easy storage and serving.
- Wrapping for gifts (optional). Wrap each caramel in waxed paper to keep them fresh and prevent sticking. For one-inch caramel squares, cut waxed paper into 3 x 4-inch rectangles. Place a caramel square in the center of the waxed paper and fold the ends over, wrapping it like a little boxed gift. Start with a 12-inch square of waxed paper and cut it into strips to save on paper.
Notes
Nutrition


16 oz. brown sugar is that by weight or volume?
weight, I usually use a 1 pound box
Can this be use on a cake
No, too chewy, even if you cook it less, but I have a great stovetop caramel icing here: https://heartscontentfarmhouse.com/caramel-bundt-cake/
Can I use maple syrup instead of the corn syrup since most are gmo? Unless you know of a brand that is organic or non-gmo? Thank you.
angela i’ve never tried maple syrup but if you do please let me know. if you search for non gmo corn syrup you can find some
Katie look up a recipe for golden syrup. It has so much more flavor than corn syrup and, well…its not corn syrup!
Thanks, Connie. I’ll take a look!
Yum!!!! Super Easy, Thank you for sharing this awesome receipe.
So glad you liked it Sue! 😊