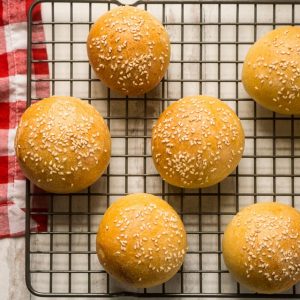
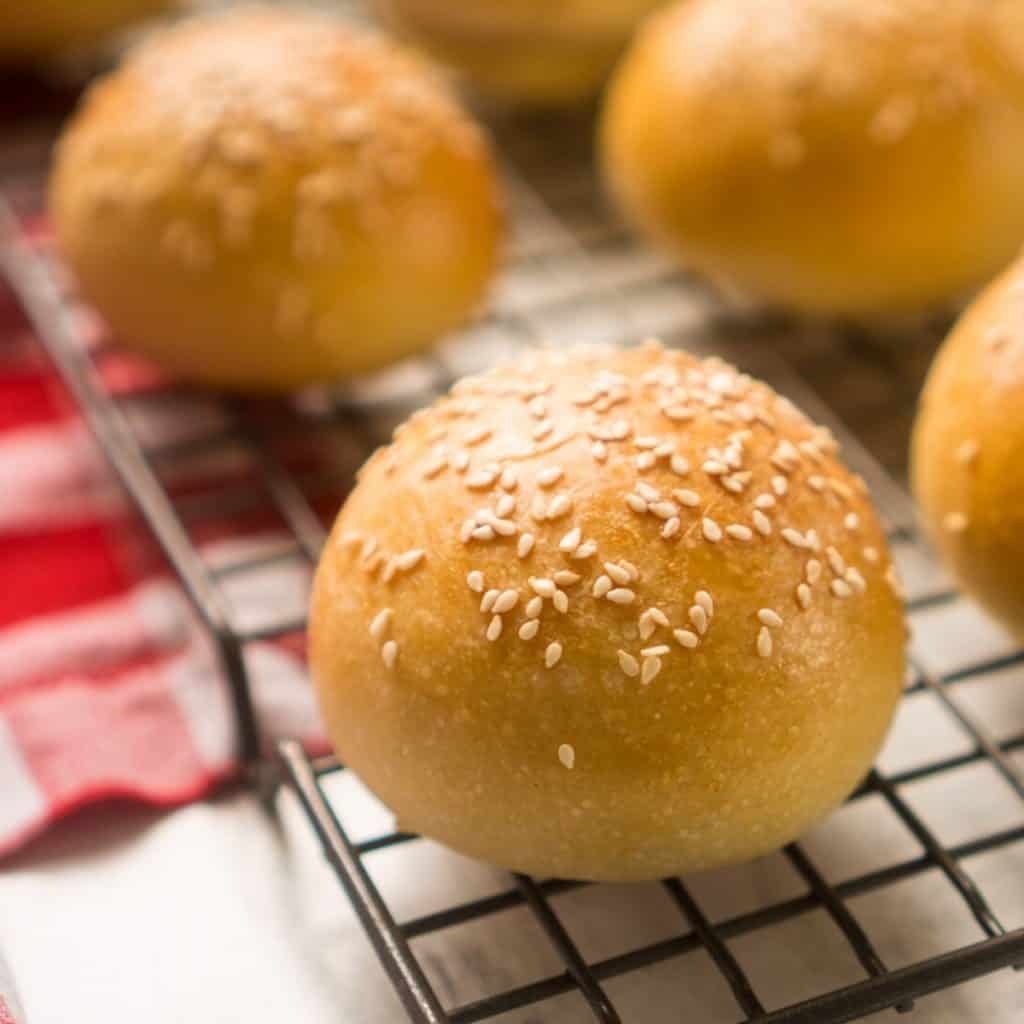
Our Favorite Sourdough Burger Buns
We don’t serve gourmet dinners in our house, but we definitely like the nicest versions of everyday staples. And these soft sourdough burger buns are a perfect example. Perfect for burgers, sandwiches, or (honestly) just slathering with butter, these are easy to make and an absolute upgrade from store-bought buns. If you’ve ever tried those big, soft bakery-style buns, this sourdough bread recipe will give you that same quality at home.
Soft Sourdough Burger Buns
Equipment
- Large mixing bowl
- Kitchen towel or plastic wrap
- Stand mixer with a dough hook (optional)
- Bread machine (optional)
- Bench Scraper
- Baking Sheet
- Pastry brush
- Oven-safe rimmed baking sheet
- Wire cooling rack
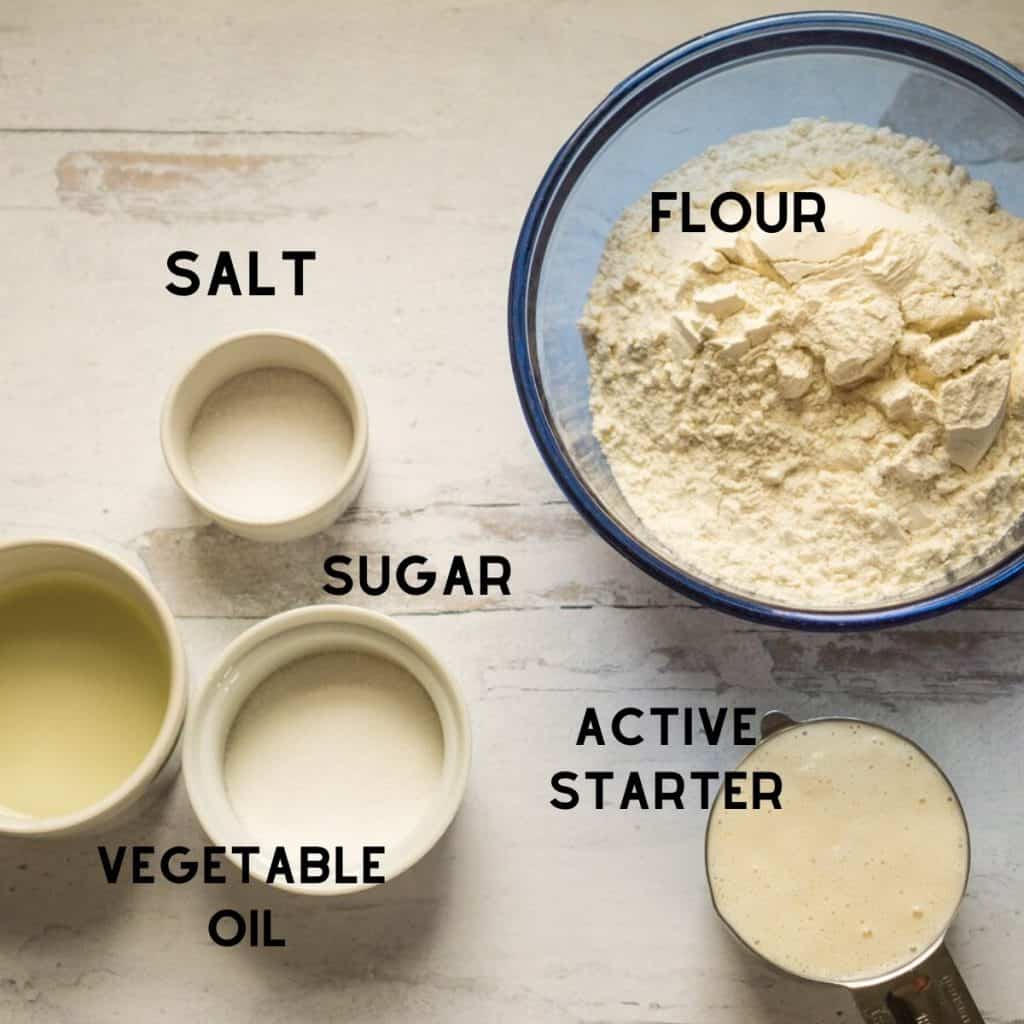
Ingredients
- ¾ cup active sourdough starter
- 3 cups all purpose flour
- ½ cup water
- 2 tablespoons sugar
- 2 tablespoons vegetable oil
- 2 teaspoons salt
for topping the dough:
- 1 egg (beaten)
- 2 tablespoons sesame seeds
Save This Recipe
You'll join my email list which you will love. And if you don't, unsubscribe in one click. ❤️
Instructions
- Mix the dough. Combine the sourdough starter, flour, water, sugar, and oil in a large mixing bowl. Stir until a shaggy dough forms. Then, cover the bowl with a clean kitchen towel and let it rest for 30 minutes to allow the gluten to develop (autolyze).
- Knead the dough. Add the salt to the dough and knead for 5–7 minutes. You can knead by hand, use a stand mixer with a dough hook, or a bread machine on the dough cycle. The dough should be soft, smooth, and slightly tacky to the touch. If it sticks excessively, add flour a teaspoon at a time. If it feels stiff or dry, add water a teaspoon at a time.
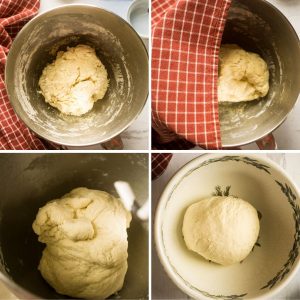
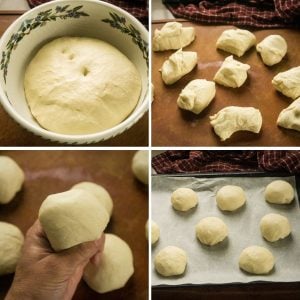
- First rise. Transfer the dough to a clean, lightly oiled bowl. Cover and let rise in a warm place for 3–4 hours or until the dough is puffy. It may not double in size, but it should look noticeably risen.
- Shape the buns. Turn the dough out onto a lightly floured surface. Then, divide it into 10 equal pieces (or 15 for slider-sized buns). Next, roll each piece into a smooth ball by cupping your hand around the dough and rolling it gently against the countertop. Arrange the balls on a parchment-lined baking sheet, spaced evenly apart.

- Final proof. Cover the buns with heavily greased plastic wrap or a damp tea towel to prevent drying out. Let them rise in a warm spot for 3–4 hours or overnight in the refrigerator until they appear puffy and slightly increased in size.
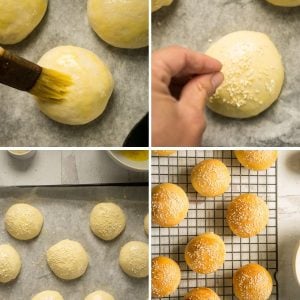
- Prepare for baking. Preheat your oven to 400°F (200°C), positioning a rack in the center. Then, place an empty-rimmed baking sheet in the oven while preheating for a soft crust with good rise. When ready to bake, brush the tops of the buns with the beaten egg and sprinkle with sesame seeds.
- Bake the buns. Pour 1 cup of water into the preheated baking sheet to create steam, then quickly place the buns in the oven. Bake for 15–18 minutes until the buns are golden brown. The larger buns may need the full-time; smaller buns may finish earlier.
- Cool completely. Transfer the buns to a wire rack and allow them to cool completely before slicing and serving. This helps them retain their structure and softness.
Notes
Nutrition
This is one of those recipes I can’t stop making—it’s just that good. Their slight sourdough tang and fluffy texture make every sandwich feel a little extra special. The recipe is simple and rewarding, but the secret to the best buns? Let the dough rise fully, and use a good, active sourdough starter. If you want something rich and buttery, check out my recipe for brioche burger buns. It’s perfect for indulgent burger nights.
We make these soft sourdough burger buns for special cookouts, but honestly, they’re perfect for any meal! If you like using a bread machine to save time, check out my bread machine burger buns for a quick and easy alternative.

Key Ingredients and Tools
Here are some key tools and ingredients to make great buns. They aren’t complicated, but knowing how they help will make baking easier and more fun.
- Active sourdough starter: This is the main part of the recipe, giving flavor and helping the buns rise. If you don’t have one, you can make it at home or ask a friend who bakes sourdough. Just make sure it’s bubbly and active before using it.
- All-purpose flour: This regular flour is perfect for these buns because it gives them that soft, fluffy texture we want. You can use bread flour for a chewier bun or mix in half-whole wheat flour for a richer taste. If you go with whole wheat, add a bit more water.
- Sesame seeds: These add flavor and a nice look to the buns. You can find them in the spice aisle or near baking items. If you’re out of sesame seeds, use poppy seeds or bagel seasoning instead, or skip them for plain buns.
- Egg wash: Made from a beaten egg, this gives the buns a shiny, golden crust. If you want an egg-free option, you can use milk or cream. It will give you a less shiny finish.
- Vegetable oil: This keeps the buns moist and soft. Any neutral oil like canola or sunflower will work fine, or you can use melted butter for a deeper flavor.
- Pastry brush: This tool is great for evenly putting the egg wash on. You can use a folded paper towel or even clean fingers if you don’t have one.
- Parchment paper: It prevents the buns from sticking to the baking sheet and makes cleaning easier. If you don’t have one, a silicone baking mat works well, too.
- Oven thermometer: If your buns bake unevenly or brown too fast, your oven might not be at the right temperature. An oven thermometer can help you make sure it’s accurate.
These tools and ingredients might seem simple, but they are key to making sure your buns come out soft, fluffy, and tasty. A little preparation helps!
Troubleshooting and Help
You can use sourdough discard, but the buns might not rise as much or have the same fluffy texture. If you use discard, you may need to add some yeast to help with the rise.
Don’t panic! Sourdough can be slow, especially in cooler kitchens. Try moving the dough to a warmer spot, like an oven, with just the light on, and give it more time. You might need to let it rise overnight if it’s very cold.
Cover the dough and shape the buns tightly. Greased plastic wrap works best, but you can also use a damp towel. Just make sure it doesn’t touch the dough directly to avoid sticking.
Roll each piece of dough into a smooth ball by cupping your hand around it and rolling it on the counter. This creates a nice, even shape and helps the buns rise evenly.
If pouring water into a hot baking sheet feels tricky, place a damp kitchen towel in the oven for a few minutes before baking. Remove it when you put the buns in to keep the environment humid and help create a soft crust.
Yes, it’s a good idea to rotate the baking sheet halfway through baking. This makes sure even browning since most ovens have hot spots that can cause uneven cooking.
They should be golden brown on top and sound hollow when tapped on the bottom. If unsure, an instant-read thermometer inserted into the center should read about 190°F.
You can mix herbs, spices, or grated cheese into the dough during the initial mixing stage. For toppings, try bagel seasoning, poppy seeds, or flaky sea salt to make the buns your own.
Yes, this recipe doubles easily. Make sure your mixing bowl is big enough, and consider baking in two batches if your oven can’t accommodate all the buns at once. If you’re new to bread baking and want to start with something simpler, try my yeast bread guide.
For smaller slider buns, divide the dough into 15 pieces. For larger burger buns, divide them into 8 pieces. Just adjust the baking time accordingly and check for a golden-brown finish.
I get it—homemade burger buns might sound a little daunting, especially when life is busy. But trust me, these are easier than you think. They’re the kind of recipe that’ll have your family asking, “Did you really make these from scratch?” So make a batch, and don’t be surprised if you share the recipe with everyone after dinner!


Beautiful buns! I used 1 cup sourdough discard and they came out perfectly! Thank you for having a recipe with no yeast!!!
hey Bettina! so glad you liked them! one of our favorites.
Do you have this recipe in grams? I live in a humid climate and must bake by weight.
This is SO dry my kitchenaid mixer can’t knead it. I measure out 3C flour and it weighed 442g to 1/2C water but your other crusty rolls measure 3 C Flour at 370G with 3/4C water and 1 1/4 C of starter that you weigh at 200g my 3/4 C weighed 170g I’m going to try your other measurements Boooo. I did add about 3 T water and it came together but VERY stiff. That is too bad. I’ll leave this and see if I can knead with pull and fold but would love to have your weights on this recipe too. Thanks
hey leslie… i’m sorry about that! I will say…since you are an experienced baker, never be afraid to add more water if you feel the dough needs it. especially in winter, your flour will be dry and pull more moisture. I’ll recheck my weight measures on this next time i make them!
Any suggestions for making this recipe with wholemeal flour (or half wholemeal and halfc white)? Thanks.
i would recommend starting at 1/3 whole wheat and going up from there. you might need a tad more water as well :
Hey there, are you using fed or unfed starter?
fed. 🙂
Hi do you have these ingredients in grams vs cups?
Not right now. But I’m making this in a couple days. I’ll weigh everything and update it for you. 😉
These are so good!
hooray im glad you liked them 🙂