Homemade Sourdough Starter (Simple to Do)
A simple method for capturing your own wild yeast. This sourdough starter recipes uses only flour and water and is ready in approximately seven days. You can do this.
So you’re ready to bake your own sourdough bread. Only one thing stands in your way… the sourdough starter. It seems very mysterious. It has to be fed. And what’s the discard? And how do you even go about making one?
Fear not. Let’s go over what you need, what you’ll do each day, and what your starter will look like at every stage.
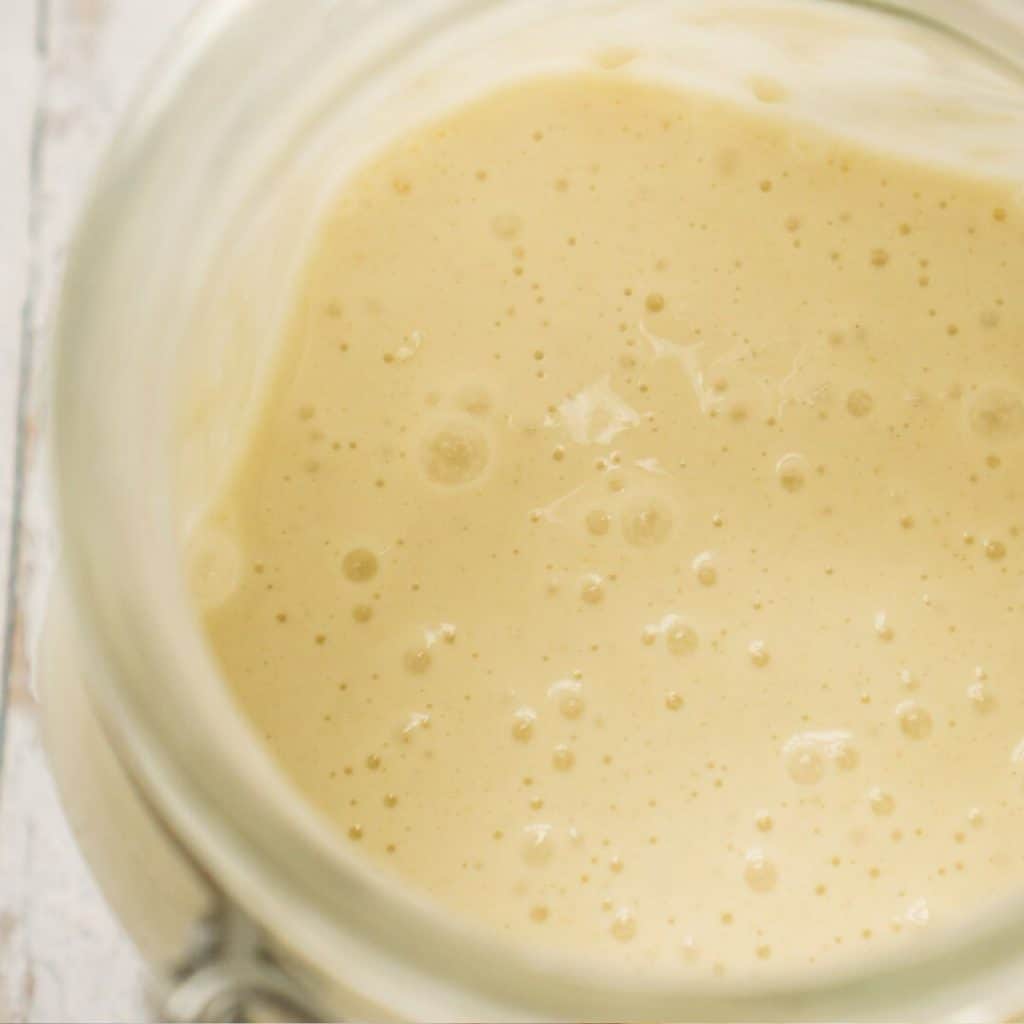
Ingredients and Tools You’ll Need
This is just as simple as can be.
Sourdough Sundays Newsletter

Every Sunday evening I’ll send you a sourdough recipe to make that week, straight from my kitchen to your inbox.
And as a thank you for signing up, I’ll send you this e-book with beautiful printable recipes right away. Simple!
You will not be added to any other email lists or my daily newsletter. But if you’re already on my newsletter, you’re welcome to join and receive both.
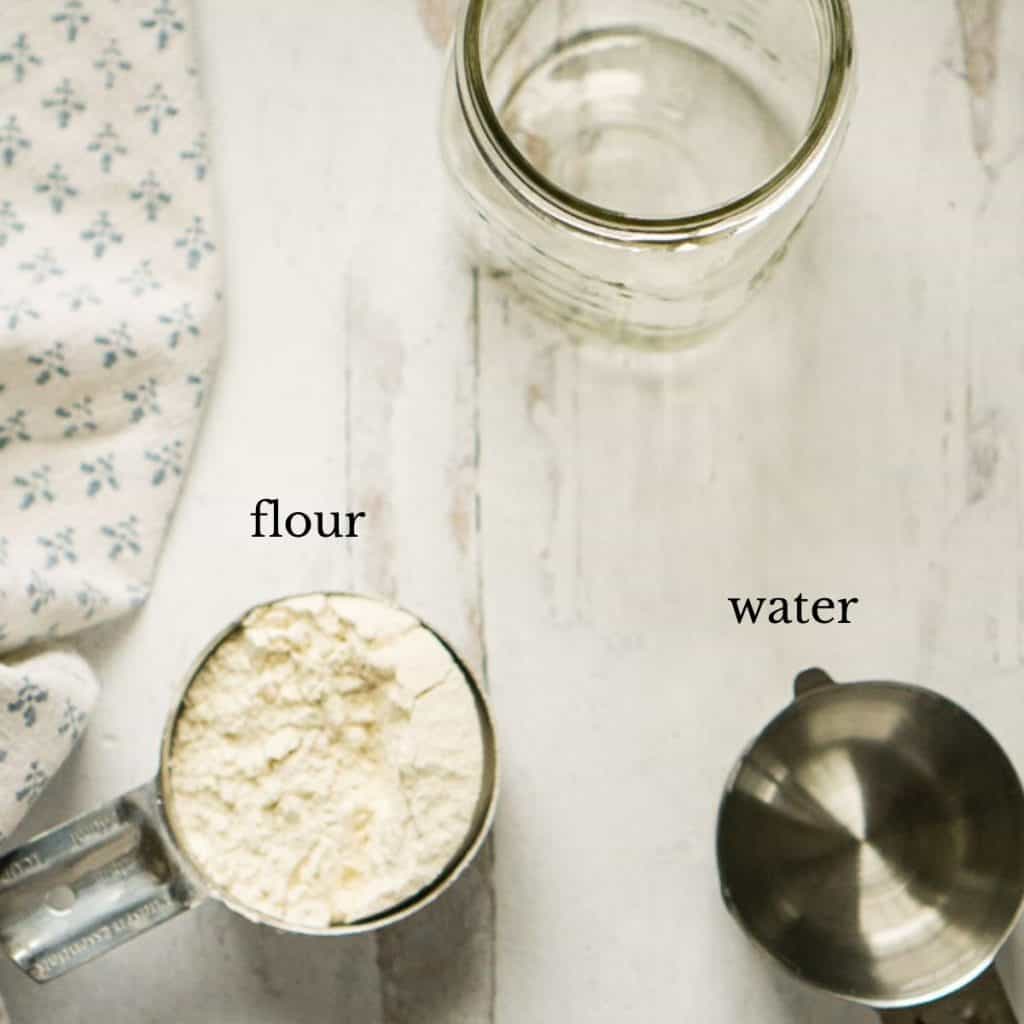
- All purpose flour
- Water
- A one quart or larger container
- A breathable piece of cloth, such as a tea towel
- A rubber band
How to Make Your Own Sourdough Starter
Day 1 and Day 2
Day 1 and day 2 are all about getting the flour and water mixture to start fermenting.
The first step is simply to mix flour and water together. We are going to start with 1/2 cup of flour and 1/3 cup of water.
Ideally, for this step you will use rye flour or whole wheat, because they will start to ferment faster. But it’s absolutely not necessary, and I wouldn’t go buying that flour if you don’t see yourself baking with it regularly. I used regular all purpose flour for my starter that is now many years old, as well as for this one that I made as an example.
As far as the type of water, tap is water is fine. If you have heavily treated tap water, you may want to try bottled water.
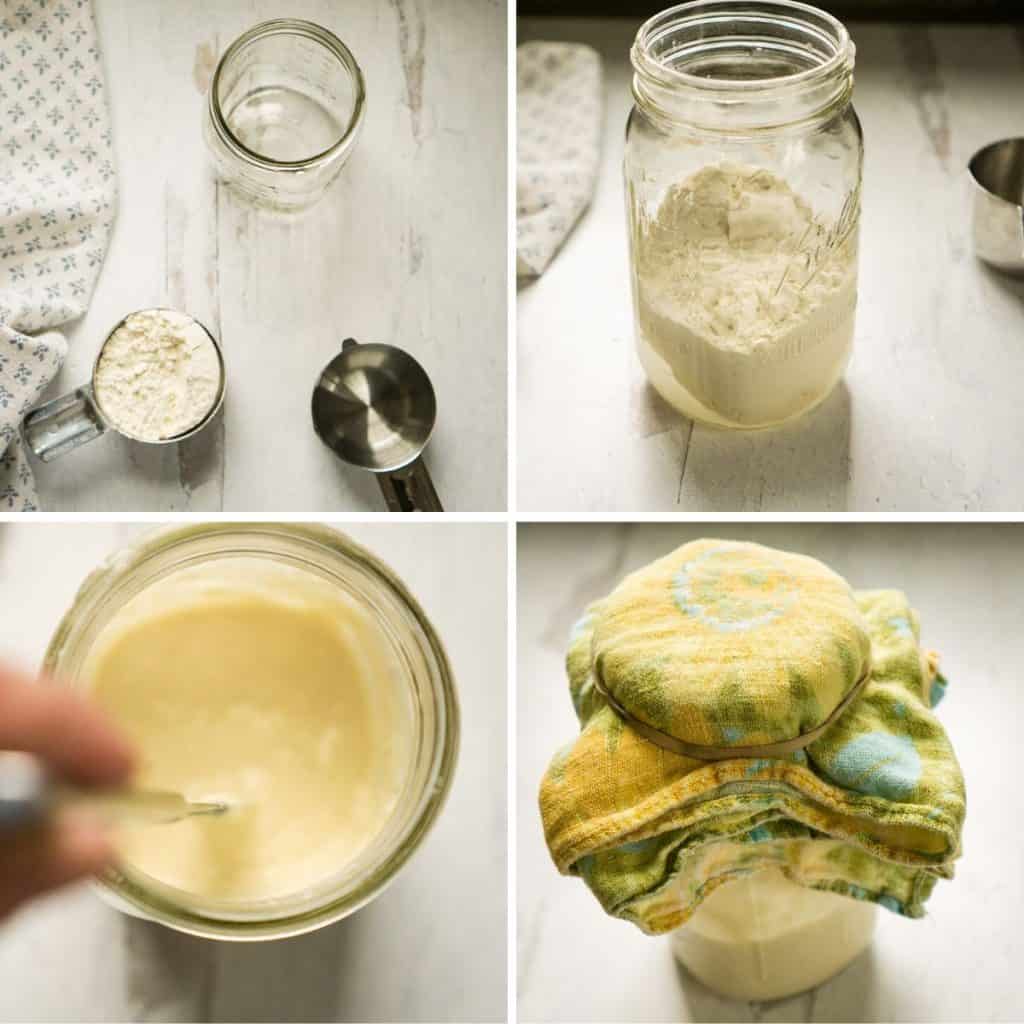
Mix the flour (1/2 cup) and water (1/3 cup) and stir them thoroughly. I use a butter knife.
Cover the jar with a breathable fabric such as a cotton or linen tea towel and fasten it around the jar with a rubber band. Set the new, baby starter somewhere cozy where it can start to ferment. It still needs air circulation, so I would not recommend the oven or microwave. Right on the counter is best.
Leave the jar alone for 24 hours and come back the next day. It might not look much different. That’s fine. Mix it up, and feed it with another 1/2 cup of flour and 1/3 cup of water. Stir, cover with the cloth, and leave the jar alone. The fermentation will happen soon.
Day 3
On Day 3, things start to get crazy. Your starter has come to life! It will look gross, separated into layers, and might not smell so great either. That’s good! It means its alive.
Stir it up until all the layers are combined. Now that we have this active bubbly creature, we are going to move on to the next phase. We are going to start with a fresh jar and fresh flour and water, and use this fermented flour to make our starter.
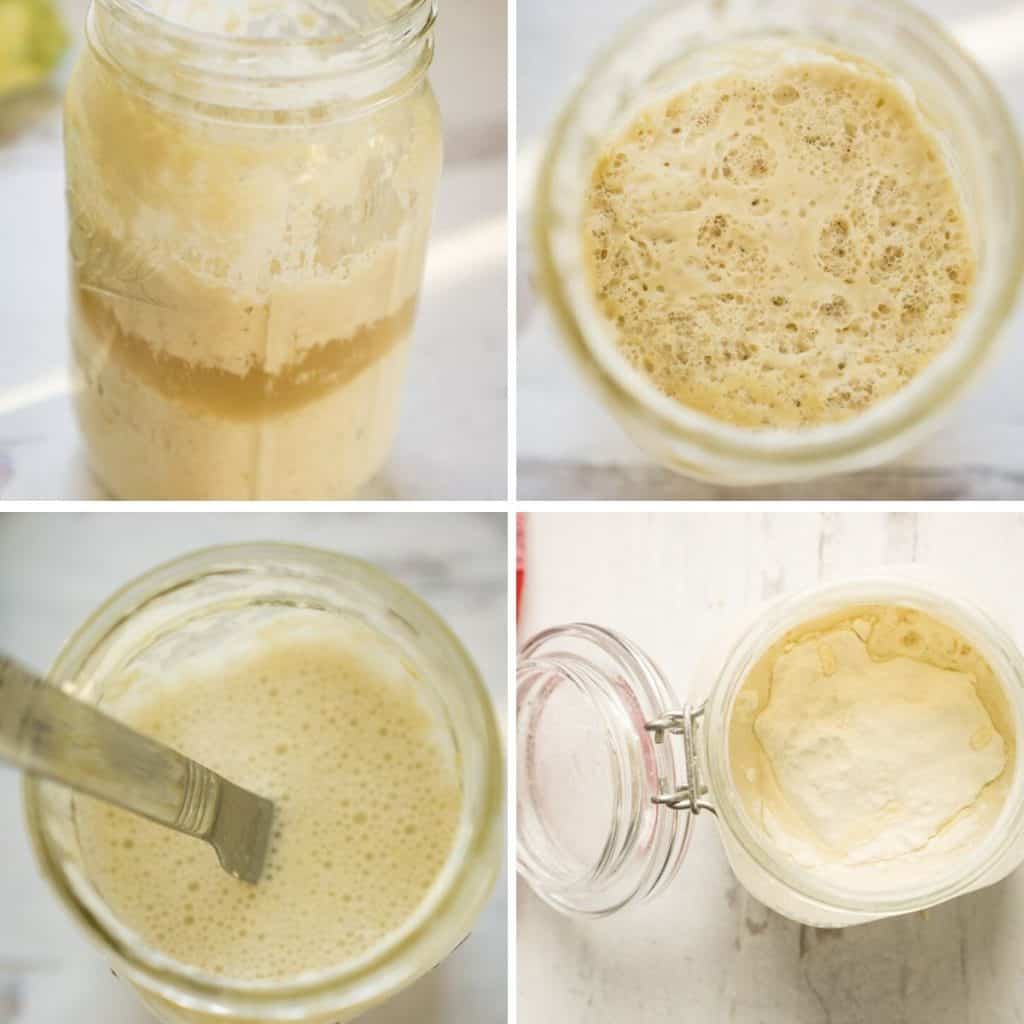
Pour out 1/2 cup of the starter, and pour it into clean jar. Add 1/3 cup of water and 1/2 cup of flour and stir it well. Cover it with the tea towel, just like before, and set it aside.
Unfortunately, the rest of the old jar is not good for much. Just toss it in the trash.
Strengthening the starter
Days 4-7
Okay! The rest of the process is easy. This jar is your starter. In the next few days we are building up its strength. Right now it might be stinky, but in a few days it will start to be sour and the bubbling activity will increase by the day.
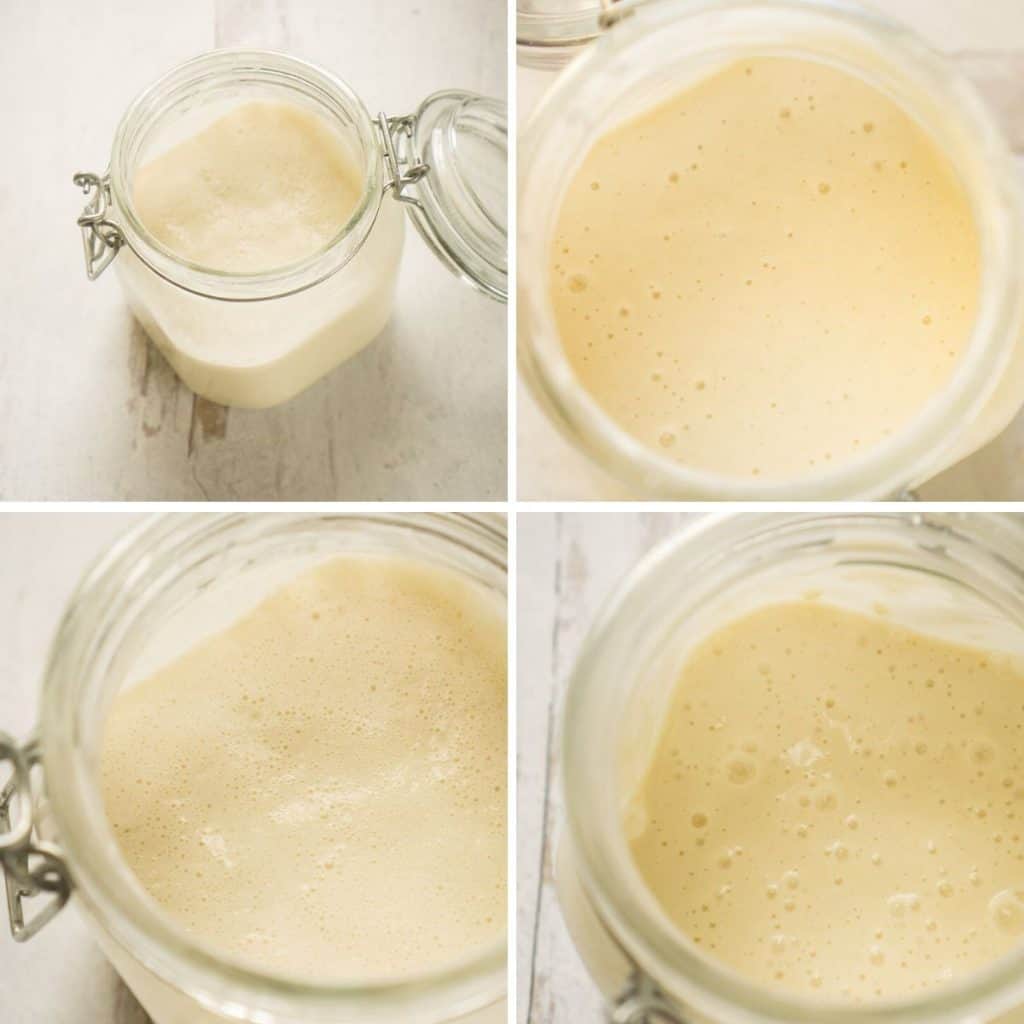
On day 4, we increase the feedings to twice per day. So in the morning, feed your starter 1/4 cup of water and 1/2 cup of flour.
Then do that again in the evening.
Now of course we can’t just keeping feeding it flour and expect it to fit in the container. So we have to discard some every day. Before you feed in the morning, mix it up and discard 1/2 cup of starter. If your jar is small you may need to discard more. It can either go in the trash or you can use it in one of these recipes.
As each day passes, it should become more bubbly, more sour smelling, and stronger. After day 7, it should be mature!
How to see if it’s ready
There are two methods you can use to see if your homemade sourdough starter is ready to bake with.
The first is the float test. Just scoop a few tablespoons of starter out and see if they float when dropped in a glass of water.
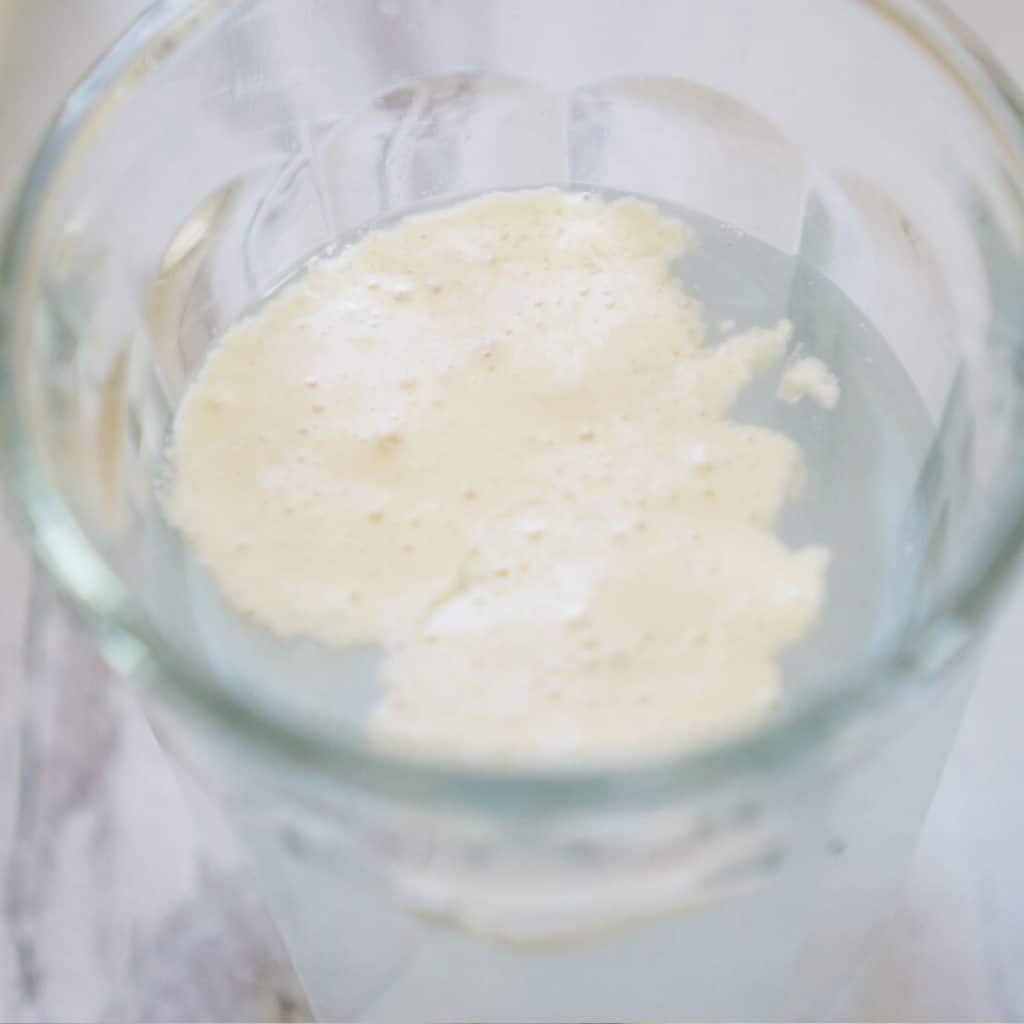
The second test is to see if it doubles in volume 8 hours after a feeding. To check this, put a rubber band on the jar to mark the level its at after a feeding, Check back after 8 hours to see if it doubles.
It fails these tests after seven days, that’s perfectly normal. Keep feeding twice a day and keep testing. It won’t be much longer.
What’s Next For Your Starter
Well, first of all, you can start tapering down the amount of flour you feed your starter now that you are maintaining your starter, not creating it. If you notice that is starting to separate by its next feeding, that just means you’ve tapered down too much and it needs more flour.
I know you’re going to want to start baking artisan breads right away. But I urge you not to. Even though your starter may pass the float test, a more mature starter (at least 30 days old) will give you much, much better results.
Right away, you can start baking with your sourdough discard, using one of these delicious recipes that use unfed sourdough.
You can also start baking “hybrid sourdoughs” that use a tiny pinch of yeast to help leaven the bread, like these crusty rolls or these easy baguettes.
When the starter is a few weeks old, branch out into recipes that rely on your starter entirely. You can bake everything from tender sourdough sandwich bread to sourdough burger buns to sweet cinnamon sourdough to bread to yes, the complicated artisan sourdough boules.
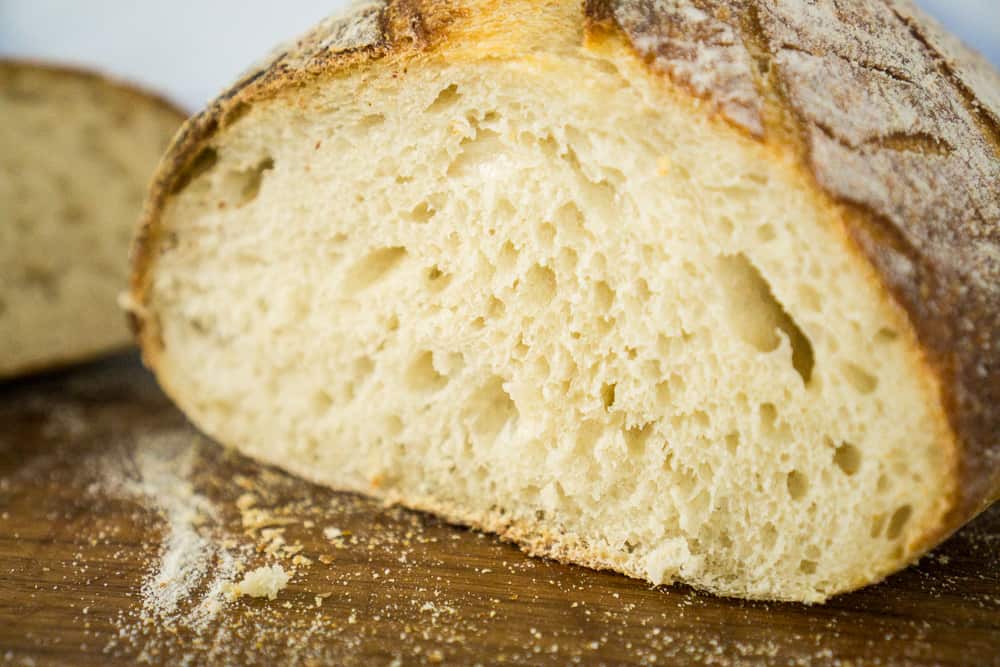
But if you want the easiest way to get a beautiful loaf of sourdough bread, try this ultra simple sourdough recipe first (pictured below!). It’s my favorite.
Questions and Troubleshooting
Nope. If you want to start with one of those for day one and day two, it can help the starter get off to a faster start. But it’s not necessary.
Nope nope nope. Don’t need them.
This is a storage issue and happens when too much moisture is introduced to the powder. Break up the clumps with a fork or butter knife. You can also reblend it in your spice grinder.
Anything at least 1 quart large, with a lid that is easily removed, and make sure its clear so you can keep an eye on it. My favorite is a plain old wide mouth 1 quart mason jar.
It’s hungry! Give it an extra feeding or two. This should correct itself after a little more food.
No big deal, just keep feeding.
Two reasons. If you don’t, the starter will become uncontrollably huge and it won’t fit in the jar. Second, it will need MORE flour to feed it, the bigger it gets. Think of it like a child. Little baby needs a little meal. A big teenager needs a big meal. Keep it a manageable size and it eats a manageable amount of flour.
I don’t know, but this happens to EVERYONE and it’s GROSS. It will go away by day 6 and become more of a sour smell. Don’t worry!
Printable Instructions
Homemade Sourdough Starter Recipe
Ingredients
- 5 cups of all purpose flour divided
- 5 cups of filtered water divided
Save This Recipe
You'll join my email list which you will love. And if you don't, unsubscribe in one click. ❤️
Instructions
- Combine 1/2 cup flour and 1/3 cup of water in a one quart jar and mix thoroughly. Cover with a breathable fabric such as a cotton tea towel and secure with a rubber band. Set in a draft free place.
- The next day, stir the starter and add another 1/2 cup flour and 1/3 cups water. Stir to mix. Re-cover and set aside again.
- On the third day, the starter should look bubbly and may have separated into layers. Stir everything back together, then pour 1/2 cup of the starter into a new, clean jar. To this new jar, add 1/4 cup of water and 1/2 cup of flour and stir well. Cover with the same breathable fabric and set aside.
- On day 4, increase the feedings to twice a day. Feed 1/4 cup of water and 1/2 cup of flour morning and night, stirring well each time. Once a day, you will need to discard 1/2 cup of starter, maybe a bit more, depending on the size of your container.
- Repeat step 4 on day 5, day 6, and day 7.
- At the end of day 7, check to see if the starter is ready for baking. It should be visibly bubbly and have a sour smell. A few tablespoons should float in a glass of water, and/ or you should be the volume of the starter double 8 hours after a feeding.
Notes
Did You Make This?
I would love it if you would leave a review!Love,


I’m on day 6 and I’m pretty sure it’s going well. It’s bubbly and has a nice sour smell. I’m wondering… can I start using the discard for recipes that call for ‘discard’ or should I wait longer?
I just added again for my day 3, but the mix still looks like the same gummy solution from day 1.
it’s normal jenn, especially if your kitchen is cool. give it 2 more days before you get concerned 🙂
Hi!
I’m about to do the day 4 of feeding 2x a day
My started is not separated and no liquid accumulation looks bubbly though
Also why do you reduce water from 1/3 cup to 1/4 cup in day 4?
Thank you!!!
hey kira! just keep going! i reduce the water a bit because you start feeding 2x day
I am in day 5 and have been using whole wheat flour the entire time. Do I need to transition to white flour or stay using whole wheat?
you can stick with whole wheat! 🙂
My question is: what do you do with the original jar after you take out 1/2 cup of the starter and put it into a new jar? Thank you
throw it out of give it away for something to start their own from that step.. 🙂
I love cooking with sourdough! I have only been using it for about three months.
I was wondering if you had a idea about clean up. The jars are hard to clean and hate to pour the soapy water down the drain. After awhile the drain starts to smell. It seems like, even though I try to put tools I am using in water, something seems to dry rock hard on them. I am learning off the internet have never seen anything on this.
Sharon, I have also had challenges with cleaning the jars after emptying them. I try to scrape them down as much as I can, but there’s still a lot that clings to the inside. We have a septic tank and I worry about putting so much of it down the drain. It sticks to everything! I hope someone can answer this question for us. 🙂
I’ve soaked jars in hot soapy water and used a brush. I’m afraid to pour it all down the drain!
My husband is gluten intolerant. Will Sorghum flour work to make the starter?
i’m sorry leona i’m not familiar with gluten free baking at all. king arthur flour has some good tutorials for it!
I’m on Day 5 and my starter is very doughy now . . should it be this way? I’m adding way more flour then water
Chantell, no it should be like a thick batter. Add more water and stir it up; it will be fine. You may just be packing your flour measuring cup and its coming out a bit too thick. :).
I read that we can store our starter in the refrigerator. Then it needs only weekly feeding. Your thoughts?
yes that will definitely work, once the starter is healthy and mature. search my site for sourdough starter maintenance and I have a post on 3 different methods.
Hi Katie this has been my go to bread since discovering that my bread machine became useful
I have been working on my sourdough starter for some time now but since lick down I gave it my undecided attention.
..However I have had some truly amazing bread by this recipe I totally swear by it.
So my starter is around 5 mths now, sour but nice and flavour some. Every time I needed to make a bread I would take some from the main jar which I feed once a wk btw, put it into another jar feed it and watch it dbl or triple in size usually just enough to make the loaf that I need, if there is any left over starter it would go straight back into the main jar. Not sure if I should throw or save… I save.
Today I used organic flour for the first time
my starter floated, but my dough was was different , the result was doughy and my bread didnt rise as fast or as much.
Firstly am I doing this starter thing right or should my main jar of starter be discarded…to be honest any fed starter that has not been used gets thrown back in there..so I’m not really discarding or wasting but I have been hav ing results.. One time my bread rose massively in half an hour of putting it in the fridge. I made pizza dough, focaccia and bread all sr dough but the results were all disheartening.
Please can you be if help not sure where I’m going wrong if it was the change in flour plus my starter took really long to activate..it had to be fed twice in 1 day b4 I could use it.
Thanks
Indi
Indi, a lot of bakers say that when the6 switch the type of flour their starter is receiving it needs a period to adjust. I would just keep feeding it!
I am going first time To try let You know later
I tried 3 other recipes for sourdough starter and this is the only one that actually worked.
Thank you, I love it.
I’m so glad it worked! thanks for letting me know! 🙂
I had to throw out a 2 week old starter made with bleached white flour that bubbled and smelled yeasty, but never rose. Possibly if I had any rye flour, I could have saved it…but I ended up buying some (had to buy 25 lb, I hope my neighbors would like some!) Online, as there was none to be had locally. On day 2 it more than doubled, almost filling the quart jar! Does this mean I can start using it in recipes calling for yeast as well?
Kristen is it all rye starter now? As long as it doubles and smells sour go ahead and try it in recipes. The rye will add a slightly different flavor to your baked goods. You can start transitioning it to a “regular” starter if you feed it with all purpose flour fro here on out. As far as using it in recipes with yeast… do you mean tweaking regular recipes to make them sourdough? You can definitely do that, it just takes some experimenting. Generally 1 cup of starter will be equivalent to a packet of yeast. And the. You’ll reduce the liquid and flour by whatS in the starter.
Hi,
On Day 3, mi starter was a little bubbly but not much. It didn’t separate either. Wasn’t a crazy creature fur sure. I continued to work with it but I am not sure if it is going well. I is always a bit bubbly but never like your pictures. today in day 5 has a nice sour smell dough. What do do suggest? Thanks so much.
Adriana, if it has a nice sour smell and looks bubbly its going well. keep feeding. start looking for doubling on day 7. if its. not doubling yet, it just needs more time before you bake bread with it. sounds like you’re on the right track. though!
Today I saw my starter double!! so exciting!!! I made the pancakes recipe with the discard and they were so fluffy delicious. Thank you! 🙂
How do I start and maintain the no discard starter?
the. method of starting it is the same. to maintain it, you just keep a very small starter and build it up with a few feedings to be the volume you need for your recipe. then use all but a tiny amount in the bread and repeat the process.
Hi Jo,
I have just discovered your website and read this post as well as the three methods for starter maintenance. Both posts were great! I used a different website recipe to make my starter. I only fed it during the 7 day period. It never had me discard any during the process. I also used white all purpose flour and added vita wheat gluten. I just recently found unbleached all purpose flour in Target which I happened to find when they just stocked it. At the end of the 7 days my starter was sort of bubbling and did not pass the float test. I suspect part of my problem was the temperature of my house. My hubby likes the ac on. I attempted to make a sourdough loaf and it was a flop. Didn’t surprise me. Anyway, I put the starter in the frig and haven’t touched it since. Do you recommend I start over or try feeding what I have and see where it goes? I really want to have a good starter to bake for my family!
Sorry meant to address this post to Nancy 🙂 been a crazy morning with my kiddos.
Hi Kelly!
I would not throw it out. Here’s what I would do: Take the current starter out of. the fridge. If it has separated into two layers, stir in back up. Measure out about 1/4 cup of the starter. And pour it into a new, clean jar. Immediately feel it with 1/4 cup water and 1/3 cup of flour. Leave it on the counter in a warmish environment. If your house is cold, you can try the oven with the light on. (I don’t love this method because it’s all too easy to turn the oven on to preheat and kill it). You can also try a heating pad underneath, with a few layers of towels in between. Anyway, see what happens. After 12 hours, discard half and feed again, the same amount. If there’s no activity, start fresh. If there’s some, even a little, keep feeding! 🙂 -Katie
Hi Katie. I used your recipe to resuscitate a starter begun from another recipe. It had flagged after about 5 days so I looked around and found yours. As a result, I didn’t know what day I was on according to your recipe, but I made a guess and it has worked out. I’ve just finished Day 7 and my starter doubled overnight last night.
It would be helpful if you would fill in what I see as an information gap after Day 7. You recommend not diving in immediately to make an artisan bread, saying “… a more mature starter (at least 30 days old) will give you much, much better results.” (I haven’t been able to buy yeast to supplement my young starter in baking.) My questions are: What to do with the starter in the meantime? How often and how much to feed it? How much to discard? Where to store it for 30 days?
Thanks,
Nancy
hi Nancy, you are right and I will add to the post! basically once your starter is active and doubling, you can relax the feeding schedule a little and move in the maintenance mode BUT you shouldn’t expect it to rise a whole loaf of bread for you. maintenance mode is more flexible that the 7 day period of starting your starter. you have choices. if you want to keep it on the counter, 1 feeding a day is fine. in the fridge, 1 feeding a week. discard half each time regardless of the method. if your starter has separated when you go to feed it, that means its getting too hungry in between feedings. you want the consistency to be like a thick pancake batter. from now one, just let it guide you. as far as the AMOUNT of the feeding, your guideline is a 1:1:1 ratio (one part existing starter, 1 part flour, 1 part water) the smaller the starter, the smaller the feeding. (this maintenance mode will continue for the life of your starter. but until day 30 I would stick to sourdough discard recipes or “Hybrid” recipes that use a small pinch of yeast. I have recipes for rolls, baguettes, banana bread, lemon cake, and coffee cake that would be ideal for this “teenage phase”. you can can certainly try using it for a loaf of bread, but the results will be better if you wait)
.
Do you continue to store your starter on the counter in a warm place or do you refrigerate it eventually? I want to keep an ongoing starter as long as I can so I always have it available ??. Thanks in advance!
I keep mine on the counter and keep it twice a day. I use some every day in some type of baking project. that means the amount of starter stays small so it needs smaller feedings. so if you’re willing to bake with it every day, it sure is convenient to always have some ready!
After day 7, the recipe says to add flour on an ongoing basis. It says nothing about additional water. So, no more water?
Thank you!
Hi Angela, after day 7 you continue to feed flour AND water.
Hello! I’ve been following this recipe religiously, and my starter doubled in size around the time it said, but didn’t float. So instead of starting maintenance feedings I’ve been continuing 2x a day feedings. However, I’m not sure if my starter is too thick. It looks like dough and doesn’t seem very active, though it has a smell. My starter discard that I’ve been saving for baking crackers is funnier and smells more like traditional sourdough. Is there any way you could tell me where to go from here? What kind of consistency should my starter be? Should I use the discard as starter instead? It’s technically being fed bc I keep adding more discard to it. I’d appreciate any advice!
Hi Jo! A lot of times a starter that’s being fed a lot will seem less sour, so it makes sense that your discard is seeming more sour. But still keep your countertop starter as the main one, it’s more active and will make the bread rise more. Since it is doubling in size, I would try baking with it! I always recommend this recipe for your first time. It has a pinch of yeast just in case the starter isn’t quite ready: https://heartscontentfarmhouse.com/crusty-sourdough-rolls/
As far as the consistency goes… mine is usually like a thick pancake batter. It should be relatively pourable. If it seems too thick add just a little splash a water (a very small amount) its amazing how the tiniest bit will change the consistency.
Hope this helps!!!