
Spicy Pickled Okra (Canning Recipe)

Okra is one of those veggies that grows easily around here but isn’t my favorite. And what do we do when we don’t like a veggie? We pickle it! (Or fry it, but that’s for another day.)

What You’ll Need
- 2 pounds okra – small and tender pods work best; they fit nicely into the jar and get nice and crisp; always get fresh, never frozen, for this recipe
- 2 cups water
- 2 cups white vinegar (5% acidity) – 5% only, please; other vinegars will NOT pickle properly
- ⅓ cup canning salt – you can look for this with the canning supplies at the store
- 5 dill umbels (dill blossoms), separated – you can sub in dill seed if you can’t find fresh dill (1 teaspoon per umbel)
- 3 cloves garlic
- 3 red chili peppers
- ⅜ teaspoon pickle crisp – if you can’t find it, don’t worry; it adds a nice crunch to the pickle, but it’s not worth stressing over

Equipment You’ll Need
Basic canning supplies are what you’ll need here. Make sure you have a large water-bath canner, pint jars, new lids and rings, and your jar lifter. It’s also handy to have a wooden kitchen utensil, like a chopstick, to help remove air bubbles from the jar.
Instructions
Prepare the jars
The very first thing you’re going to do is prepare the jars. You always want jars that are extremely clean and warm before you start canning.

Just wash the jars with hot water and soap, then place them in the water bath canner to keep them hot. You can wash the lids and rings separately, then set them aside.
make the brine
To make the brine, mix the water, vinegar, canning salt, and two of the dill umbels in a large stainless steel pot. You’ll want a stainless steel pot for this, as it’s the best material to work with highly acidic ingredients like vinegar.

Boil the mixture over medium heat, ensuring all the salt is dissolved. Then reduce the heat to low and keep it warm until your jars are ready to be filled.
Trim and pack the okra in the jars
You want to leave the okra whole, so don’t cut them up at all. All you need to do is trim the stems so they fit better in the jar.

Take your hot jars out of the water bath so that you can fill them with the okra. As you stuff the jar, alternate between top-down and top-up for the okra so more fit into the jar. It’s kind of like a little puzzle. The important thing here is to make sure that there’s 1/2 inch of headspace.
Add the aromatics
Once the okra spears are packed in there nice and snug, you’re going to add the aromatics. To each jar, add one sprig of dill, a clove of garlic, and a chili pepper.

Remember, you can substitute black peppercorns for the chili peppers or dill seed for fresh dill. Fresh is always best, but I totally get it. If you don’t have them on hand, the other two are probably already in your pantry.
Fill the jars
Grab your ladle and funnel, and pour the hot liquid mixture over the okra. Again, make sure that you leave that 1/2 inch of headspace.
Save This Post
You'll join my email list which you will love. And if you don't, unsubscribe in one click. ❤️

Once everything is in there, you’ll want to make sure there aren’t any air bubbles. Take a wooden chopstick, or even the opposite end of a wooden spoon, and poke around a bit to make sure the air bubbles are gone. If you notice that the liquid has gone down at all, you can pour a little bit more in to get that 1/2 inch back.
Add the pickle crisp
Now is the time to add the pickle crisp if you’re going to use it. Again, if you don’t have it, don’t worry about it. It just kind of helps the pickling process, but it’s not necessary.
Seal the jars
Before you seal the jars, make sure the rims are dry and clean; use a towel to wipe the edges.

Then place the lid on top and secure the rings, making sure they are fingertip-tight. You don’t want it to be too tight, so simply turn it with your fingers, not your whole hand.
Process the jars
Carefully place the jars into the canner and cover them with water. You need to be sure the jars aren’t touching each other. Then bring the water to a boil and process the jars for 15 minutes.

If your altitude is above 1,000 ft, extend the processing time per USDA guidelines.
Rest and cool
Once the jars are done processing, take the canner off the heat and let the jars sit in the hot water for about 5 minutes.

Now you’re going to use the jar lifter to take them out of the canner and place them in a heat-safe area to cool. I like to put them on a towel or even a cutting board. They need to stay put there for 12 to 24 hours, so make sure they are somewhere no one will come and touch them.
Check the seals
Before you store them in the pantry, you’ll want to check that the seals are nice and tight. You can remove the rings and gently lift to test that they’re on there good.

Storage Instructions
Properly sealed jars can be stored in a cool, dark pantry for up to 18 months. Once you open a jar, store it in the refrigerator. As long as the okra is completely submerged in the pickling brine, the jar is good for up to 2 months.
Questions and Troubleshooting
Sure! No harm there. The red peppers definitely add a little bit of a kick, but you can take them out or bring it down a notch and use black peppercorns instead. If you’re using black peppercorns, add 1 teaspoon to the pickling brine and 1/2 teaspoon to each jar.
Yep, sure is. The okra might not be safe to eat if you use a different kind of vinegar.
Okra has a weird rep in that, yes, it can get a little slimy. To avoid this, make sure you’re picking small pieces of okra, handling them gently, and not cutting them. When you keep them intact, they stay crunchy.
As with most canning recipes, those of you at 1000ft or higher will need to adjust your cooking time. This resource is best for getting the right cooking times.
More pickled canning recipes
- Pickled Banana Peppers (Canning Recipe)
- Extra-Crisp Pickled Jalapeno Slices (Canning Recipe)
- How to Can Pickled Red Onions
- Giardiniera for Canning
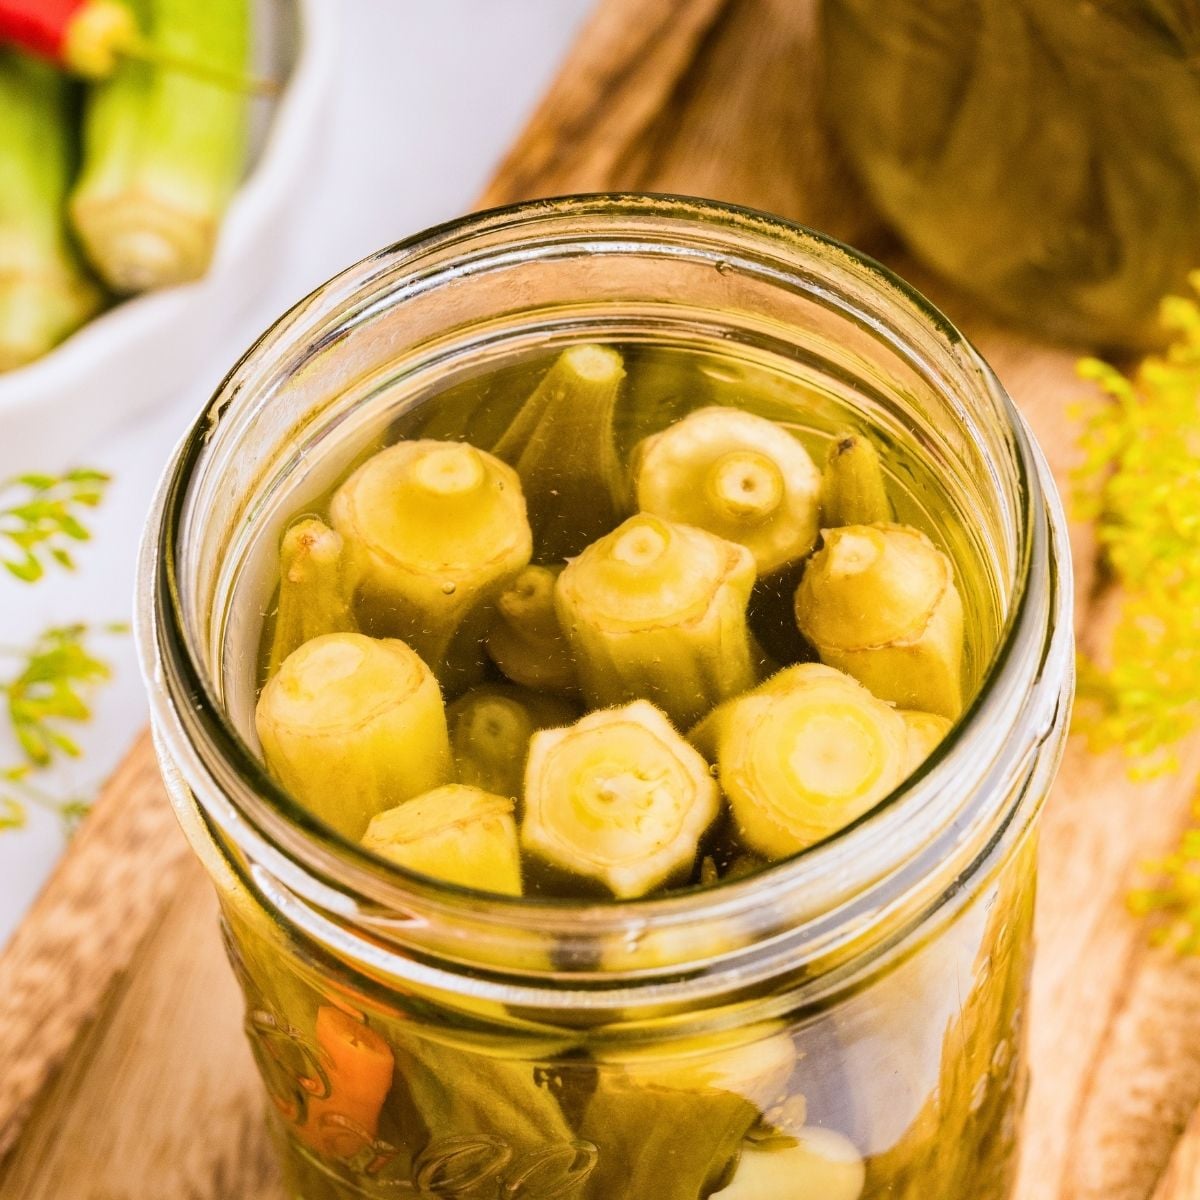
Pickled Okra
Equipment
- water bath canner with rack
- 3 pint-size canning jars with two-piece lids and rings
- Large stainless steel saucepan
- Jar lifter
- Canning funnel
- Bubble remover or wooden chopstick
- Ladle
Ingredients
Pickling Brine
- 2 cups water
- 2 cups white vinegar 5% acidity
- ⅓ cup canning salt
- 5 dill umbels (dill blossoms) separated: 2 for the brine, 3 for the jars
For the Jars
- 2 pounds okra small, young pods
- 3 cloves garlic
- 3 red chili peppers fresh, small
- ⅜ teaspoon pickle crisp optional, ⅛ teaspoon per jar
Instructions
Prep Jars & Canner
- Prepare the jars. Wash the jars with hot, soapy water, then place them in a water bath canner filled with water and keep them hot. Wash the lids and rings with hot, soapy water and set aside.
Make the Brine
- Combine the brine. In a large stainless steel saucepan, combine the water, vinegar, canning salt, and 2 of the dill umbels.
- Bring to a boil. Boil over medium heat, stirring to dissolve the salt, then reduce the heat to low and keep hot until ready to use.
Trim & Pack the Okra
- Trim the okra. Trim only the stem ends, taking care not to cut into the pods.
- Pack the jars. Pack the okra into the hot jars, alternating top up and top down to fully pack the jars, leaving a generous ½ inch headspace.
- Add the aromatics. Add 1 dill umbel, 1 clove of garlic, and 1 red chili pepper to each jar.
Fill & Process
- Fill the jars. Ladle hot pickling liquid over the okra, leaving ½ inch headspace. Remove air bubbles with a wooden chopstick or non-metal debubbler and top off to maintain ½ inch headspace.
- Add the pickle crisp. Add ⅛ teaspoon pickle crisp to each jar, if using.
- Seal the jars. Wipe the rims with a clean damp towel, then add the lids and rings, tightening to fingertip tight.
- Process the jars. Transfer the jars to the canner, making sure they are covered by at least 1 inch of water. Bring the water to a boil and process pint jars for 15 minutes, adjusting for altitude.
Cool, Check Seals & Store
- Rest and cool. Remove the canner from the heat, remove the lid, and let the jars sit for 5 minutes. Remove the jars and let them cool for 12-24 hours.
- Check the seals. Once a proper seal is confirmed, remove the rings, clean the jars, and store them in a cool, dark place for 12-18 months.
Notes
Nutrition

Related Articles
See ALL
Canning Butternut Squash Soup Base
Old Fashioned Blackberry Jam For Canning
Free Printable Canning Labels
How to Wake Up (Super) Early and Why It Will Absolutely Change Your Life
Homemade Spiced Apple Rings (For Canning)
Giardiniera for Canning
5 Simple + Lovely Ways to Make Your Home Cozy in Summer
18 Ways to Have an Old Fashioned Summer to Remember
Easy Blackberry Sourdough Muffins
Creamy Hawaiian Macaroni Salad Recipe (Easy!)
How to Make Garlic Powder in a Dehydrator
How to Decorate in Country Summer Style (For Free)
See all
Related Articles
Old-Fashioned Peach Ice Cream
Small Batch Strawberry Jam
How to Pressure Can Pinto Beans
Garden Cucumber and Tomato Salad
How to Can Pickled Red Onions
Piña Colada Sheet Cake
Canning at Home: A Guide for Absolute Beginners
Fresh & Simple Apple Juice Canning Recipe
Basil and Walnut Pesto