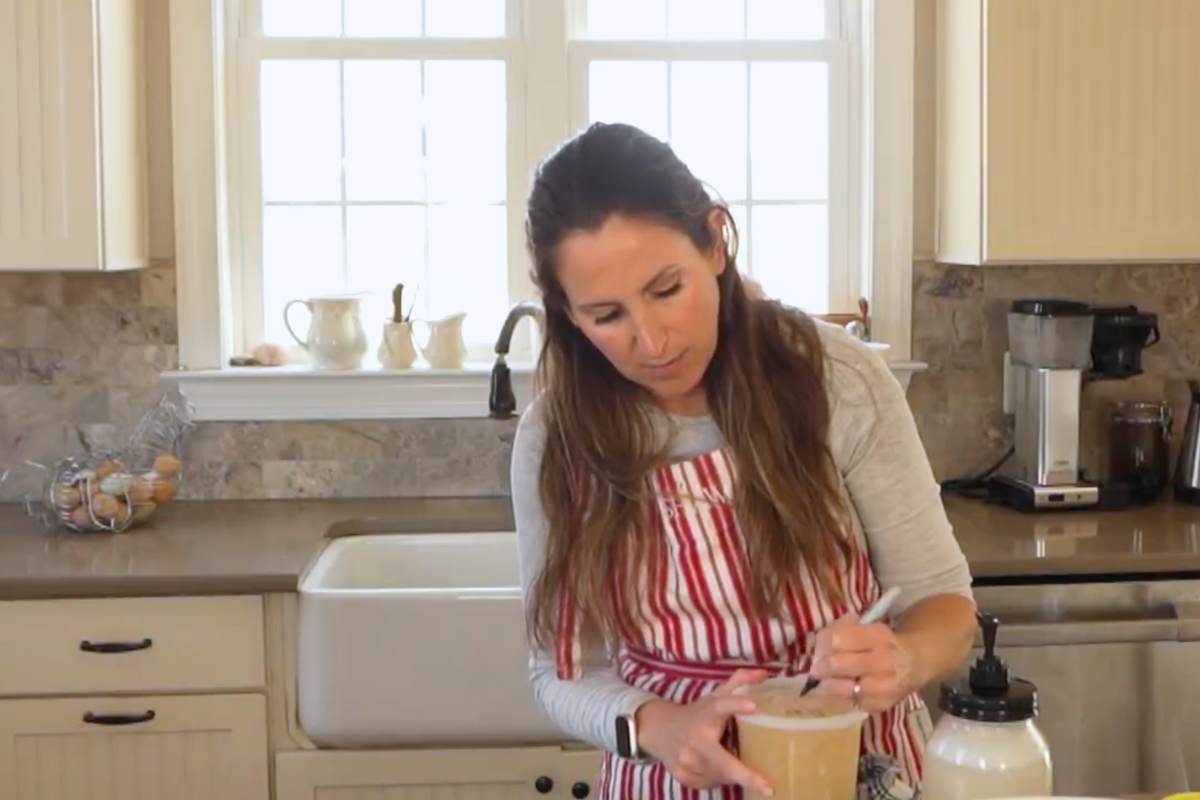
Before we get started, there’s one thing you need to understand: this is not a recipe where you’re buying something premade and diluting it and then adding some fragrance. No, my friend. You are taking oil and lye and making, for real, your own homemade dish liquid. But this is a good thing. Like most soap making projects, it will save you money (I’ve done the math!) and you’ll feel like a magician. Shall we? We shall.
If you’ve never made soap before, you can start here. Liquid soap is often considered to be more advanced than cold process bar soap, but really it isn’t. It’s just different.
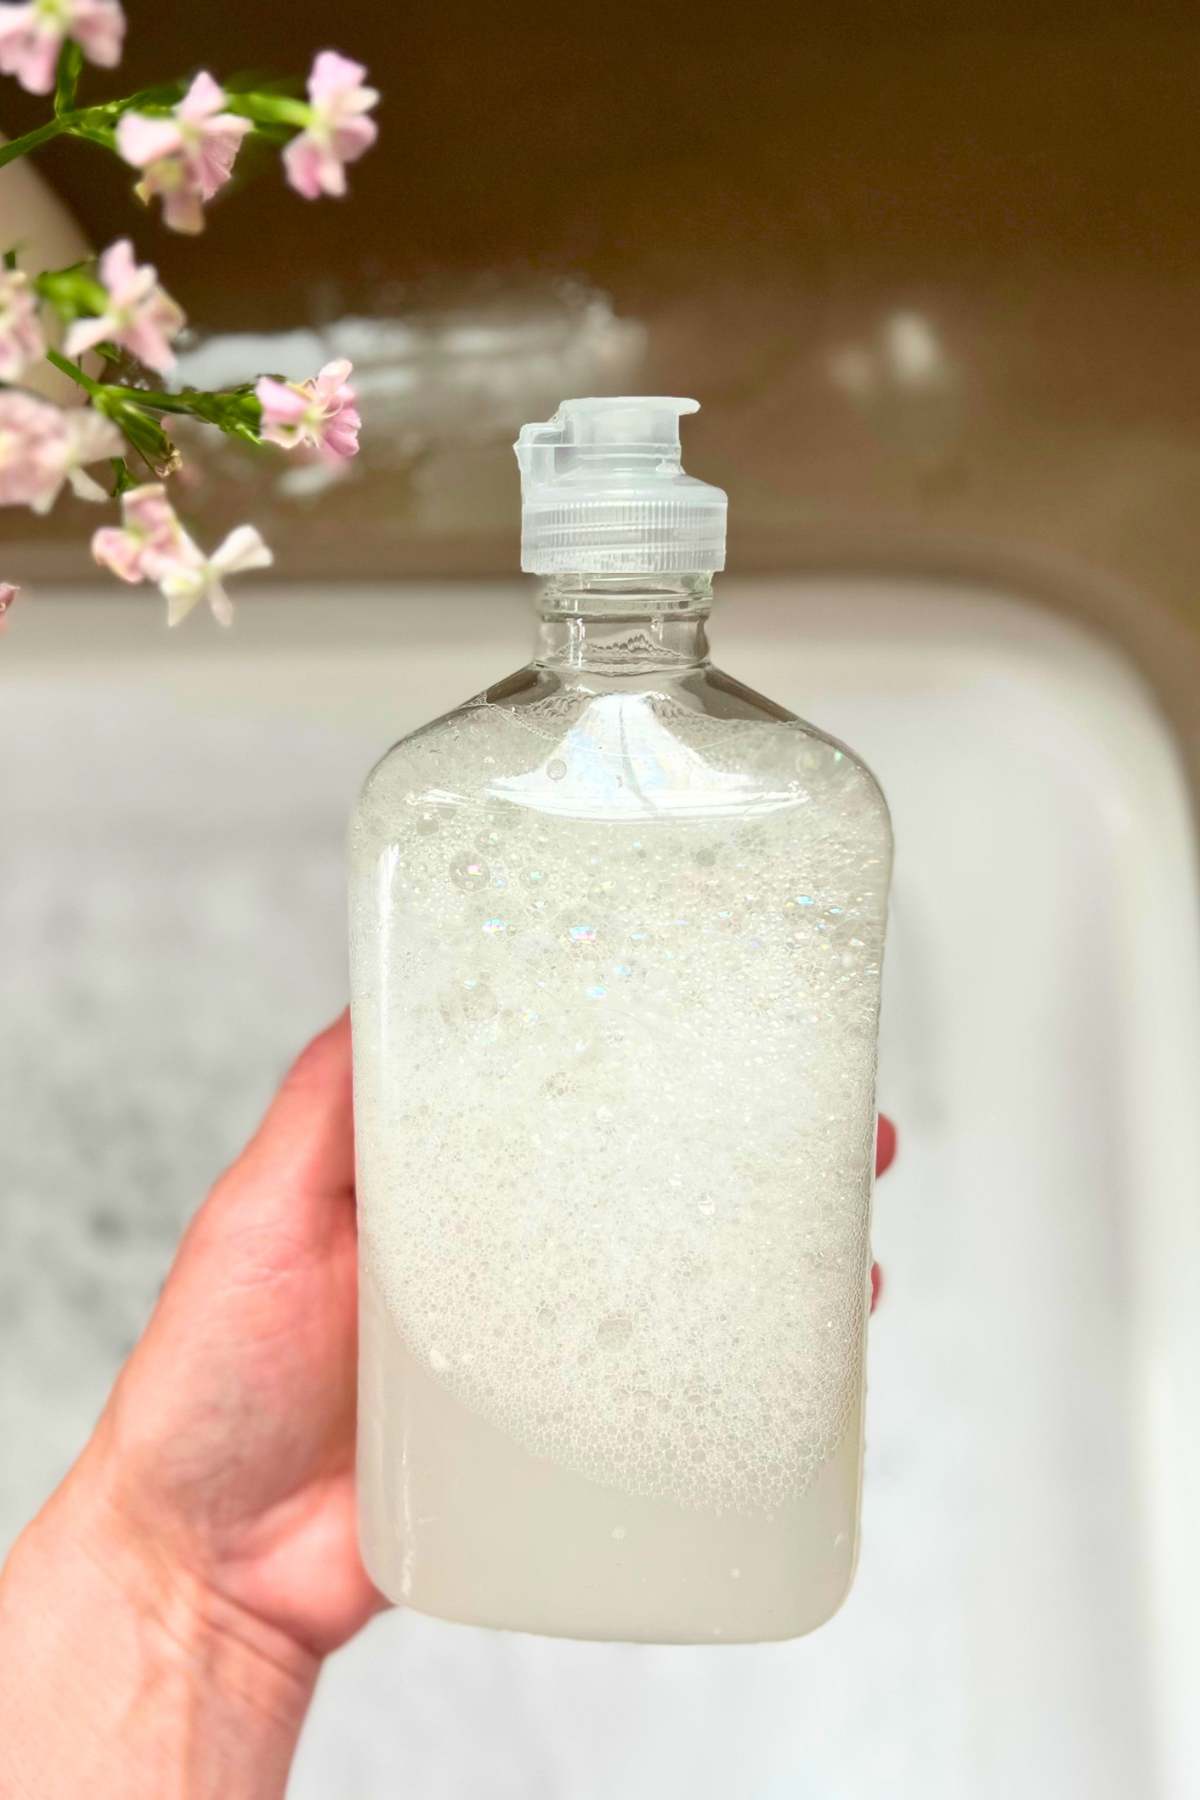
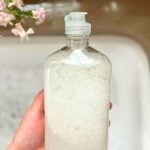
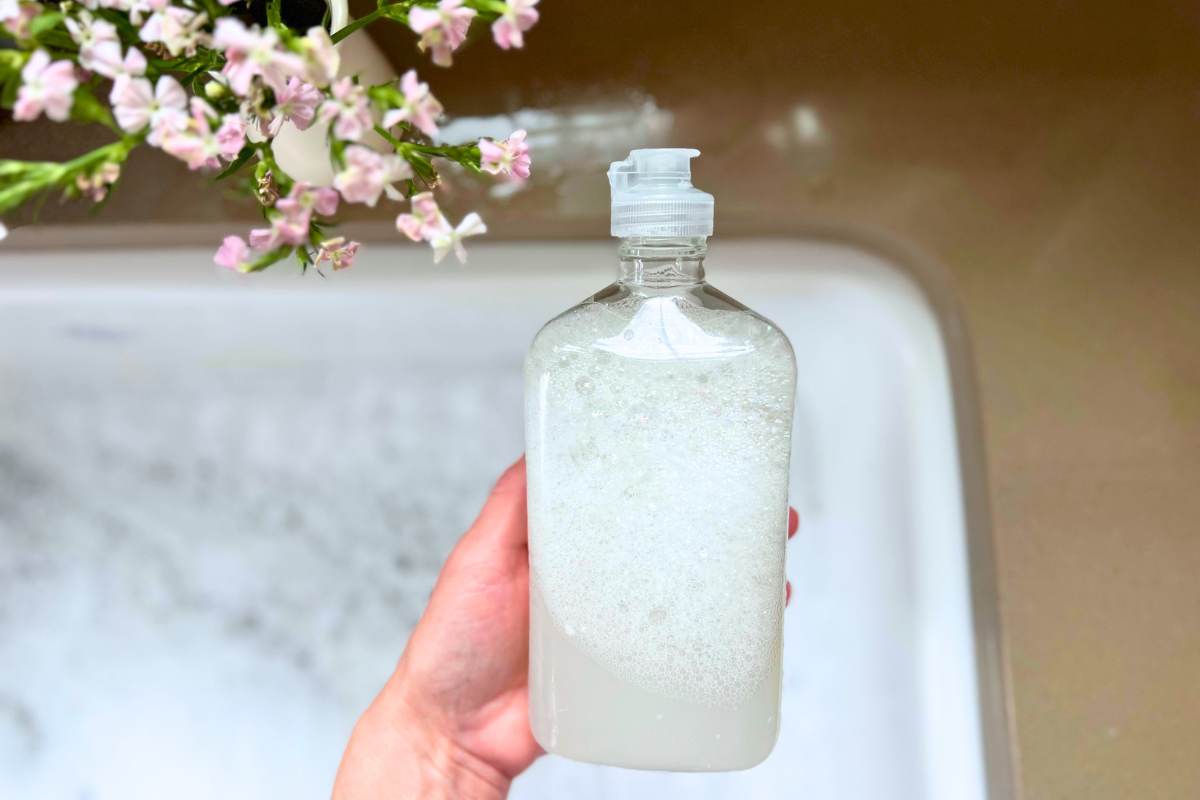
When you’re done you’ll have a lovely, simple dish soap that works just as well as any name brand concoction. And (my favorite part!) you can fragrance it however you’d like and pour into a pretty bottle and it will be clear instead of alien green or blue.
Ingredients and Tools You’ll Need
The thing about soap making is the ingredients all serve a very specific purpose. There is no substitute for lye, it’s what makes the whole thing work. The oils in soap can be substituted, but for this particular recipe, you really need the coconut oil. It is the most cleansing and most affordable.
Heart’s Content Farmhouse is a participant in the Amazon Services LLC Associates Program, an affiliate advertising program designed to provide a means for sites to earn advertising fees by advertising and linking to Amazon.com. This means that when you click on certain links on this site and make a purchase, I may earn a small commission at no additional cost to you. I only recommend products I genuinely believe in and would use in my own kitchen. As an Amazon Associate, I earn from qualifying purchases.
EQUIPMENT
- Slow cooker
- Stick blender
- Heat-safe glass or plastic container for mixing lye
- Stainless steel or heatproof plastic mixing spoon
- Gloves, goggles, and safety gear
- Scale (for accurate weighing)
- Thermometer
- Bungee cord (optional, for sealed cook)
- Mason jars or bottles for storage
INGREDIENTS
FOR MAKING THE SOAP PASTE
- 35.3 ounces coconut oil
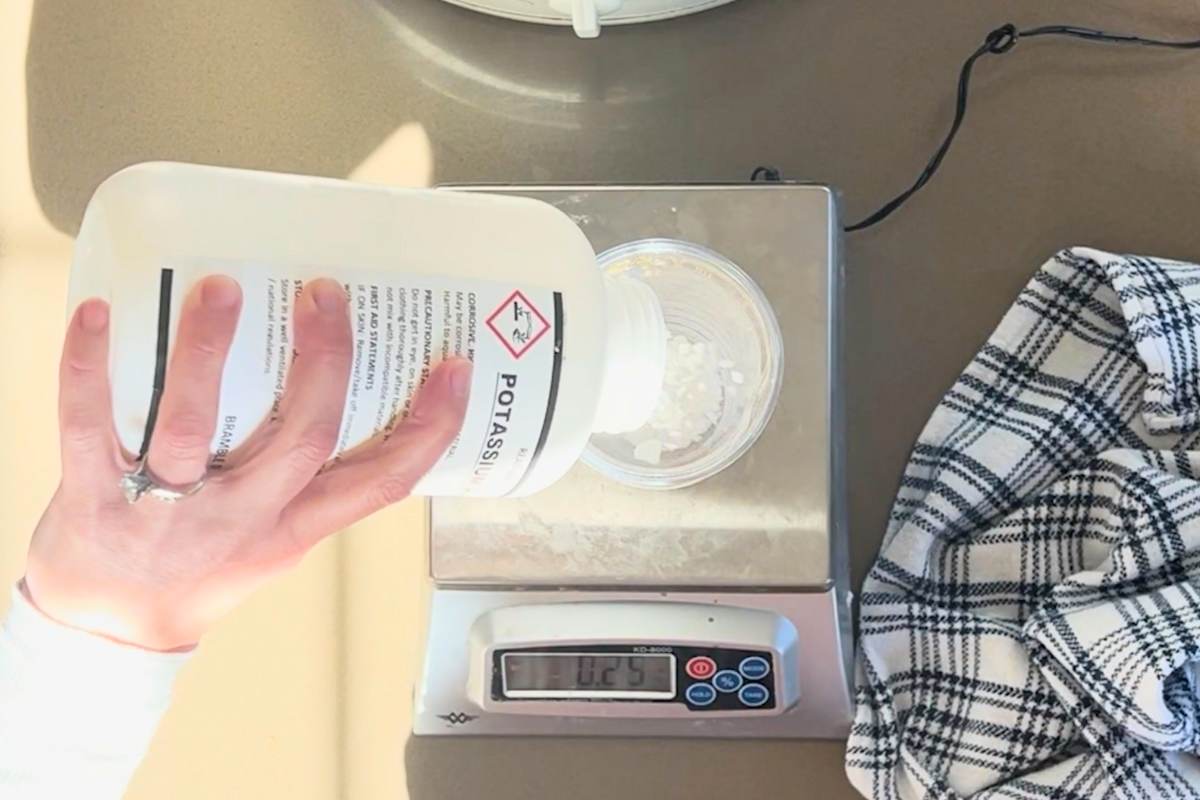
- 10 ounces potassium hydroxide
- 31.7 ounces water
- 5.3 ounces alcohol 90%
FOR DILUTION AND FRAGRANCE
- 53 ounces dilution water (distilled water is best)
- 1 ounce lemon essential oil
- A bulk container for storing the paste
- A pretty bottle for the finished product (I am absurdly picky about this and have bottles from this collection, but it often goes out of stock. I have also used Dawn bottles and removed the sticky labels.)
How to Make Liquid Dish Soap
Step One: Measure Water and Lye
Getting your measurements right is absolutely crucial for soap making success. You can’t eyeball it or use measuring cups! Place your container on the digital scale, tare it to zero, and weigh exactly what the recipe calls for.
And before you even start, put on those safety gloves and goggles. Lye is seriously caustic and can cause burns or blindness if it splashes on your skin. I am a bad example for this but I want you to be safe.
Don’t do this if you’re in a rush, or distracted. That’s how mistakes happen.
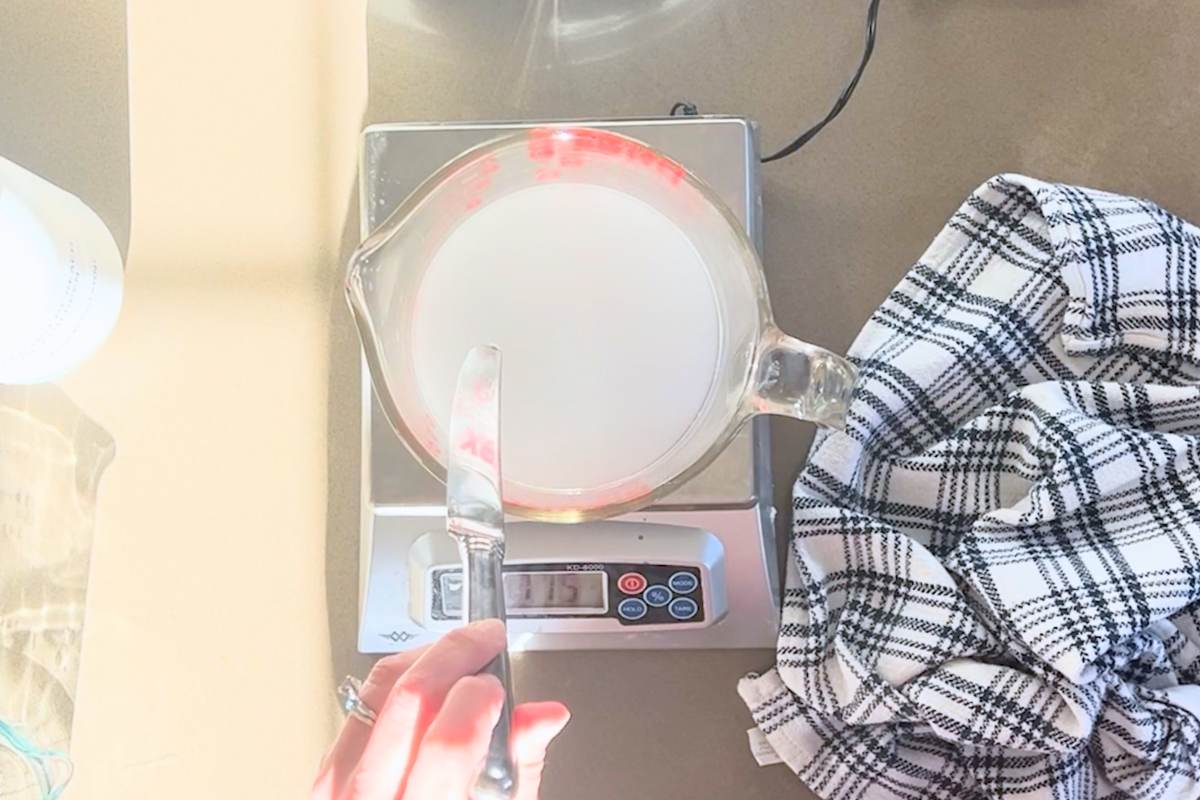
Step Two: Mix Lye and Water Together Very Carefully
This is where the chemistry begins! Pour the water into a heat-safe container first (never the other way around: remember the saying “snow falls on the lake” to get the order right). Then slowly add the lye to the water, pouring in a thin stream. Stir gently but thoroughly with a heat-resistant silicone spatula or wooden spoon until the lye completely dissolves.
The solution will heat up dramatically and release fumes, so work in a well-ventilated area or near an open window. It will also make a crackling sound! This is normal. Now set it aside somewhere safe to cool while you move on to the next step. The solution needs to cool to about 100-110°F before we can use it.
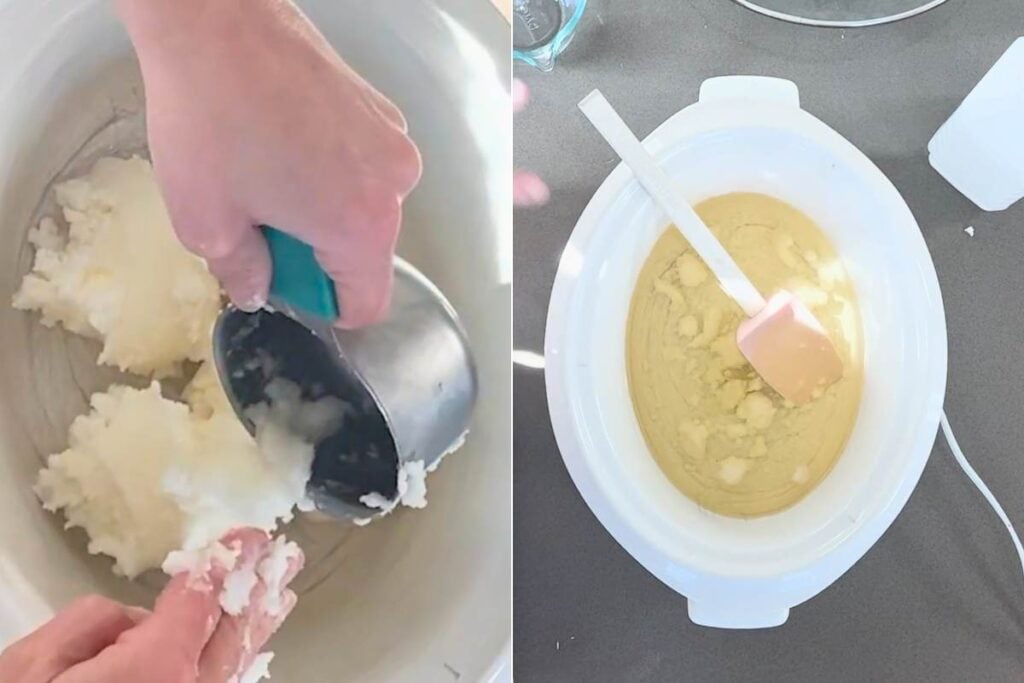
Step Three: Melt the Coconut Oil
Weigh out exactly 1000g (35.3 oz) of coconut oil and place it in your slow cooker. If your coconut oil is solid, don’t worry about chopping it up – it will melt just fine. Turn the slow cooker to high and let it do its thing until the oil is completely melted and reaches about 140°F (60°C). This usually takes around 30 minutes, but use a thermometer to check rather than just eyeballing it.
Once melted, turn off the slow cooker. The residual heat will keep the oil at the right temperature while your lye solution continues cooling.
Step Four: Mix the Lye Solution With Oil
Once both your lye solution and coconut oil are at the right temperature (100-110°F for the lye solution, coconut oil can be slightly warmer), it’s time to bring them together. Slowly pour the lye solution into the melted oil in your slow cooker. If you’re adding alcohol, now’s the time to do that too.
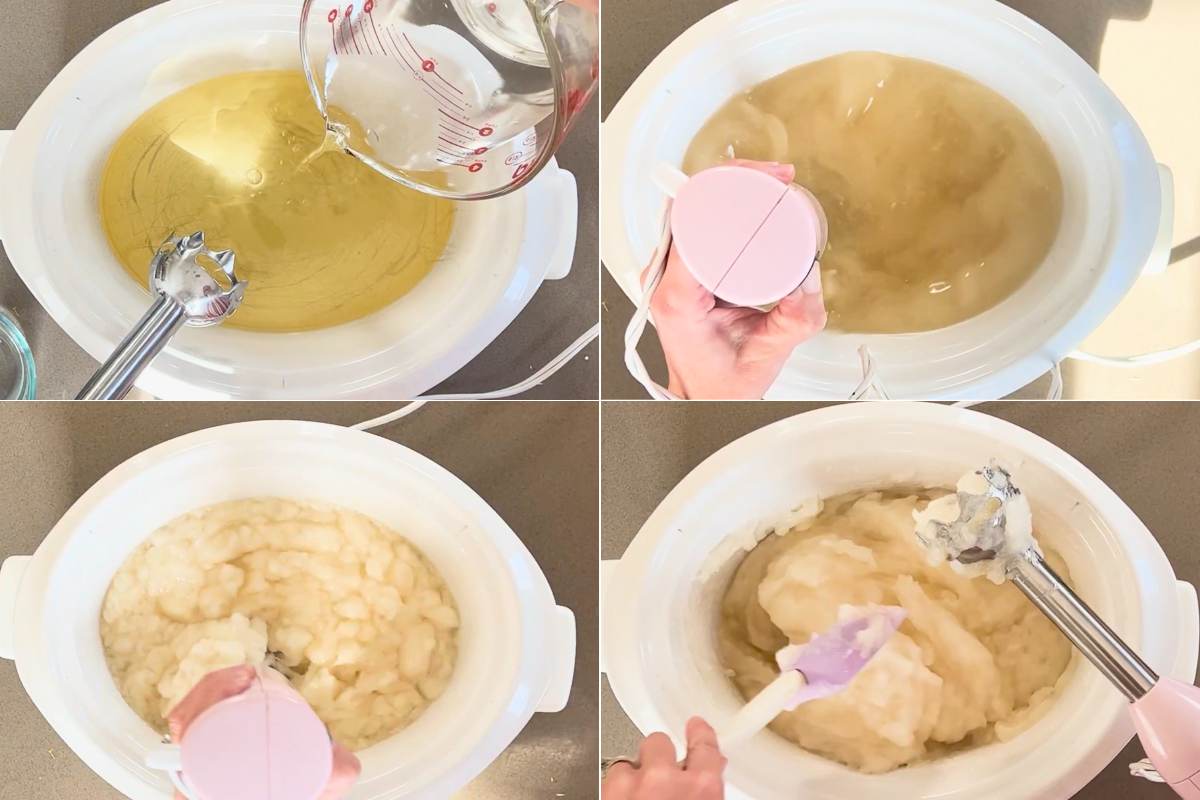
Now grab your stick blender. Start by stirring manually to incorporate everything, then use the stick blender in short 30-second bursts, giving it a rest between bursts to prevent burning out the motor. The mixture will start to thicken and might go through a “rice pudding” stage where it looks grainy: that’s normal! Keep blending until you reach a very thick trace. This is completely different than a cold process trace. It will look like thick pudding and there should be no visible oils.
Step Five: Cook the Soap Paste
Now we enter the most hands-off part of the process. Put the lid on your slow cooker and secure it – I usually place a heavy cookbook on top and wrap a bungee cord around the whole thing. This prevents any expansion and potential overflow. Turn the slow cooker back to high and let it cook for 2-4 hours.
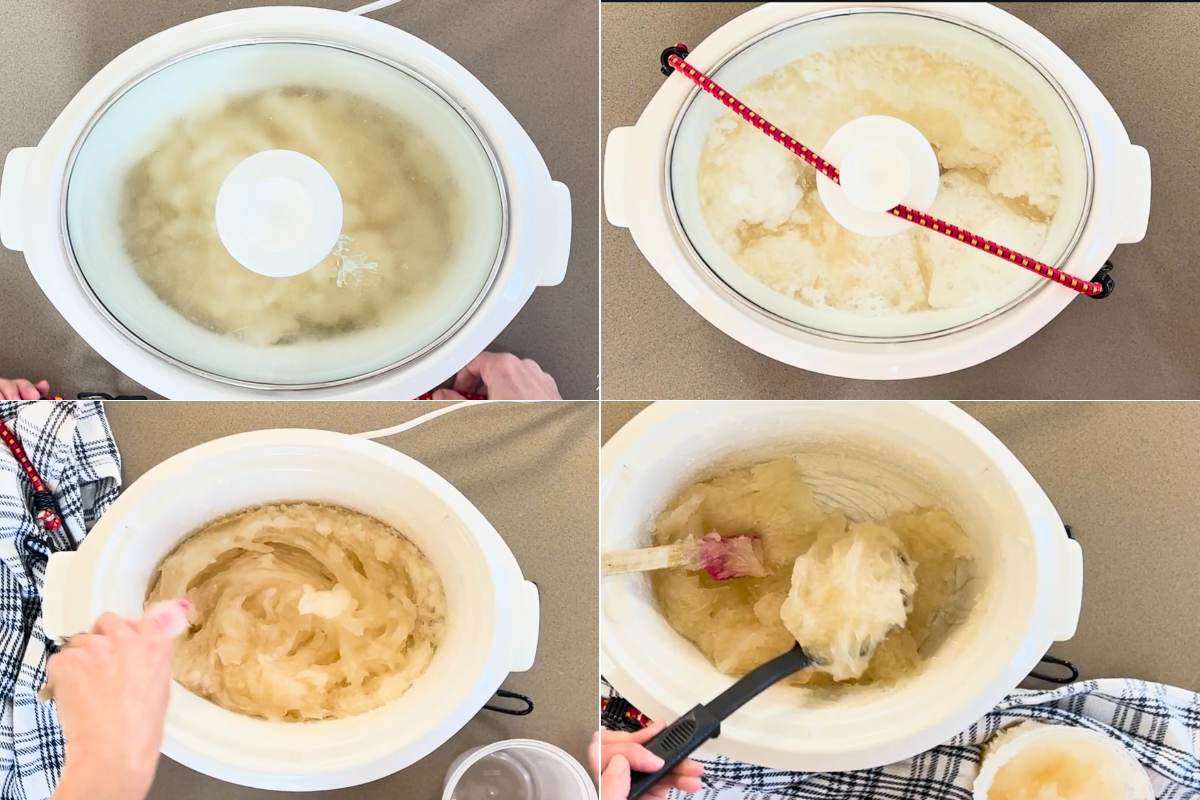
During this time, the soap will go through several phases, from thick and opaque to a translucent gel-like consistency. The exact time varies based on your slow cooker’s temperature, but you’re looking for a paste that’s translucent like petroleum jelly.
Step Six: Check Occasionally
Every hour or so, carefully lift the lid and give the mixture a gentle stir. You’re looking for that translucent quality throughout the entire batch. Once you think it’s done, it’s time for the “zap test.” After turning off the heat and allowing the soap to cool slightly, dampen your finger, touch a small amount of the paste, and very lightly touch it to the tip of your tongue. If it “zaps” like a battery, it needs more cooking time. If it just tastes like soap, congratulations! Your soap paste is ready. I know this is weird, but it’s the best and simplest way to know if it’s done.
Step Seven: Store Until Ready to Dilute
Once your soap paste passes the zap test, it’s ready to be stored! Let it cool enough to handle, then transfer to clean glass jars with tight-fitting lids. The wonderful thing about soap paste is that it keeps for a LONG time, easily a year or more ,with no preservatives needed.
The high pH and lack of water creates an environment where bacteria simply can’t thrive. Store your jars in a cool, dark place until you’re ready to dilute some for use.
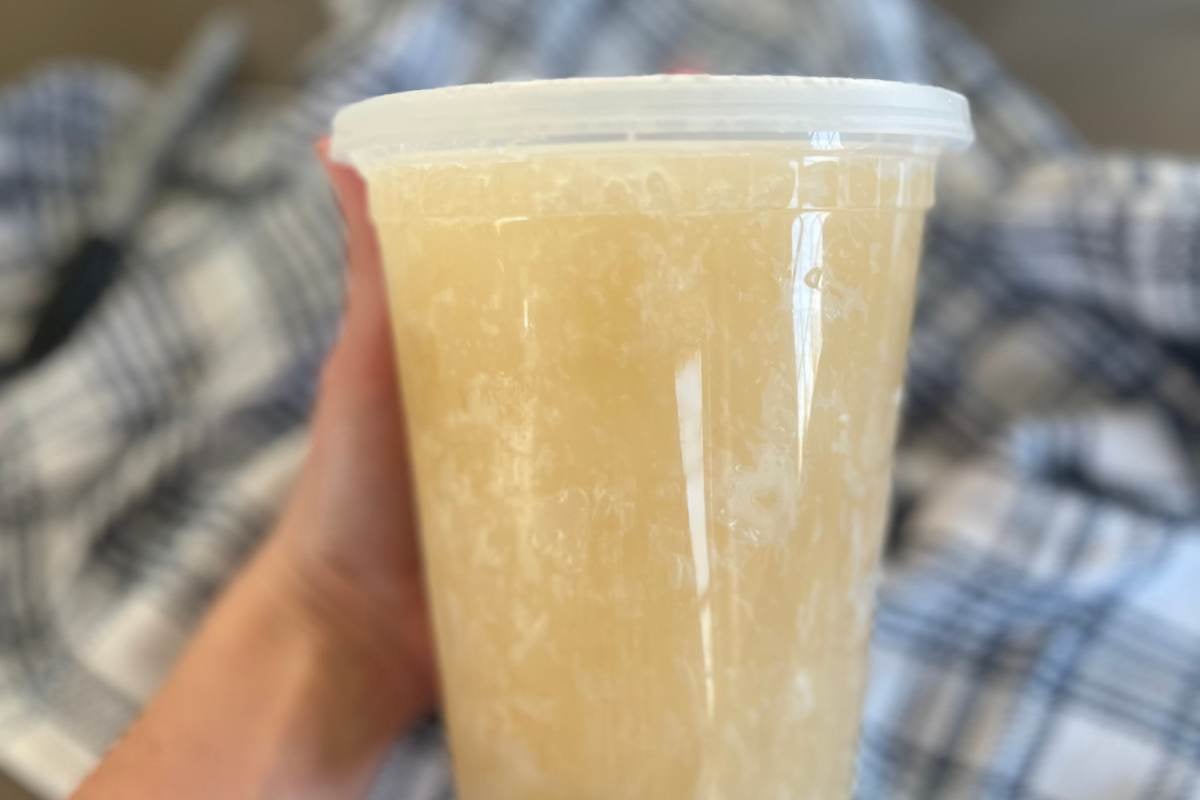
Step Eight: Dilution
Whenever you need liquid soap, simply combine soap paste and distilled water in a 1:1 ratio in a clean container. Technically you should use distilled water, but I do not. I like to cut the paste into small chunks to speed up the process. Let this mixture sit overnight.
By morning, most of the paste will have dissolved into a lovely liquid soap. If you’re in a hurry, you can gently heat the mixture to speed up the process, stirring occasionally. Once fully dissolved, add a few drops of lemon essential oil for a fresh scent and some antibacterial properties.
Step Nine: Sequester
This step is optional but makes a difference in the appearance of your soap. After dilution, let your liquid soap sit undisturbed for 1-2 weeks. During this time, any cloudiness will gradually settle, and your soap will become clearer. This doesn’t affect how well it cleans: it’s purely aesthetic.
Storage Instructions
Store undiluted soap paste in clean glass jars with tight-fitting lids for up to a year.
For diluted soap, use pump bottles or squeeze bottles and use within 3 months.
This soap works beautifully in foaming dispensers: just use a more diluted ratio (about 1:3 paste to water).
Other Ways to Use Your Dish Soap Paste
- All-purpose spray cleaner: Dilute 1 tablespoon of soap paste in 2 cups of warm water and add 10 drops of tea tree or lemon essential oil. Fill a spray bottle and use for countertops, bathrooms, and quick clean-ups. The coconut oil’s cleaning power works WONDERS on kitchen grease!
- Foaming hand soap: These fancy dispensers aren’t just for store-bought soap! Mix 1 part soap paste with 3 parts water, add a few drops of your favorite essential oil, and fill your foaming pump dispenser. Saves money and avoids all those single-use plastic bottles.
- Laundry spot treatment: Make a concentrated solution (2:1 soap paste to water) and keep it in a small jar with an old toothbrush nearby. Dab onto stains before washing. It’s especially effective on grease spots and collar grime.
- Shower cleaner: Coconut oil soap naturally cuts through soap scum. Mix equal parts soap paste and white vinegar with enough water to make a spreadable consistency. Apply to shower walls, let sit for 10 minutes, then scrub and rinse.
- Floor cleaner (for tile and laminate): Add 2 tablespoons of diluted soap to a gallon of warm water for clean, streak-free floors. Don’t use on hardwood.
- Fruit and veggie wash: A very diluted solution (just a pea-sized amount of paste in a bowl of water) makes a great produce wash that rinses clean with no residue or taste.
Making Bar Soap vs. Liquid Soap
If you’ve made bar soap before, you already know most of what you need! It’s still a matter of lye water + oils + blending.
- Different type of lye: Bar soap uses sodium hydroxide (NaOH). Liquid soap needs potassium hydroxide (KOH). This one switch is what makes your soap stay soft instead of hardening. Don’t mix them up!
- Always hot process: Unlike bar soap which can be made cold process, liquid soap ALWAYS needs to be cooked.
- Longer to reach trace: Liquid soap takes longer to thicken up than bar soap. Be patient with your stick blender – it will get there! It might look like applesauce before it turns to pudding consistency.
- Two steps instead of one: Bar soap is a mix-pour-cut-cure process. Liquid soap has two separate stages: making the paste first, then diluting it later when you’re ready to use it. This means you can make one big batch and have soap for months!
- Ready to use right away: Bar soap needs 4-6 weeks to cure. Your liquid soap paste is ready right after cooking (once it passes the zap test), though letting it sit after diluting helps it clear up.
- Lower superfat: Bar soap often has extra oils added for moisture. Liquid soap (even a kind used for skin), will never go above 4% or so.
More Practical Soap Recipes
- A basic liquid soap that’s suitable for skin is all you need to say goodbye to store-bought soap forever.
- If you strongly prefer bar soap (it’s a little less fussy), I have a bar dish soap recipe as well.
- And to keep my your kitchen sink, there’s nothing more cheerful than a cold process lemon soap.
Questions and Troubleshooting
Cloudiness is totally normal in homemade liquid soap! Commercial soaps add chemicals to make them crystal clear. Your natural version will have a slight haze, especially with coconut oil. If clarity matters to you, letting it sit longer (2-3 weeks) will help it clear up some.
Yes, but stick with liquid colorants specially made for soaps. Add them during dilution, not to the paste. Start with just a tiny drop, a little goes a LONG way!
Properly made soap paste can last over a year. Diluted soap should be good for 3-6 months. Watch for unusual smells (beyond your fragrance), visible mold, or dramatic changes in texture or color. When in doubt, start fresh. That’s the beauty of keeping paste on hand!
Printable Recipe
Liquid Dish Soap Recipe
Equipment
- Slow cooker
- Heat-safe glass or plastic container for mixing lye
- Stainless steel or heatproof plastic mixing spoon
- Gloves, goggles, and safety gear
- Scale (for accurate weighing)
- Thermometer
- Bungee cord (optional, for sealed cook)
- Mason jars or bottles for storage
Ingredients
For Making the Soap Paste
- 35.3 ounces Coconut oil
- 10 ounces Potassium hydroxide
- 31.7 ounces Water
- 5.3 ounces Alcohol 90%
For Dilution and Fragrance
- 53 ounces Dilution water distilled water is best
- 1 ounce Lemon essential oil
Save This Recipe
You'll join my email list which you will love. And if you don't, unsubscribe in one click. ❤️
Instructions
- Measure water and lye. Put on gloves and goggles for safety. Measure the lye and water in separate containers.
- Mix lye and water together very carefully. Pour the water into a heat safe container like large Pyrex measuring cup. Pour the lye on top. Stir until fully dissolved. The solution will get very hot. Set it aside to cool while you heat the oil.
- Heat the Oil. Weigh and add 1000g (35.3 oz) of coconut oil into a slow cooker. Heat until fully melted, around 140°F (60°C). This will take about 30 minutes. Turn it off once melted.
- Mix the Lye Solution with Oil. Slowly pour the cooled lye solution into the melted oil. (Right into the slow cooker.) If you are using the alcohol add it now. Begin mixing with a stick blender in short bursts until it reaches trace. It will often go through a stage where it looks like rice pudding, but keep blending until it's quite thick and no spots of oil are visible.
- Cook the Soap Paste. Put the slow cooker lid on and either weight it down and put a bungee cord around it so it doesn't move. Turn it back on to high. and let it cook for 2-4 hours, until the mixture is thick and translucent.
- Check occasionally. The paste is ready when it passes the zap test (a small bit rubbed between fingers and tasted should not tingle like lye).
- Store until ready to dilute. The soap paste will keep a long time with no preservatives in this state. It's best to store it as a paste and dilulte/ add fragrance as needed.
- Dilution. Mix a 1:1 ratio of water and soap paste and allow to sit overnight. In the morning, it will have turned into a liquid. If you're in a hurry, you can heat the whole thing up. Add a few drops of lemon essential oil.
- Sequester. Before using the liquid soap, let it sit 1-2 weeks after dilution. It will become clearer as it sits. This is optional and just for appearance.
Video
Notes


Making this right now. When it comes time to mix it up 1:1 and add the scent, how do you exactly do that? And how much scent do you put in? Recipe says 1oz, is that ever time you mix some up? Or am I suppose to break that up every time I mix some paste/water? I plan to just refill my current dish soap bottle. 28oz
Could I make it in the stove? I don’t have a slow cooker? If so, could you please share how to make it? Thanks
hi gaby! you CAN, but be very careful because it’s SUPER flammable. I would not recommend it if your stove is gas. keep the heat as low as it will go and don’t turn your back on it 🙂
I love this soap paste! Thank you for sharing. Do you have any tips for making the dish soap a little thicker?
hey Chelsea! you can add glycerin to the finished product after dilution. but honestly I’ve found just getting used to the thinness is better. the glyerin adds cost.
Ok thank you!
Hey Katie,
it’s Valentina here, nice to meet you. Thank you for this recipe (I have just watched your YouTube video, too).
I have 3 questions. Can you, please, tell me the measurements in percentage? I make solid bars and I am used to running the number into (before) SoapCalc (now SoapCalc doesn’t work anymore, but there is a new very similar and accurate calculator now) and I prefer using percentage:
1) For example, is the ley solution 25% – 33% – 38% ?
The other 2 questions:
2) If I am correct you said that if I do not want to add alcohol, I need to replace the SAME amount with water? Or more? Or less?
3) Can I use this liquid soap as laundry soap too ? (I am asking because I use my solid dish soap to hand-wash laundry, too).
Thank you so much for your reply.
Have a wonderful day,
Valentina
hi Valentina! 1. it is 24%, and I calculate to a 0% super fat 2. I do NOT add additional water, just leave the alcohol out. but I do highly recommend it for a clearer soap. 3. if you have no problems using dish soap, this should be the same!
I’m not sure of the measurements to use there is a difference from the video and the printed recipe. Help please.
printed recipe is correct for sure, I just did a new batch yesterday off it. I’ll go and rewatch the video and see what’s up there.
Thank you
Yes please. Got everything ready to go and now I’m putting it all back away! So frustrated over here can we get the corrects amounts of all ingredients PLEASE!!
Kris, all the ingredients in this recipe are correct! The video is just to show the process. Follow the written recipe.
I must be nuts that feels like too much lye to me! I actually just made this exact thing but a hard bar version using sodium hydroxide that I made into my homemade laundry detergent powder (will share that recipe if you want it- anyone!). I usually only make bar soap and have only made a few batches of liquid soap so far. I’ve been soaping for quite a while now tho and I was wondering how you calculate your lye? I ran those numbers thru the one I use but I was much less (around 6 oz instead of 10) and I trust you know your shit, so I guess im wondering if that is in fact a lot and you did that on purpose? or if because its liquid soap which requires potassium hydroxide instead and you need more of THAT. would that also mean P. Hydroxide is not as stronger as sodium hydroxide???? this just got my scratching my head now lmao im genuinely curious and I suppose I could have googled it but id much rather ask u than the Ai generator 😅🤣 forgive me for this long one! and for my ignorance! im not an expert, im just a mom with a soap hobby!
hi Elizabeth, yes, potassium hydroxide is TOTALLY different saponification. you can’t use any of your old cold process recipes with liquid soap you have to recalculate as totally new recipes 🙂