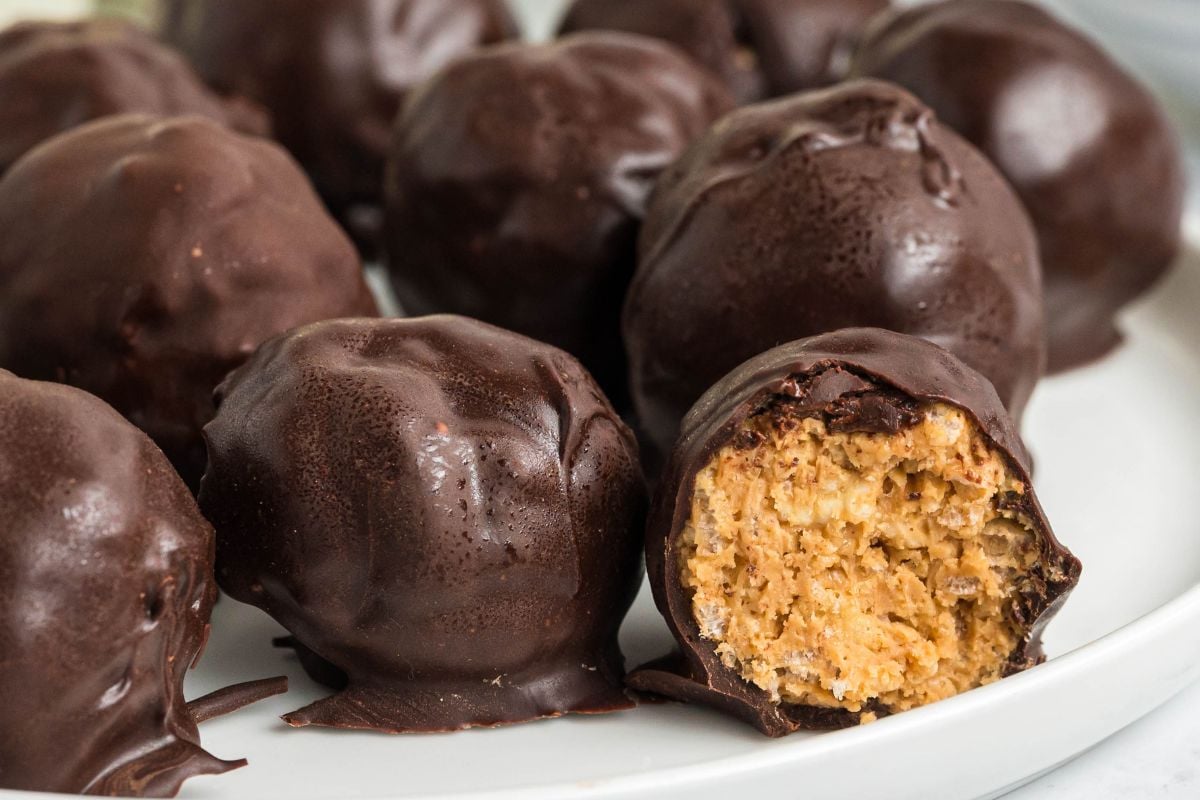
Old Fashioned Peanut Butter Balls with Rice Krispies
Every year we make tins of homemade candies and cookies, and by the time I’m halfway through I’m ready for something easy. And lucky for both of us, these peanut butter balls are simple and foolproof. I love the chocolate coating, the crunchy peanut butter filling that isn’t too heavy, and the fact that you can add sprinkles or decorations to make them festive.

These are an easy Christmas candy that everyone loves and won’t take all day or use any fancy equipment.
Table of Contents
Ingredients and Tools You’ll Need
Your peanut butter has to be creamy, not crunchy. We need the smooth consistency to keep the balls together. And make sure your Rice Krispies are fresh and not stale.

Double the batch, gift some, and keep some for yourself. You can make adjustments in the recipe card at the bottom of this post by clicking the 2x, and it will adjust the measurements for you.
Equipment
- Large mixing bowl
- Microwave-safe bowl
- Handheld mixer (or rubber spatula for mixing)
- cookie sheet (lined with parchment or wax paper)
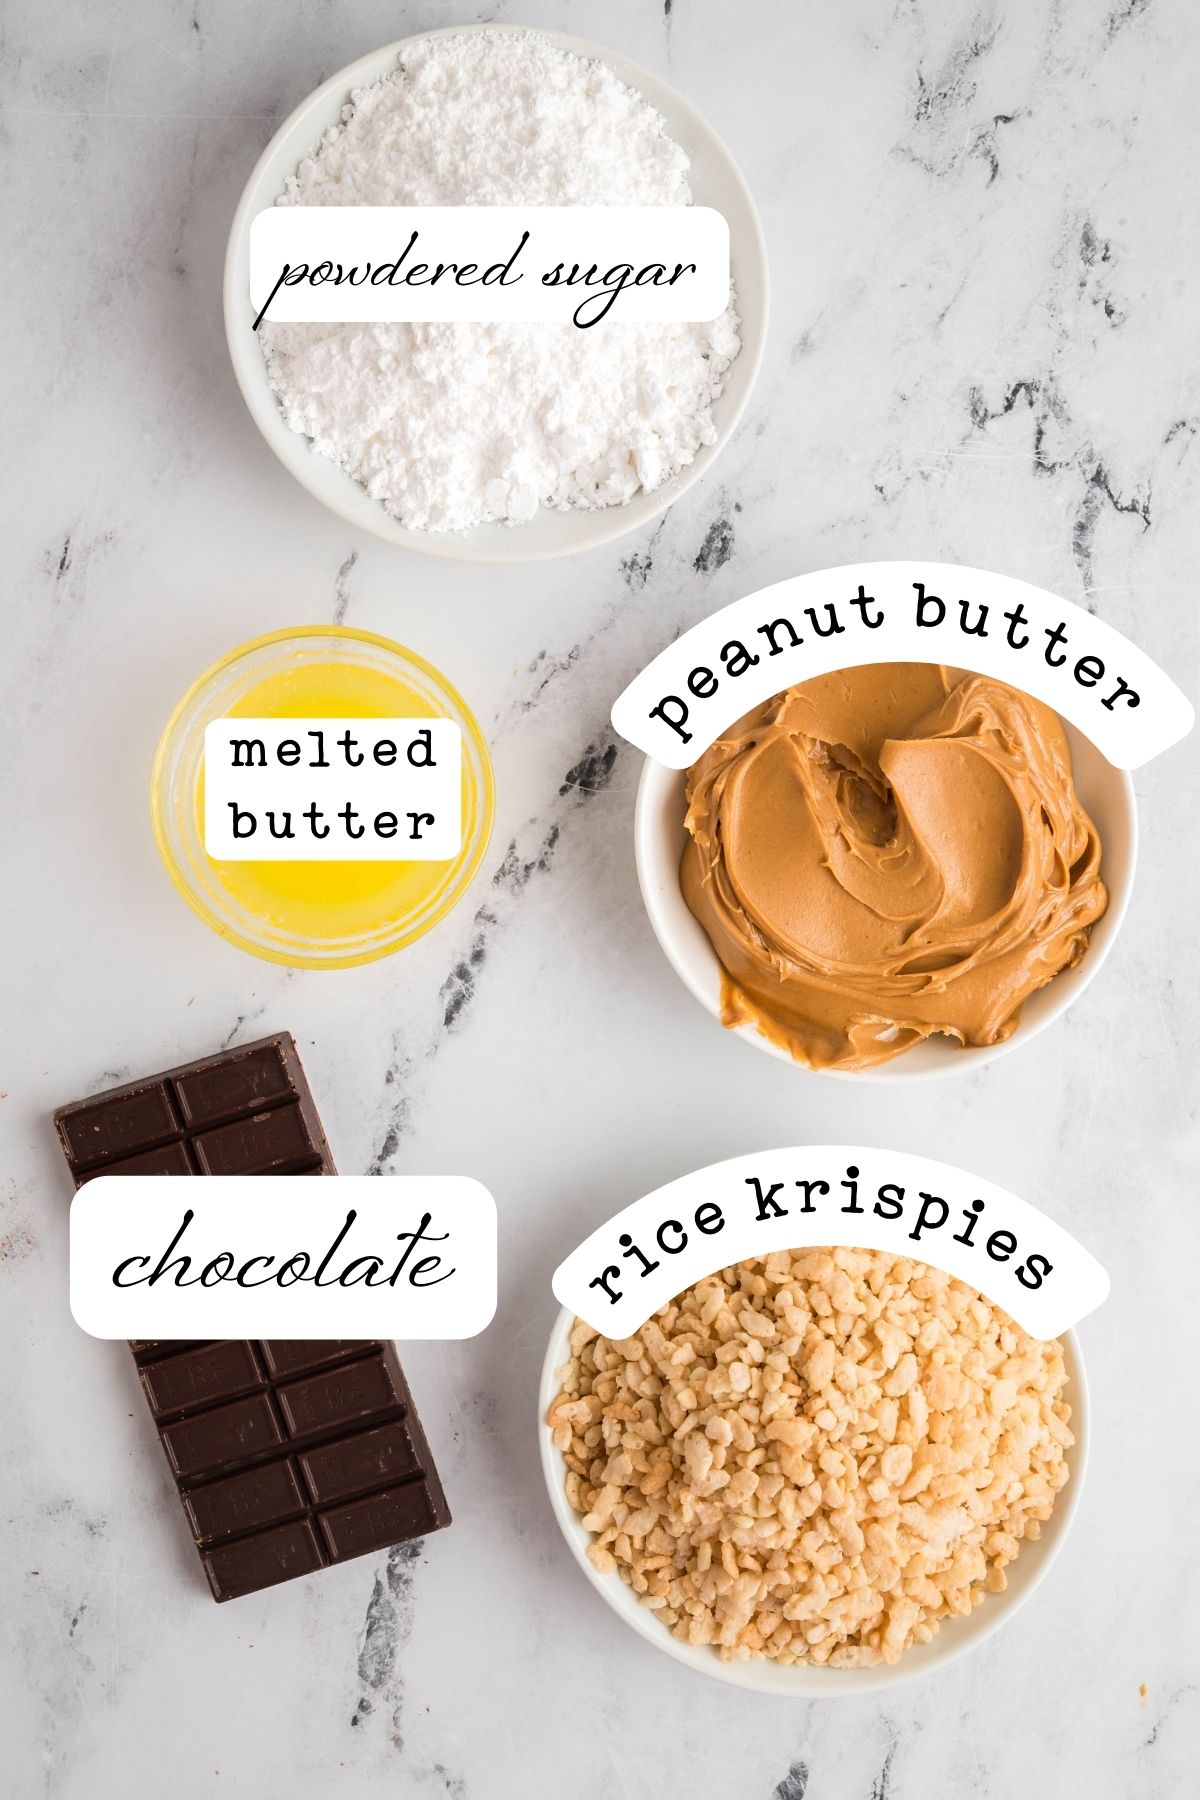
Ingredients
- 1 cup creamy peanut butter (You can replace the peanut butter with equal amounts of almond or cashew butter.)
- 3 tablespoons salted butter (melted)
- 2 cups Rice Krispies cereal
- 1 cup powdered sugar (You can substitute the powdered sugar with a non-sugar sweetener like Stevia or Erythritol.)
- 12 ounces melting chocolate (look for wafers or bars in the baking aisle)
How to Make Old-Fashioned Peanut Butter Balls
Feel free to sprinkle some crushed nuts, coconut flakes, or even some sea salt over the balls right after you dip them in the melted chocolate. The toppings will stick to the chocolate as it sets, adding an extra bit of flavor and texture.
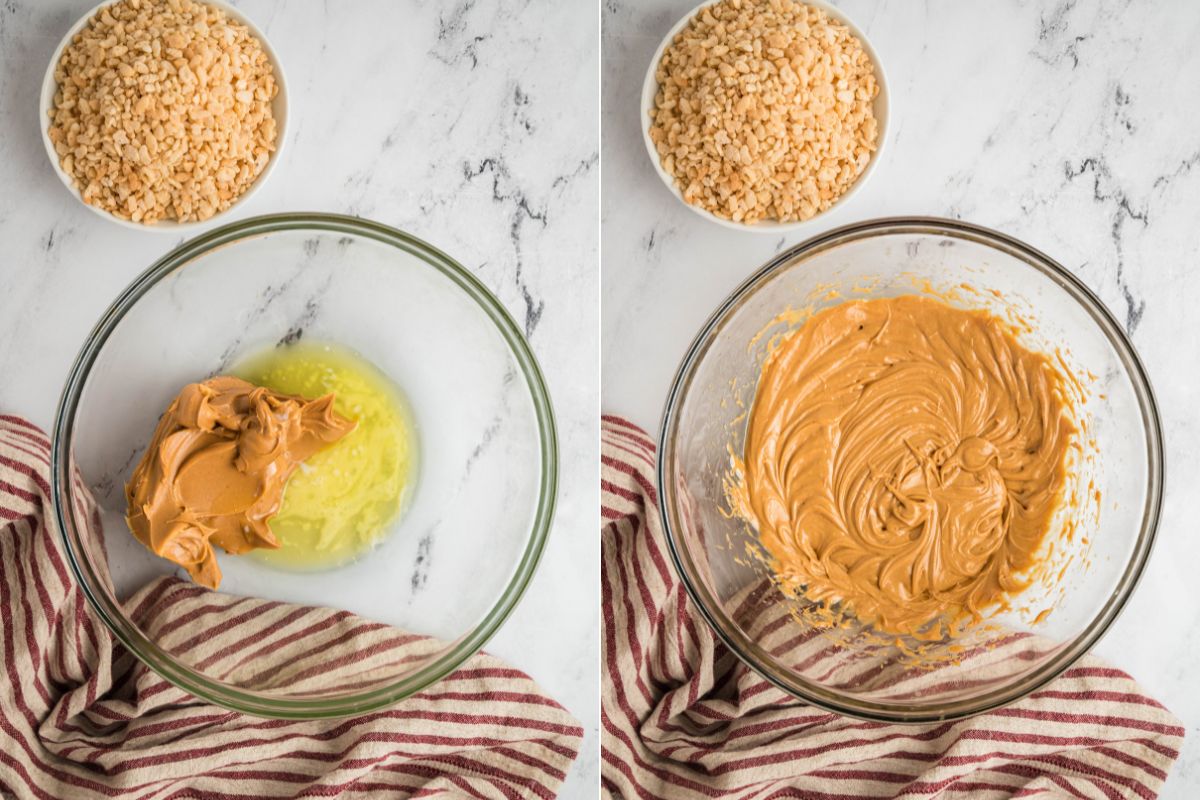
Step One: Blend Butter And Peanut Butter
First, you’ll need to mix your creamy peanut butter and melted salted butter in a large mixing bowl. You can use a handheld mixer or a rubber spatula for this. Just keep going until you’ve got a smooth, combined mixture.
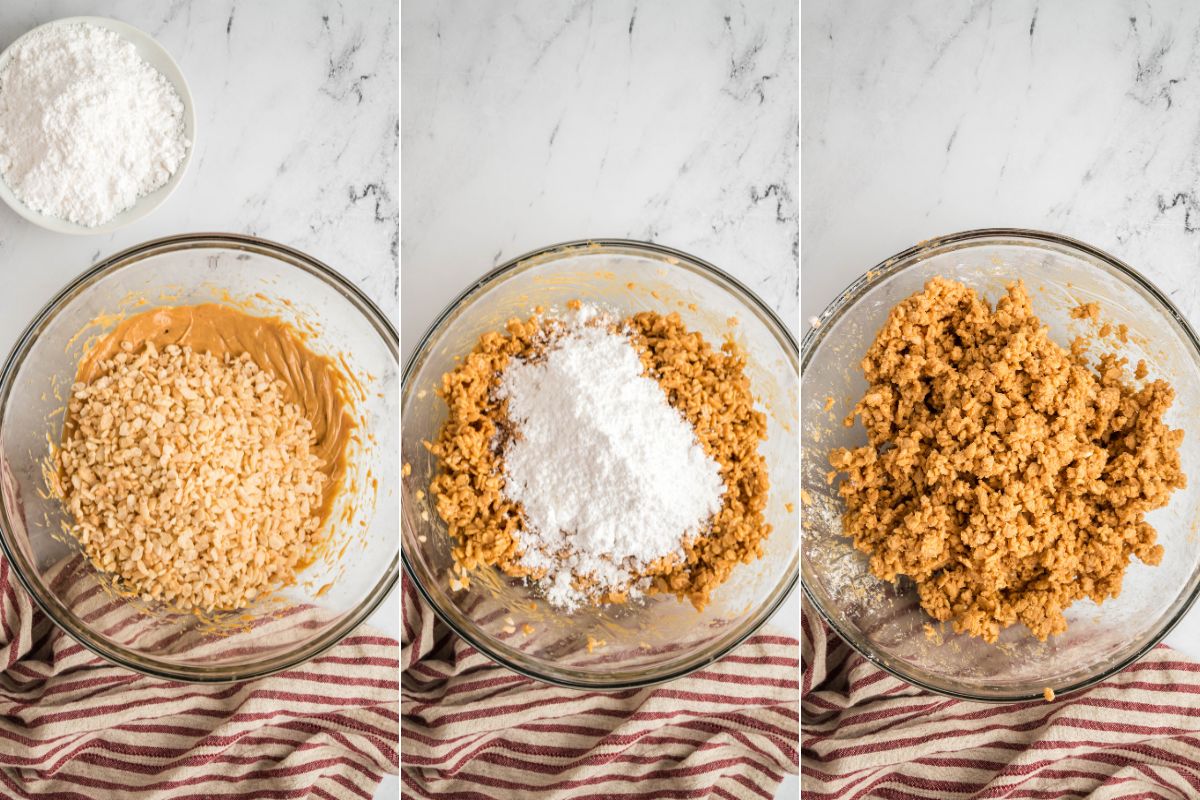
Step Two: Add Sugar And Rice Krispies
Stir in the cereal until combined. Add the powdered sugar and mix until well incorporated.
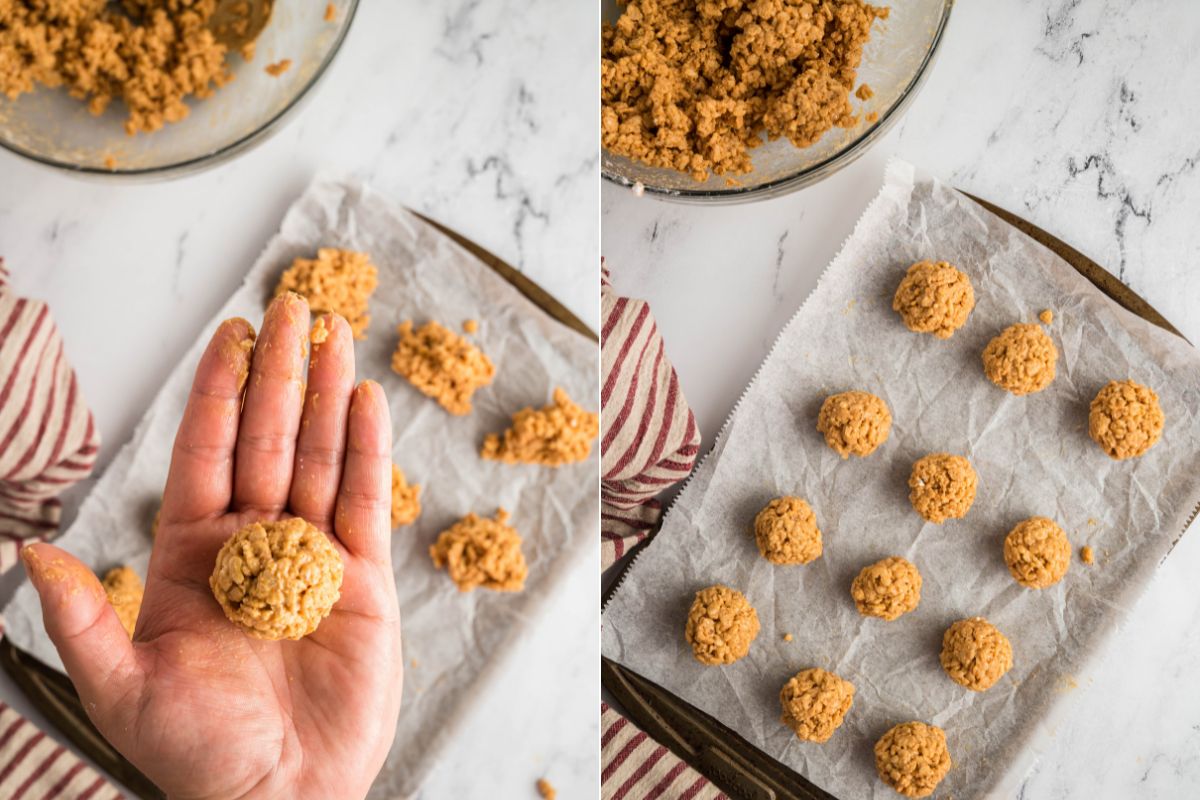
Step three: Shape
Line a cookie sheet with some parchment or wax paper. Then, with the help of a tablespoon, scoop out some of your mixture and shape it into a ball using your hands. You might find it helpful to lightly grease your hands first. Once you’ve filled up your tray, let them chill in the fridge for about 30 minutes.
Step Four: Dip
Get your chocolate ready. In a microwave-safe bowl, heat up the chocolate in 30-second intervals, giving it a stir each time. The result should be beautifully smooth and melted chocolate.

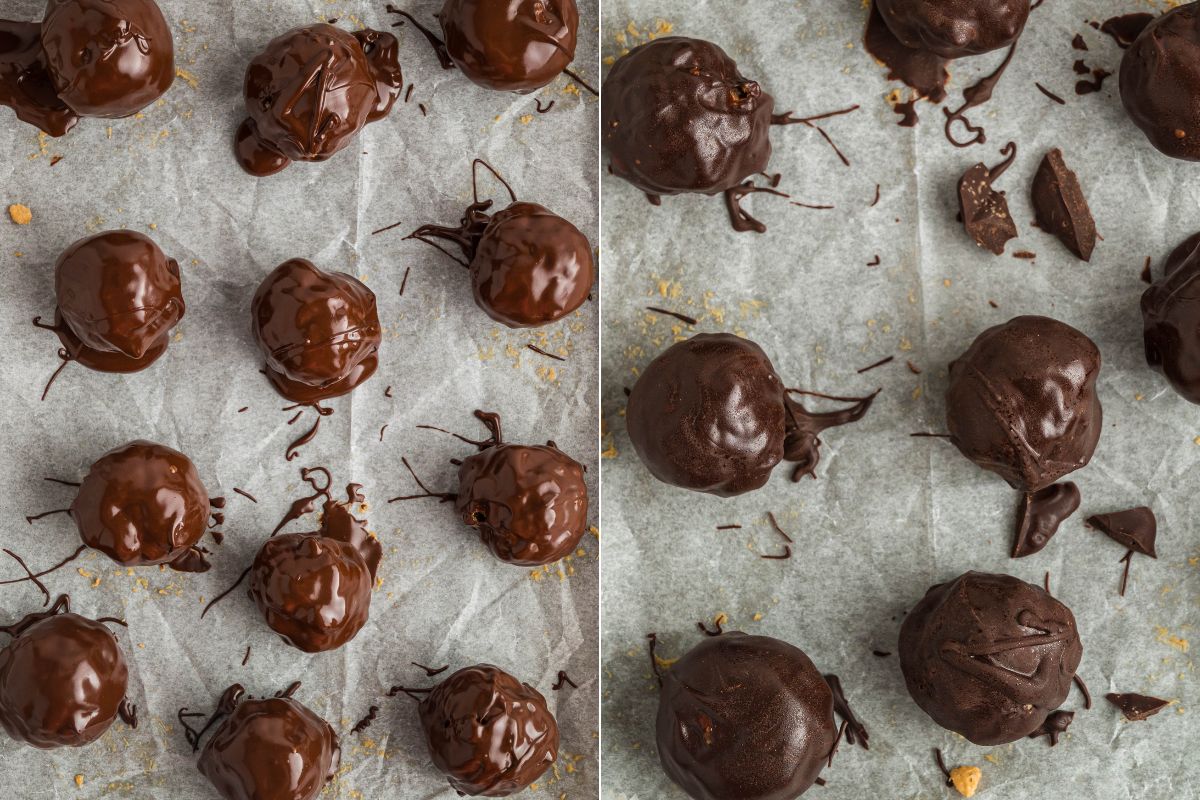
With the peanut butter balls nicely chilled, it’s time for their chocolate bath! Dip each ball into the melted chocolate until it’s fully coated. You can use a spoon to dip and a fork to remove – it makes the process much easier. Once they’re all dipped, pop them back on the baking sheet.
Step Five: Set
Now, they need one last trip to the fridge. Let them chill until the chocolate sets, and then you’re done!
Serving & Storing
Enjoy with a glass of milk or mugs of hot chocolate, coffee, or some espresso. Add to a gift platter along with divinity candy, chocolate chip cookies, and some sugar cookies. Wrap it all up in a tin for a homemade Christmas gift.
After the chocolate has set, you can store these in an airtight container at room temperature. They’ll keep for up to 7 days like this. Just make sure to layer parchment paper between any stacked balls to prevent them from sticking together. If your kitchen is too hot, place them in the fridge so the chocolate doesn’t melt. They’ll last for 2 weeks.
If you want to keep them around for longer or want to prep in advance for a party or event, you can also freeze these peanut butter balls. Place them in a freezer-safe container, again with parchment paper between layers, and they can be stored for up to 3 months.
When you’re ready to serve them, remove them from the freezer and let them sit out at room temperature for about 10-15 minutes. This short thawing period will make sure they’re at their best when you bite into them.
Remember, whether you store them at room temperature or in the freezer, keeping them in an airtight container is key.
Questions and Troubleshooting
You can try adding a teaspoon of coconut oil or shortening to help it. But also make sure you are microwaving it in short intervals and stirring so it doesn’t overheat.
If you’ve chilled them for the 30 minutes, they should be good. If they are still too soft for some reason, pop them in the freezer for a few minutes to get them to hold together before dipping.
When the chocolate coating is still wet, drizzle some white chocolate over it or sprinkle some sea salt, nuts, or sprinkles.
More Fun Recipes
Everyone should have a go-to recipe for each season.
- Check out these Christmas baking ideas for kids and pick one or two to make this holiday season.
- Make some peanut butter fudge. You probably already have all the ingredients.
- Fall is my favorite time to bake, and these fall sourdough recipes will give you lots of inspiration.
- Valentine’s Day muddy buddies are simple, sweet, and perfect for sharing!
Printable Recipe

Old Fashioned Peanut Butter Balls
Equipment
- Large mixing bowl
- Microwave safe bowl
- Handheld mixer (or rubber spatula for mixing)
- cookie sheet (lined with parchment or wax paper)
Ingredients
- 1 cup creamy peanut butter
- 3 tablespoons salted butter (melted)
- 2 cups Rice Krispies cereal
- 1 cup powdered sugar
- 12 ounces melting chocolate (look for wafers or bars in the baking aisle)
Save This Recipe
You'll join my email list which you will love. And if you don't, unsubscribe in one click. ❤️
Instructions
- Combine butter and peanut butter. In a large mixing bowl, use a handheld mixer or a sturdy rubber spatula to blend the creamy peanut butter and melted butter until smooth and well combined. The mixture should be creamy and thoroughly combined.
- Add cereal and powdered sugar. Gently stir the Rice Krispies cereal until evenly coated with the peanut butter mixture. Then, add the powdered sugar and mix until everything is well combined and forms a firm, cohesive mixture.
- Shape and chill. Line a cookie sheet with parchment or wax paper. Using a tablespoon, scoop out portions of the peanut butter mixture. Then, lightly grease your hands and roll each portion into a ball about the size of a walnut. Next, place the balls onto the lined cookie sheet and refrigerate for at least 30 minutes or until firm.
- Melt and dunk. In a microwave-safe bowl, melt the chocolate in 30-second intervals, stirring in between to prevent burning. Continue until the chocolate is completely smooth. Dip each peanut butter ball into the melted chocolate, ensuring it’s fully coated. Place the coated balls back onto the lined baking sheet.
- Chill again. Chill the chocolate-covered peanut butter balls in the refrigerator for 15-20 minutes or until the chocolate has fully set. Once the chocolate is firm, they’re ready to enjoy!
Notes
Nutrition


These are delicious! My kids love the rice cereal addition. Thanks for a sweet and simple recipe!
thank you Torrie!!