Chocolate Covered Shortbread Cookies
Shortbread is nice and simple, but sometimes it needs a little extra… something. And in this case, the extra something is a layer of chocolate! These chocolate-covered shortbread cookies are the perfect Christmas cookie, but they are also lovely plain or decorated for any holiday at all.

Once the chocolate coating has fully set, you can stack them up, and they will transport just fine. Add this and more Christmas cookie recipes to your yearly baking list!
Table of Contents
Ingredients and Tools You’ll Need
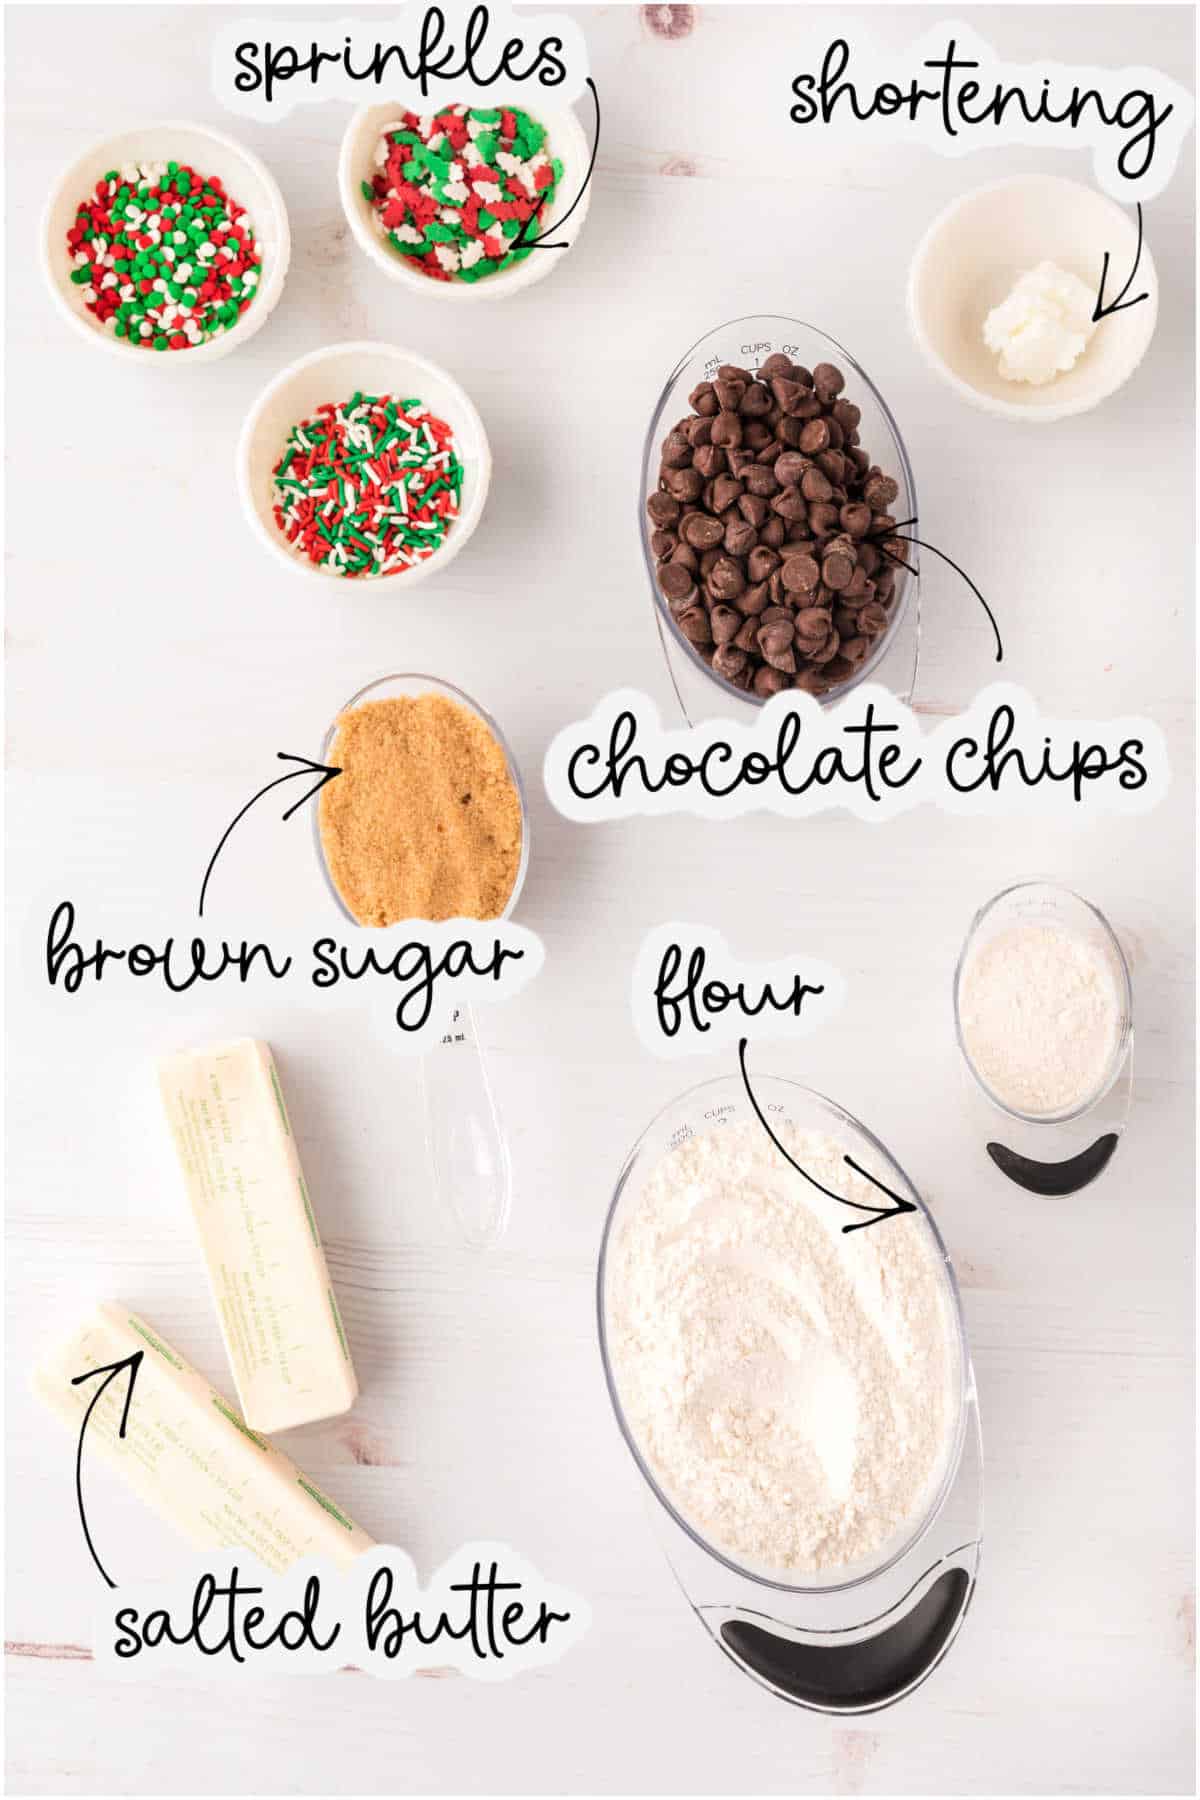
We’re only using a few basic ingredients, so don’t change much. But if you only have unsalted butter, add a pinch of salt to the recipe. Make sure you pack your brown sugar into the measuring cup to get the right sweetness. Don’t try to substitute the shortening. We need it to help the chocolate set right.

This makes 24 cookies. You can easily double or triple the recipe if you have a stand mixer. Just make adjustments in the recipe card at the bottom of this post.
Equipment
- Parchment paper
- Rolling Pin
- Electric Mixer
- Microwave-safe bowl
- 2 Rimmed baking sheets
- Wire rack
Ingredients
- 1 cup salted butter (at room temperature)
- ½ cup brown sugar (packed)
- 2 to 2¼ cups all-purpose flour
- 1 cup semisweet chocolate chips
- 2 teaspoons vegetable shortening
- sprinkles (optional)
How to Make
Be careful when lifting the cookies on or off the baking sheet; they are delicate and crumble easily. An offset spatula works well.
You can also use a cookie cutter instead of cutting out strips, but a simple shape, such as a heart or circle, will be the most successful.
Step One: Prep
First, preheat the oven to 325 degrees with two racks in. The recipe as written will make 2 dozen cookies, which will fit nicely on two cookie sheets. Prepare them simply by laying down some parchment paper.
Step Two: Make The Dough
We begin by creaming the butter and sugar until light and fluffy. This will take about 3 minutes with an electric mixer. After that, add 2 cups of flour and mix it low. You don’t want to overmix at this stage. Mix until just combined.

The dough will be very soft and crumbly. You may be tempted to add a liquid. Don’t! It will come together as you turn it out and knead it on the counter.
Sprinkle the countertop with flour and turn the dough out onto the floured surface. Add the remaining ¼ cup of flour and knead it in by hand. The dough will begin to hold its shape.
Step Three: Roll And Cut
At this point, roll it out with a floured rolling pin until it’s ½ an inch thick.
Cut the dough into strips 1 inch x 3 inches in size, or cut out using a floured cookie cutter. You can re-roll the dough once without worrying about the cookies being too tough.

Step Four: Bake And Cool
Carefully lift them off the counter and place them on the baking sheet about an inch apart in each direction. Bake them until the edges are golden brown, which takes between 20 and 25 minutes. Rotate the baking sheets halfway through. Cool them completely on a wire rack before moving on to dipping them in chocolate.

Step Five: Dip And Decorate
To make the chocolate topping, place the shortening and chocolate chips in a microwave-safe bowl and melt on low for 45-60 seconds, stirring halfway through.
Dip the ends of the cookies into the chocolate and then place them on a piece of wax paper or parchment paper. Sprinkle with any decorations before the chocolate cools.

Serving & Storing
Serve these cookies with hot cocoa, coffee, tea, vanilla ice cream, or on a dessert platter with peppermint fudge and crockpot Christmas candy.
Keep the cookies in an airtight container at room temperature for up to 3 days in a cool, dry place to prevent the chocolate from softening or melting.
To freeze, bake the cookies, and let them cool completely (don’t add chocolate). Place them in a single layer in an airtight container or freezer bag, adding parchment paper between layers to prevent sticking. They can be frozen for up to 2 months.
When you’re ready to enjoy, let the cookies thaw at room temperature, dip them in melted chocolate, and add decorations.
There is no need to chill the dough at any point. But if you’d like to make it ahead, feel free to pop it in the fridge and come back to it later.
Questions and Troubleshooting
Yes, shortbread dough can look a bit dry and crumbly! Gently press and knead it together; it’ll come together as you roll it out. Don’t add more liquid; this texture is what gives shortbread its signature, melt-in-your-mouth feel.
Sure! Dark, milk, or white chocolate all work fine.
Lightly dust both your rolling pin and the surface with flour. If it still sticks, try rolling the dough between two sheets of parchment paper for an easier, mess-free option.

More Classic Cookies You’ll Love
Because no matter what time of year (or day), everyone loves a cookie.
- Using the same process, make these Halloween shortbread cookies that are so fun for a party.
- Vintage-style molasses cookies are soft with a little spice and crisp edges.
- There’s something we all love about a classic sugar cookie. They are great for any time of year.
- When you are a little sick of chocolate chip cookies, make these old-fashioned butterscotch cookies (or make both!).
Printable Recipe

Chocolate Covered Shortbread Cookies
Equipment
- Rolling Pin
- Electric Mixer
- Microwave safe bowl
- 2 Rimmed baking sheets
- Wire rack
Ingredients
- 1 cup salted butter (at room temperature)
- ½ cup brown sugar (packed)
- 2 to 2¼ cups all purpose flour
- 1 cup semisweet chocolate chips
- 2 teaspoons vegetable shortening
- sprinkles (optional)
Save This Recipe
You'll join my email list which you will love. And if you don't, unsubscribe in one click. ❤️
Instructions
- Prep. Preheat your oven to 325°F. Position oven racks in the upper-middle and lower-middle sections. Then, line two rimmed baking sheets with parchment paper.
- Make the dough. Using an electric mixer on medium speed, cream the room-temperature butter and packed brown sugar until the mixture is light and fluffy (about 2–3 minutes). Then, slowly add 2 cups of flour, mixing at low speed until combined. The dough will look crumbly—avoid adding any liquid at this stage. Next, transfer the dough onto a floured surface. Knead in the remaining ¼ cup of flour by hand until the dough holds together.
- Roll out and cut. Roll the dough to a ½-inch thickness on the floured surface. If the dough sticks, lightly dust the rolling pin with flour. Then, cut the dough into roughly 3 by 1-inch rectangles. Place the cut pieces onto the prepared baking sheets, leaving at least 1 inch of space between each cookie.
- Bake and cool. Bake for 20 minutes until the cookies are set and the edges are lightly golden. Cool completely on a wire rack before dipping in chocolate.
- Dip and decorate. In a microwave-safe bowl, combine the chocolate chips and shortening. Then, stirring halfway through, melt in the microwave on LOW power for about 45 seconds. If needed, microwave in 10-second intervals until fully melted and smooth. Dip one end of each cooled cookie into the melted chocolate. Place the dipped cookies on wax or parchment paper to set. While the chocolate is still melted, add sprinkles to the dipped ends if desired. If the chocolate hardens before you finish, reheat it briefly in the microwave.
Notes
Nutrition


I make this recipe every Christmas and it is a huge hit.
Thanks,
Beth
thank you Beth!
These are the perfect Christmas cookie.
Shortbread Cookies are THE best! One of my favorite holiday bakes. Yours are so festive!